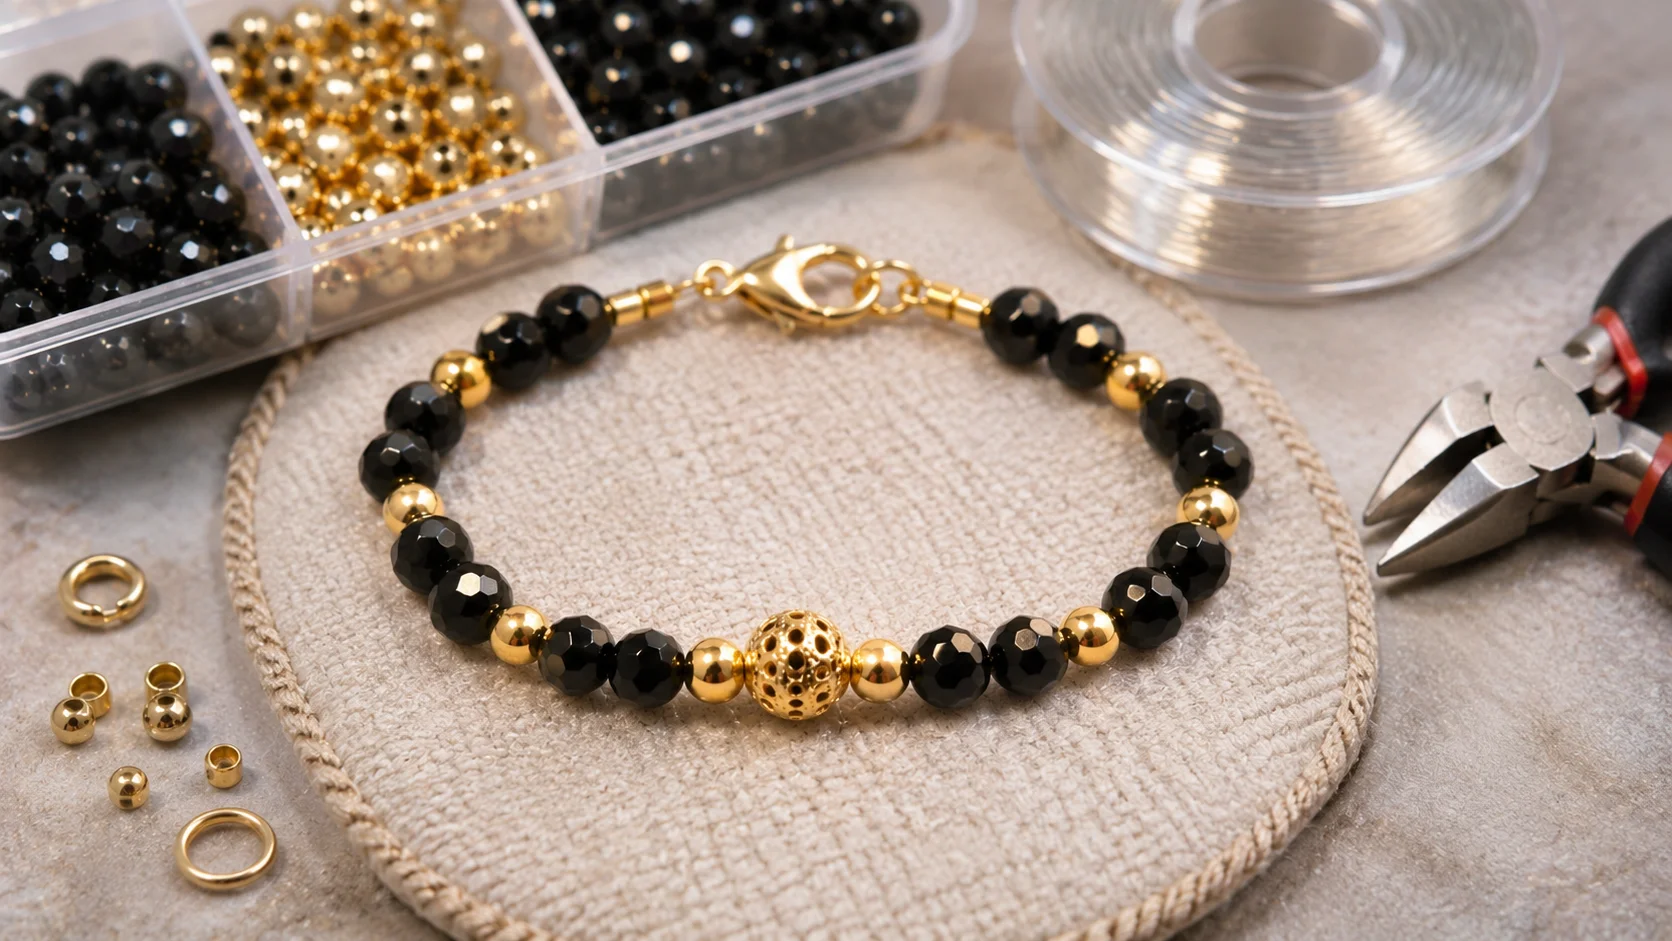
Black beaded jewelry with gold accents is a beautiful way to create accessories that look polished, modern, and timeless. With black glass beads, gold spacer beads, and a few simple jewelry-making supplies, you can make your own bracelet, necklace, or matching earring set at home.
This beginner-friendly guide walks you through choosing the right beads, planning a balanced color pattern, stringing your jewelry, attaching clasps, and finishing each piece neatly. You’ll also find styling ideas and practical tips for making your black and gold jewelry last.
What You Need to Make Black and Gold Beaded Jewelry
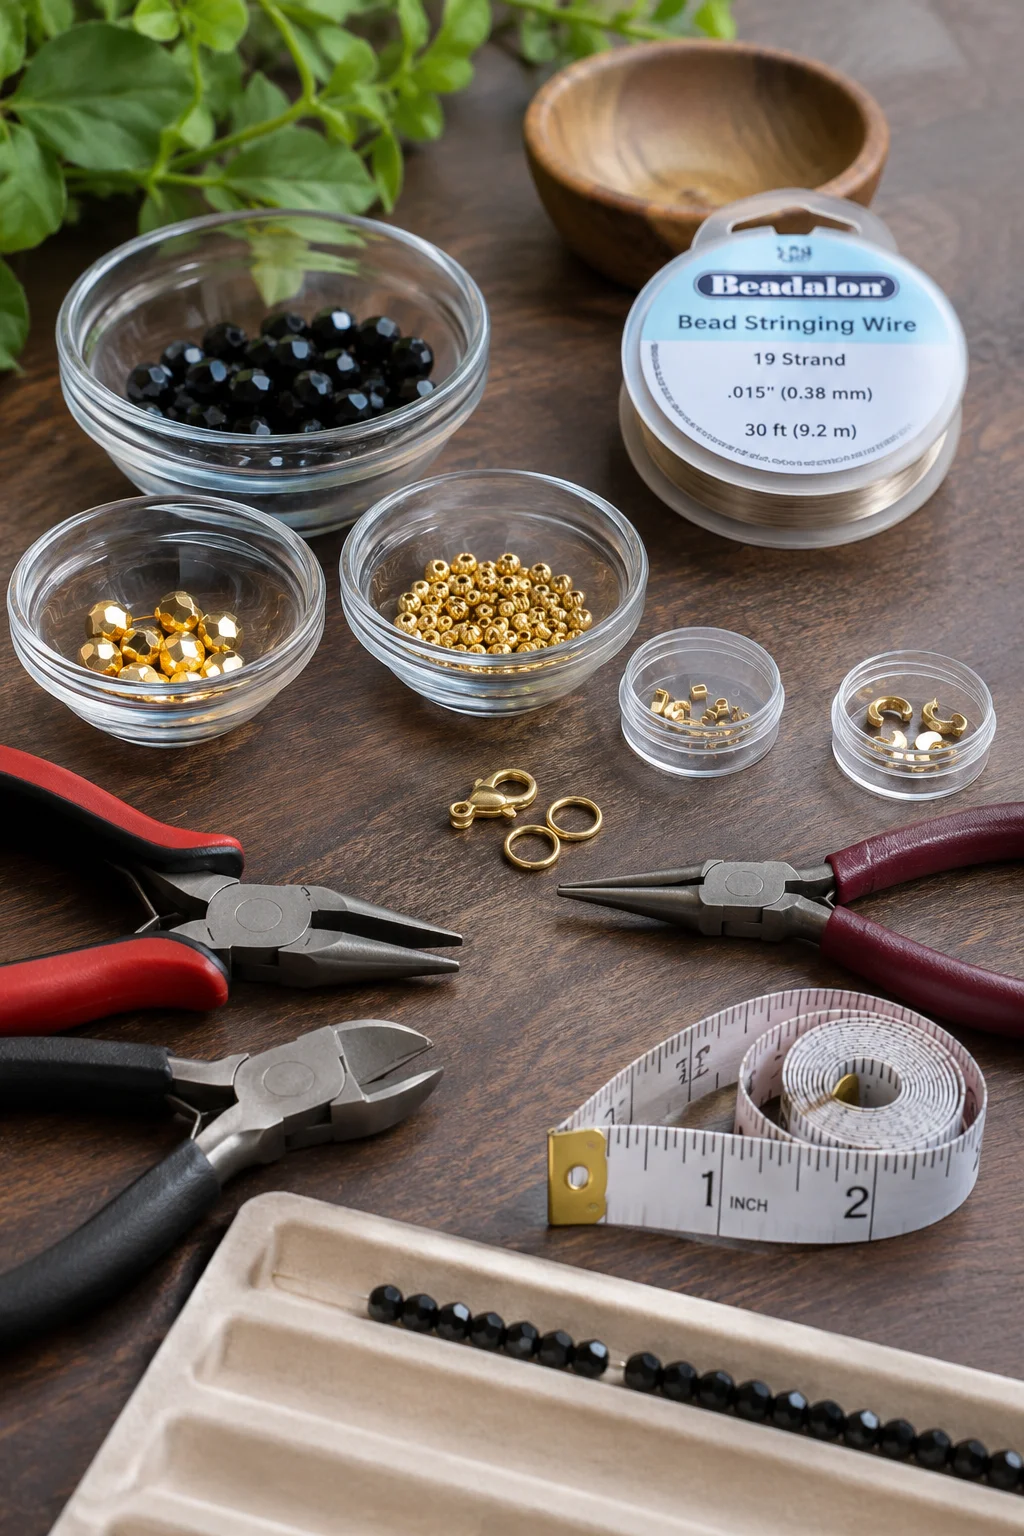
Before starting, gather your beads, stringing materials, findings, and basic jewelry tools. The supplies below are suitable for making a simple bracelet with a classic black-and-gold pattern.
Materials
- Black beads: Approximately 45–55 black glass or crystal beads, preferably 4–6 mm in diameter. The exact number depends on the bead size and finished bracelet length.
- Gold spacer beads: Approximately 12–16 gold-tone metal spacer beads, around 3–4 mm wide.
- Gold accent beads: 3–5 slightly larger gold-tone beads for decorative details.
- Beading wire: Approximately 12 inches of flexible 19-strand or 49-strand jewelry wire, around 0.015–0.019 inches (0.38–0.48 mm), provided it fits through the bead holes.
- Gold-tone lobster clasp: One clasp for closing the bracelet.
- Jump rings: Two gold-tone jump rings, if needed for attaching the clasp.
- Crimp beads or tubes: Two compatible with your wire diameter.
- Crimp covers: Optional, for concealing the finished crimps.
Tools
- Jewelry crimping pliers
- Flat-nose pliers
- Jewelry wire cutters
- Measuring tape or ruler
- Bead tray or small containers
Material tip: Choose the largest wire diameter that can pass comfortably through the smallest bead hole. Always check the wire manufacturer’s recommended crimp size rather than choosing crimps by appearance alone.
How to Choose Black and Gold Beads for Your Design
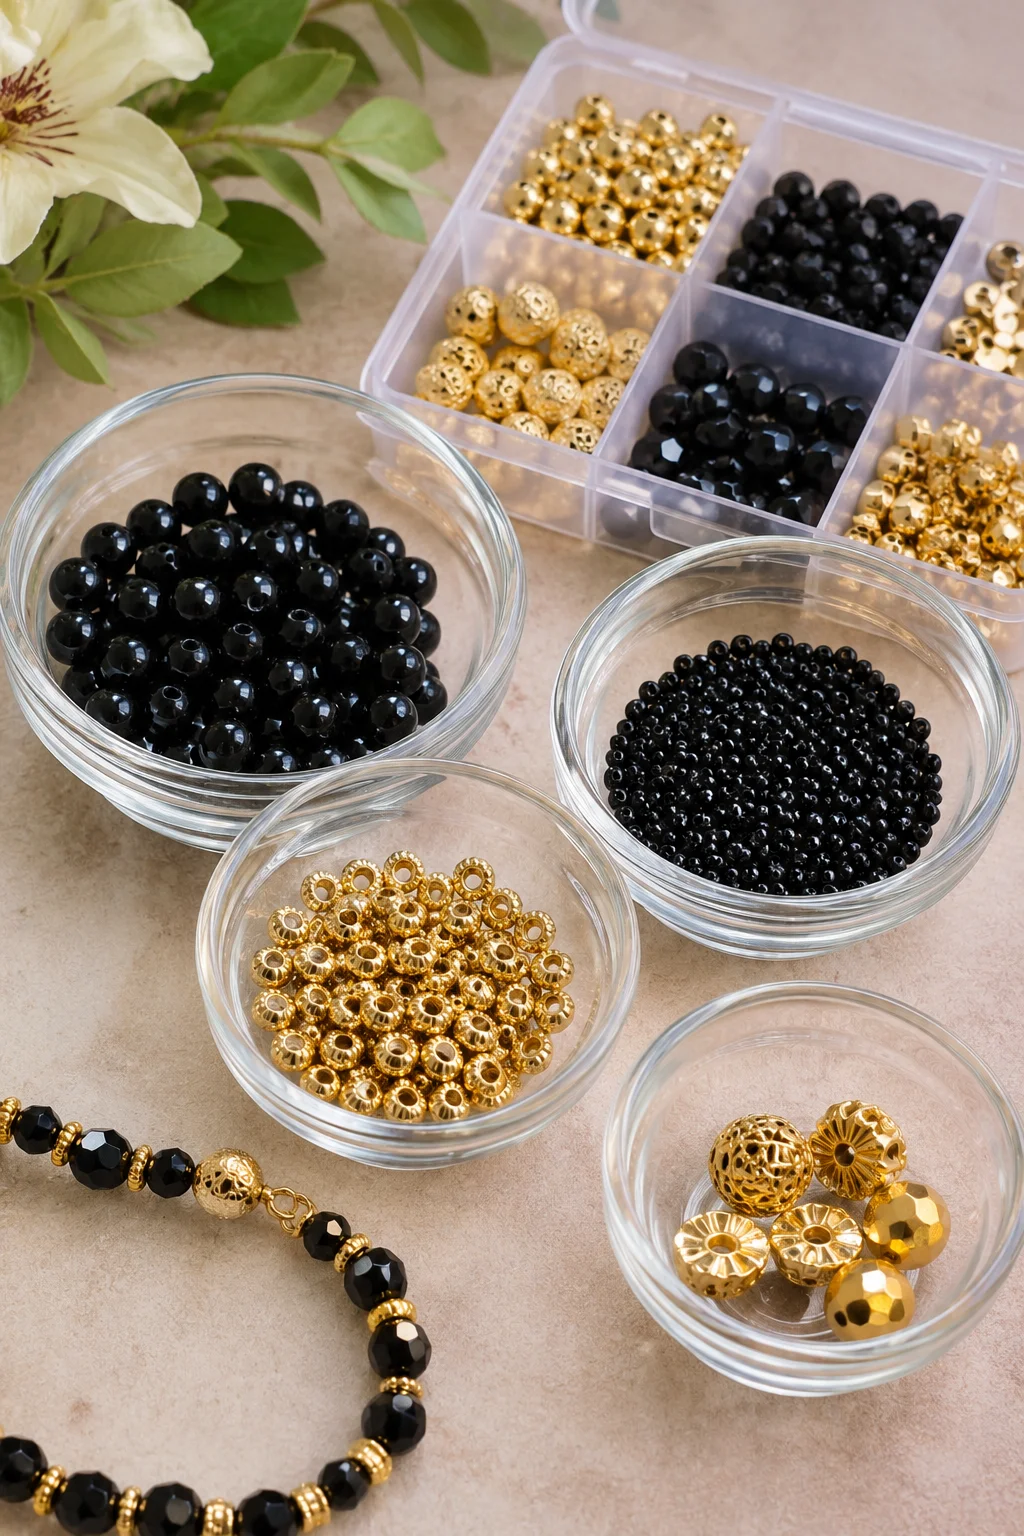
The combination of black and gold works because the dark beads create a strong background while the metallic details provide contrast. Choosing beads with different finishes also gives your jewelry more depth without introducing too many colors.
1. Black Glass Beads
Black glass beads are a versatile starting point. Smooth, round beads create a clean and traditional appearance, while faceted black glass beads reflect light and add sparkle.
For a simple everyday bracelet, choose uniform 4–6 mm round beads. If you want something more decorative, combine glossy and faceted black beads in the same design.
2. Black Seed Beads
Black seed beads are smaller and work particularly well for delicate bracelets, detailed patterns, and woven jewelry. Size 11/0 is a popular option for intricate beadwork.
Remember that seed bead sizing works in reverse: a smaller number generally indicates a larger bead. You can learn more in this seed bead size and type guide.
3. Gold Spacer Beads
Gold spacer beads create small breaks between black beads and help establish a consistent rhythm throughout the design. Smooth round spacers give a minimalist finish, while textured or ridged spacers add detail.
Choose one gold finish for the main design. Mixing yellow gold, rose gold, and antique gold can make a simple bracelet look visually crowded.
4. Gold-Finished Accent Beads
Larger gold-tone beads can be used as focal points. Place one in the center of a bracelet or use three smaller accents in a balanced arrangement.
If the jewelry will be worn frequently, look for quality findings with a suitable protective finish. Check the product specifications for plating and nickel content, especially if you have sensitive skin.
How to Make a Black and Gold Beaded Bracelet Step by Step
A simple repeating pattern is one of the easiest ways to make black and gold jewelry. This bracelet uses black beads as the main color and gold spacers as small decorative accents.
Step 1: Measure Your Bracelet Length
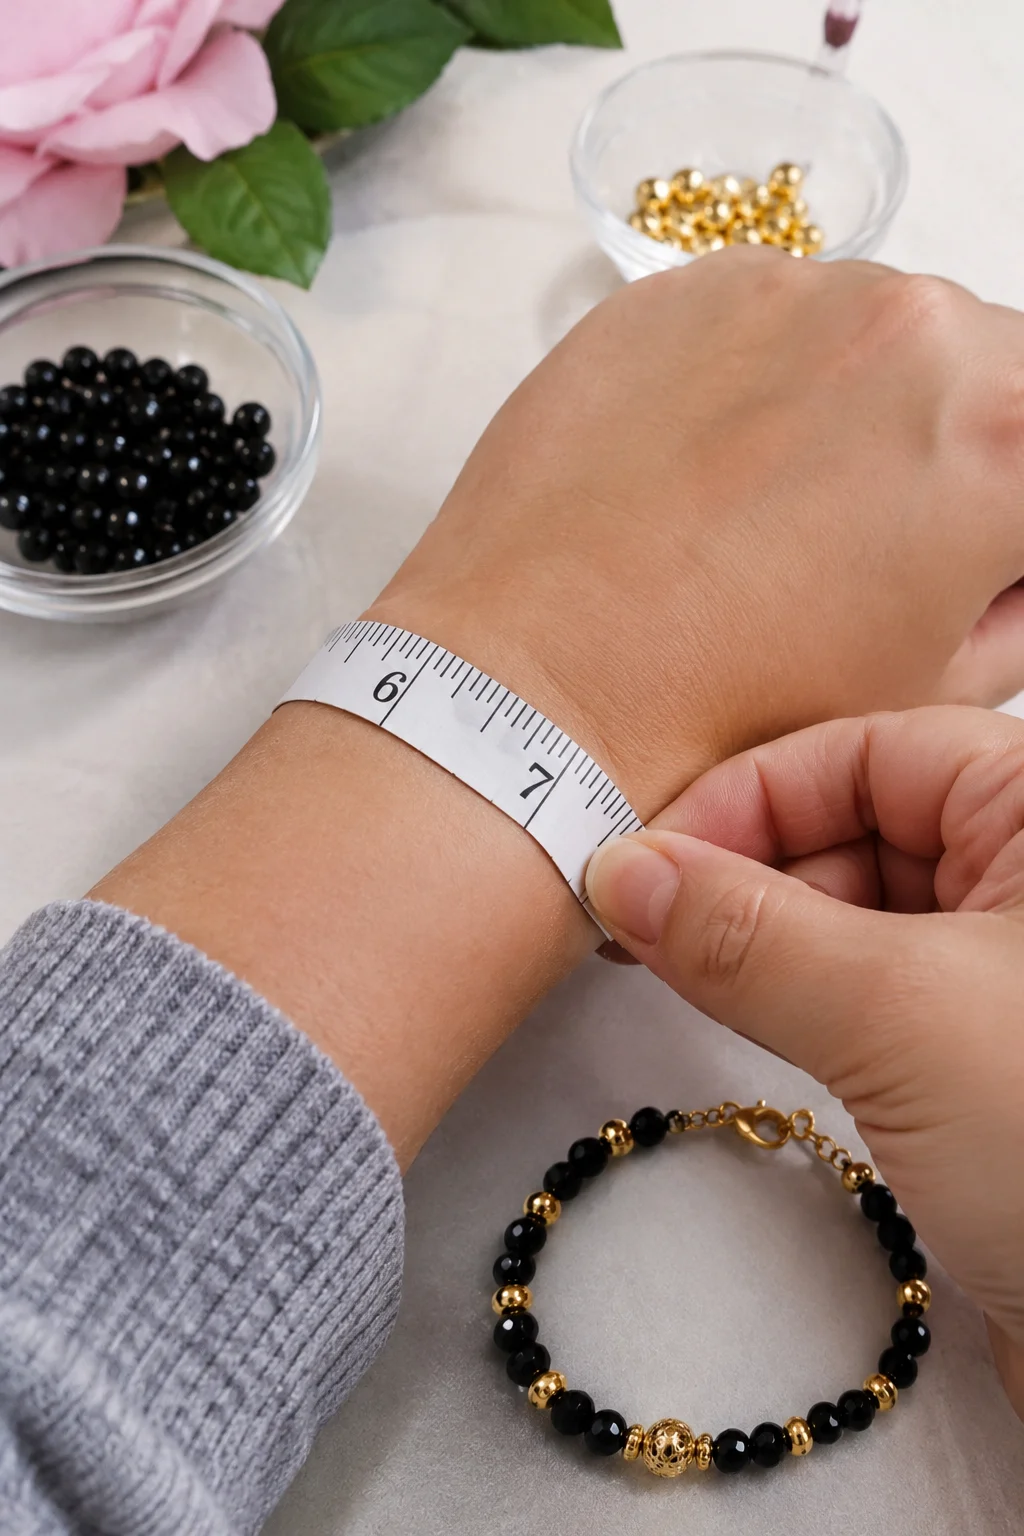
Wrap a measuring tape around your wrist where you normally wear a bracelet. Record the measurement and decide how much extra room you prefer for movement.
For example, if your wrist measures 6.5 inches, you might start by planning a finished bracelet around 7 inches long. Adjust the length to your preference and account for the clasp and connecting findings.
Step 2: Plan Your Bead Pattern
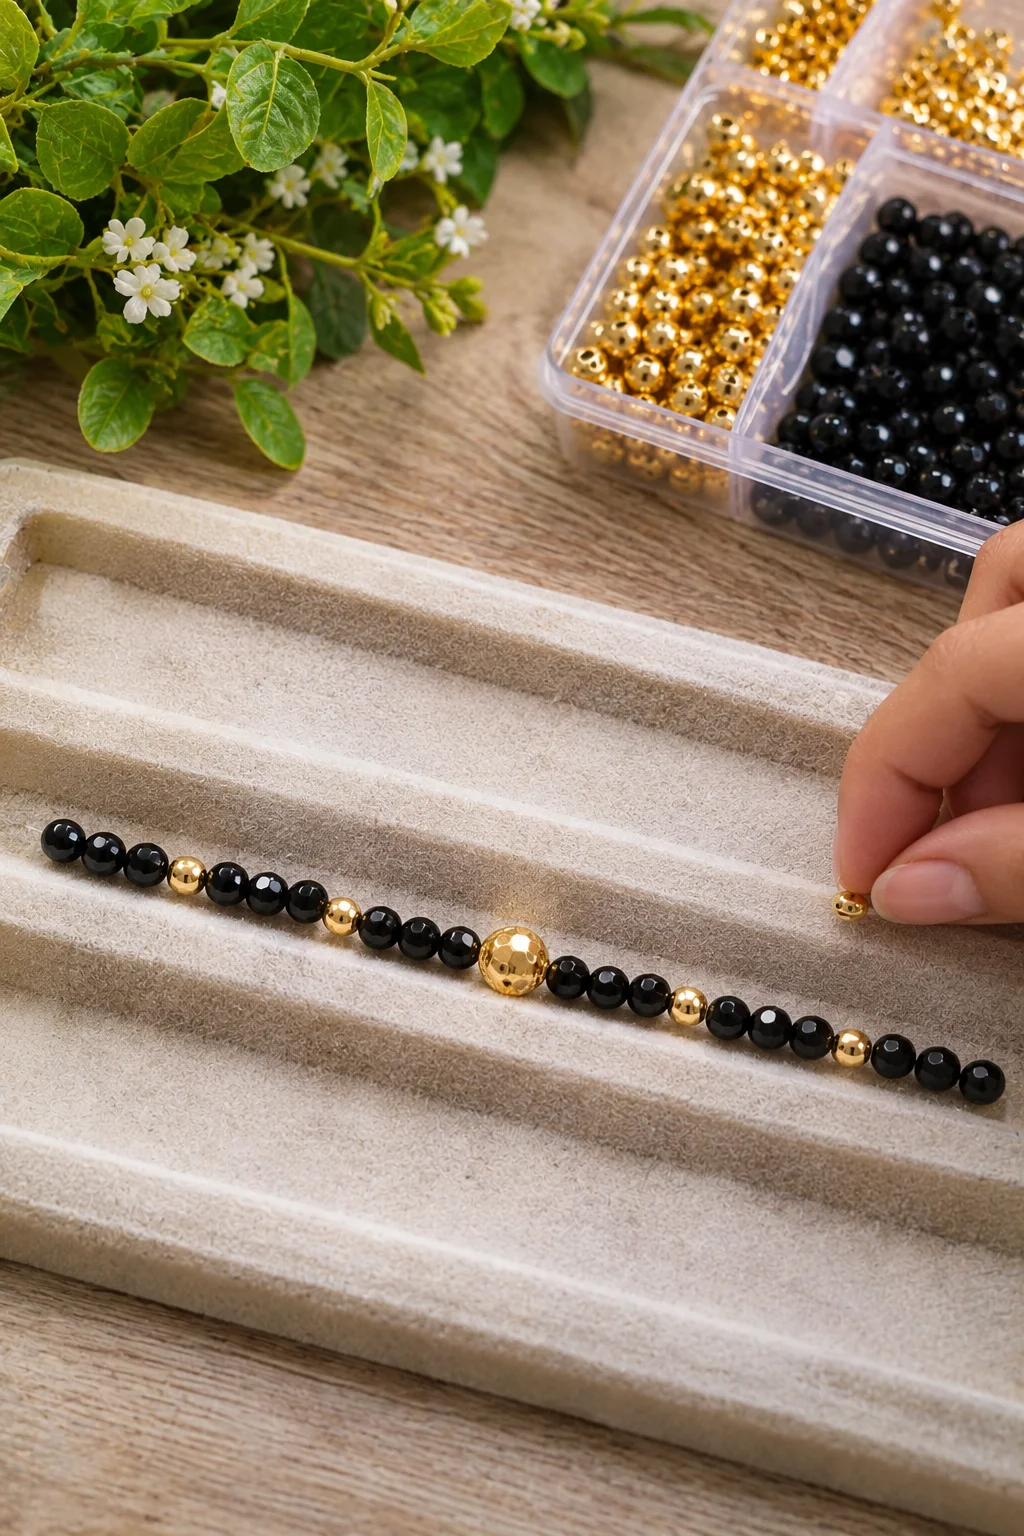
Lay the beads on a bead tray before stringing them. This makes it easier to check the spacing and keep both sides of the bracelet balanced.
Try this repeating arrangement:
- Three black beads
- One gold spacer bead
- Three black beads
- One gold spacer bead
- One larger gold accent bead at the center
Repeat the black-and-gold sequence on both sides of the central accent. Adjust the number of beads to achieve your desired length.
Step 3: Cut the Beading Wire
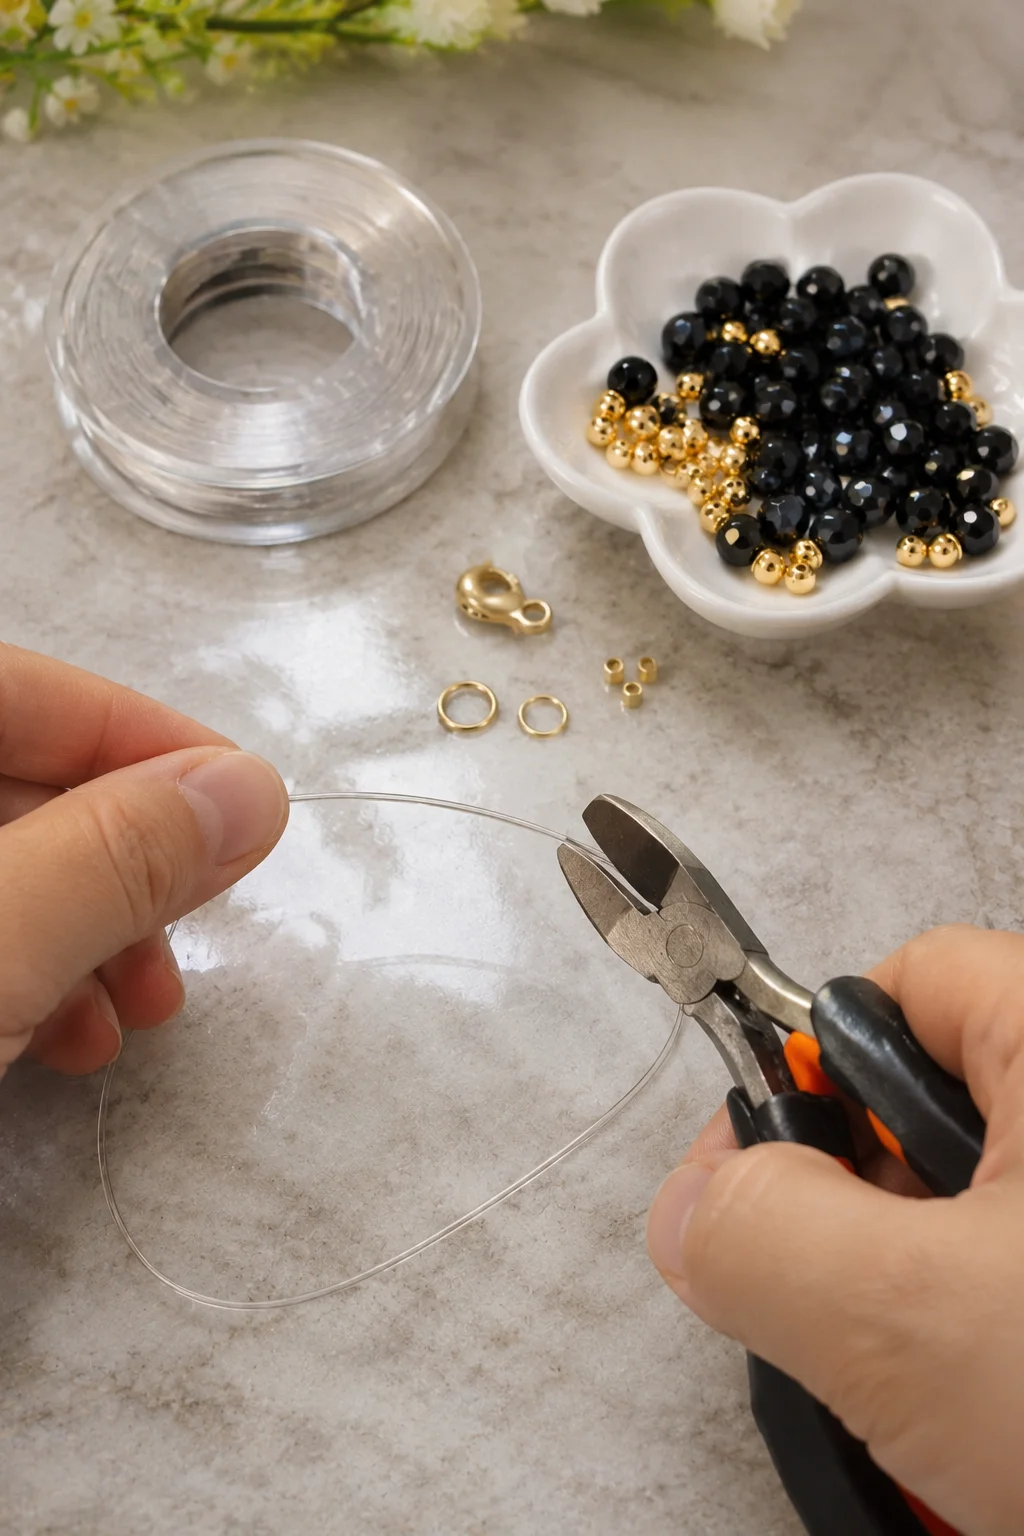
Cut approximately 12 inches of flexible beading wire. This gives you extra length for attaching the clasp and working with the crimps.
A flexible 19-strand or 49-strand wire is a practical choice for a bracelet that needs to curve naturally around the wrist.
Step 4: Attach the First Clasp
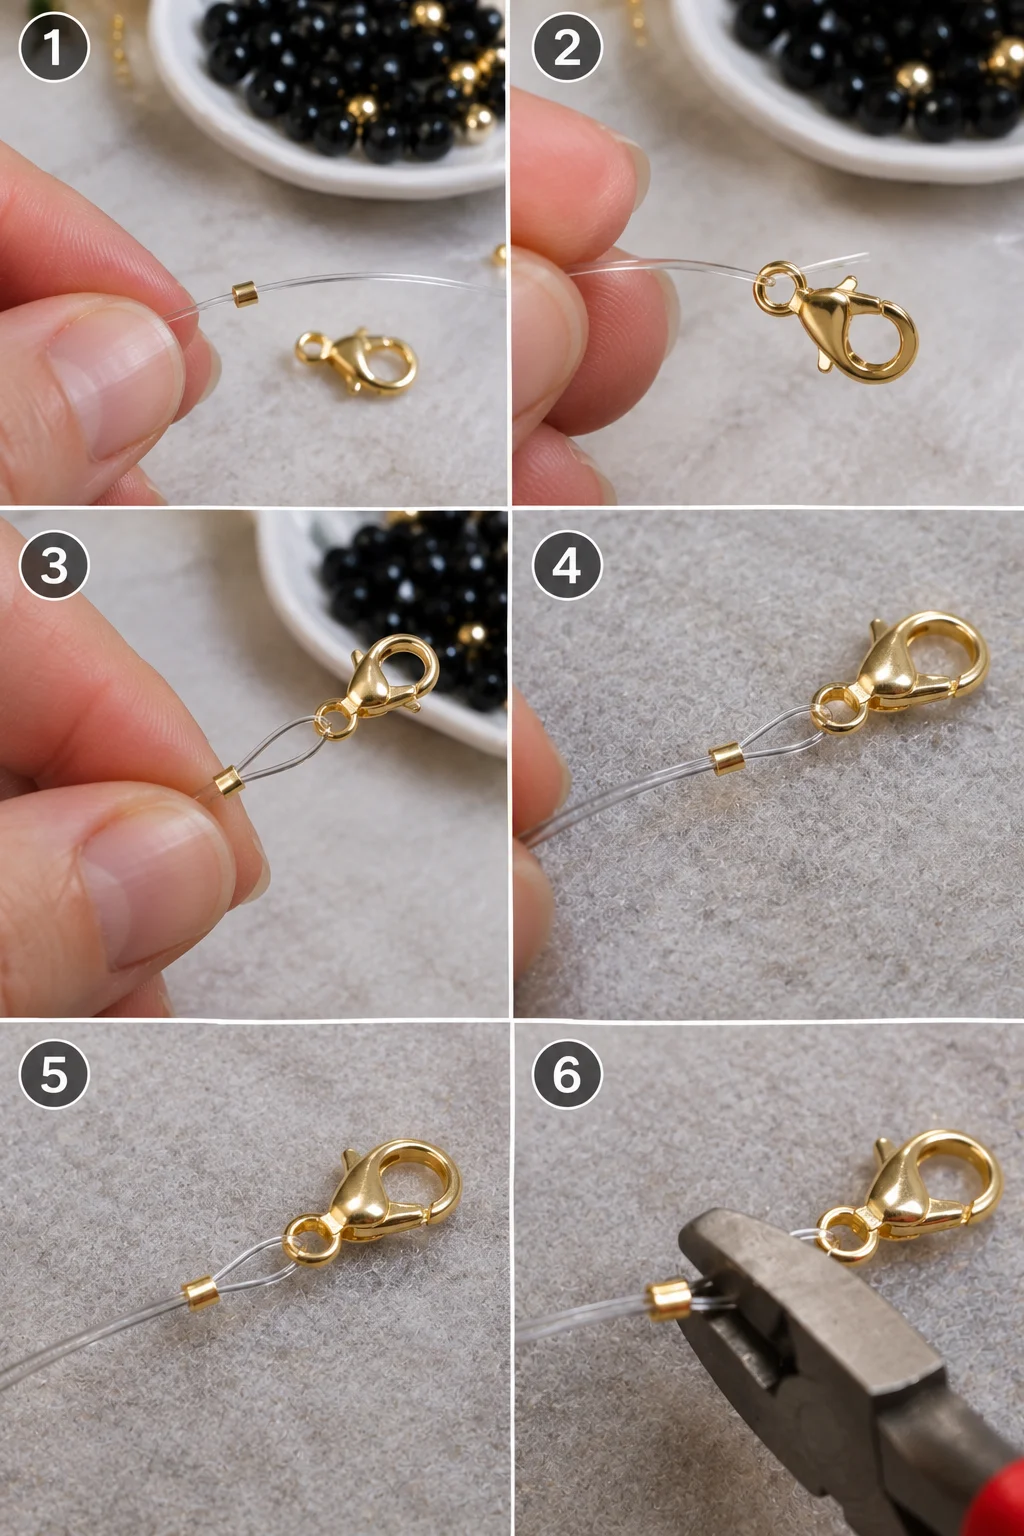
- Slide one compatible crimp bead onto the wire.
- Thread the wire through the loop of the lobster clasp.
- Bring the wire back through the crimp bead.
- Leave a small loop so the clasp can move freely.
- Position the crimp according to the manufacturer’s instructions.
- Use the appropriate crimping pliers to secure it.
Keep the two wire sections parallel rather than crossed inside the crimp. Proper crimping helps prevent the bracelet from coming apart during wear.
Step 5: String the Black and Gold Beads
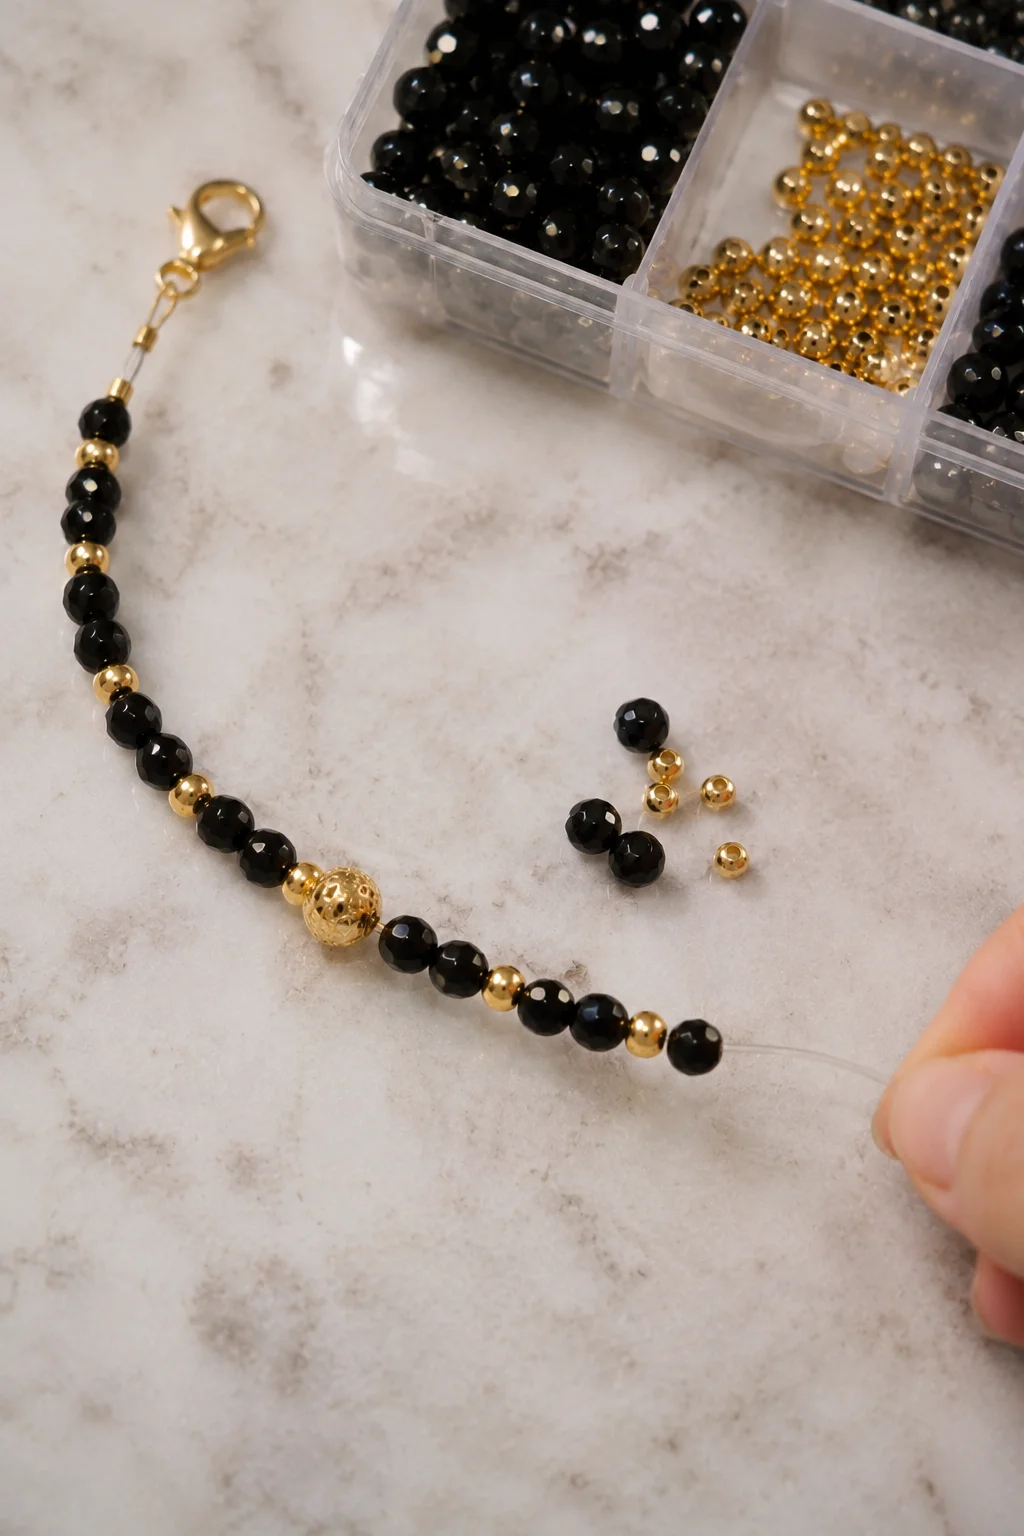
Begin adding your beads according to the pattern you arranged earlier.
Keep the gold spacers consistent in size and placement. If you are using a larger gold focal bead, make sure it sits in the center rather than slightly to one side.
Continue until the bracelet reaches your planned length. Before finishing, wrap it loosely around your wrist to check the fit.
Step 6: Attach the Other Side of the Clasp
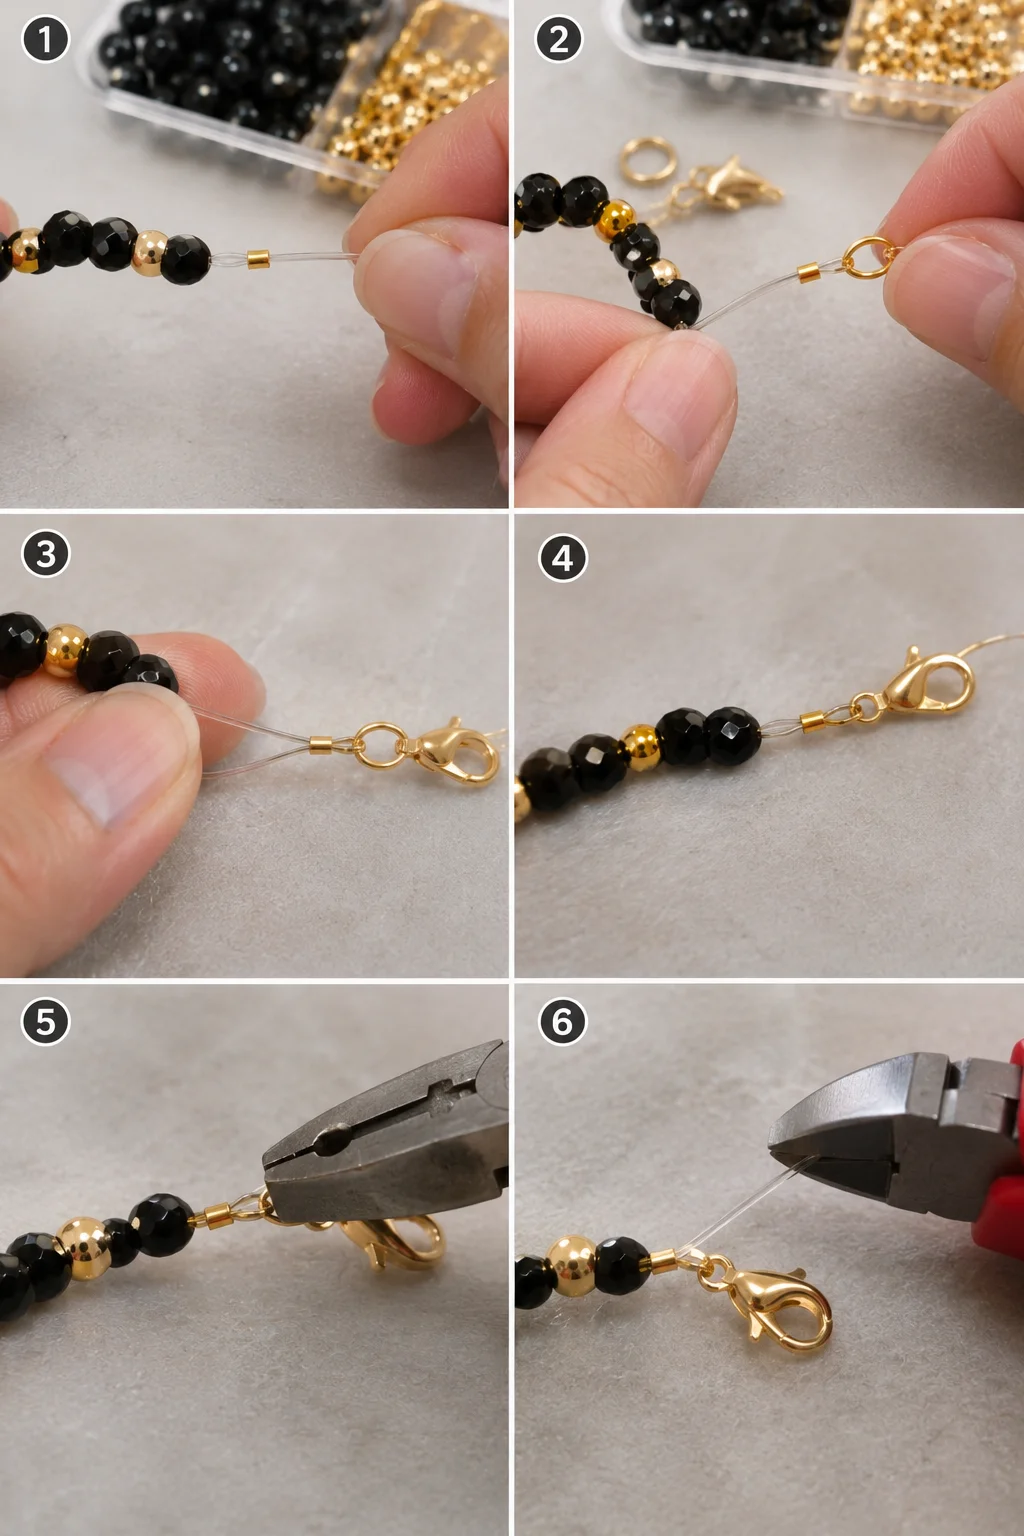
- Slide the second crimp bead onto the wire.
- Thread the wire through the clasp’s connecting ring.
- Pass the wire back through the crimp bead and, where possible, through the last few beads.
- Leave enough space for the bracelet to bend comfortably.
- Check the bracelet length and bead arrangement.
- Crimp the second end using the correct crimping tool and technique.
Trim the excess wire with jewelry cutters. Avoid cutting too close to the crimp if doing so could weaken or damage the connection.
Step 7: Check and Finish Your Bracelet
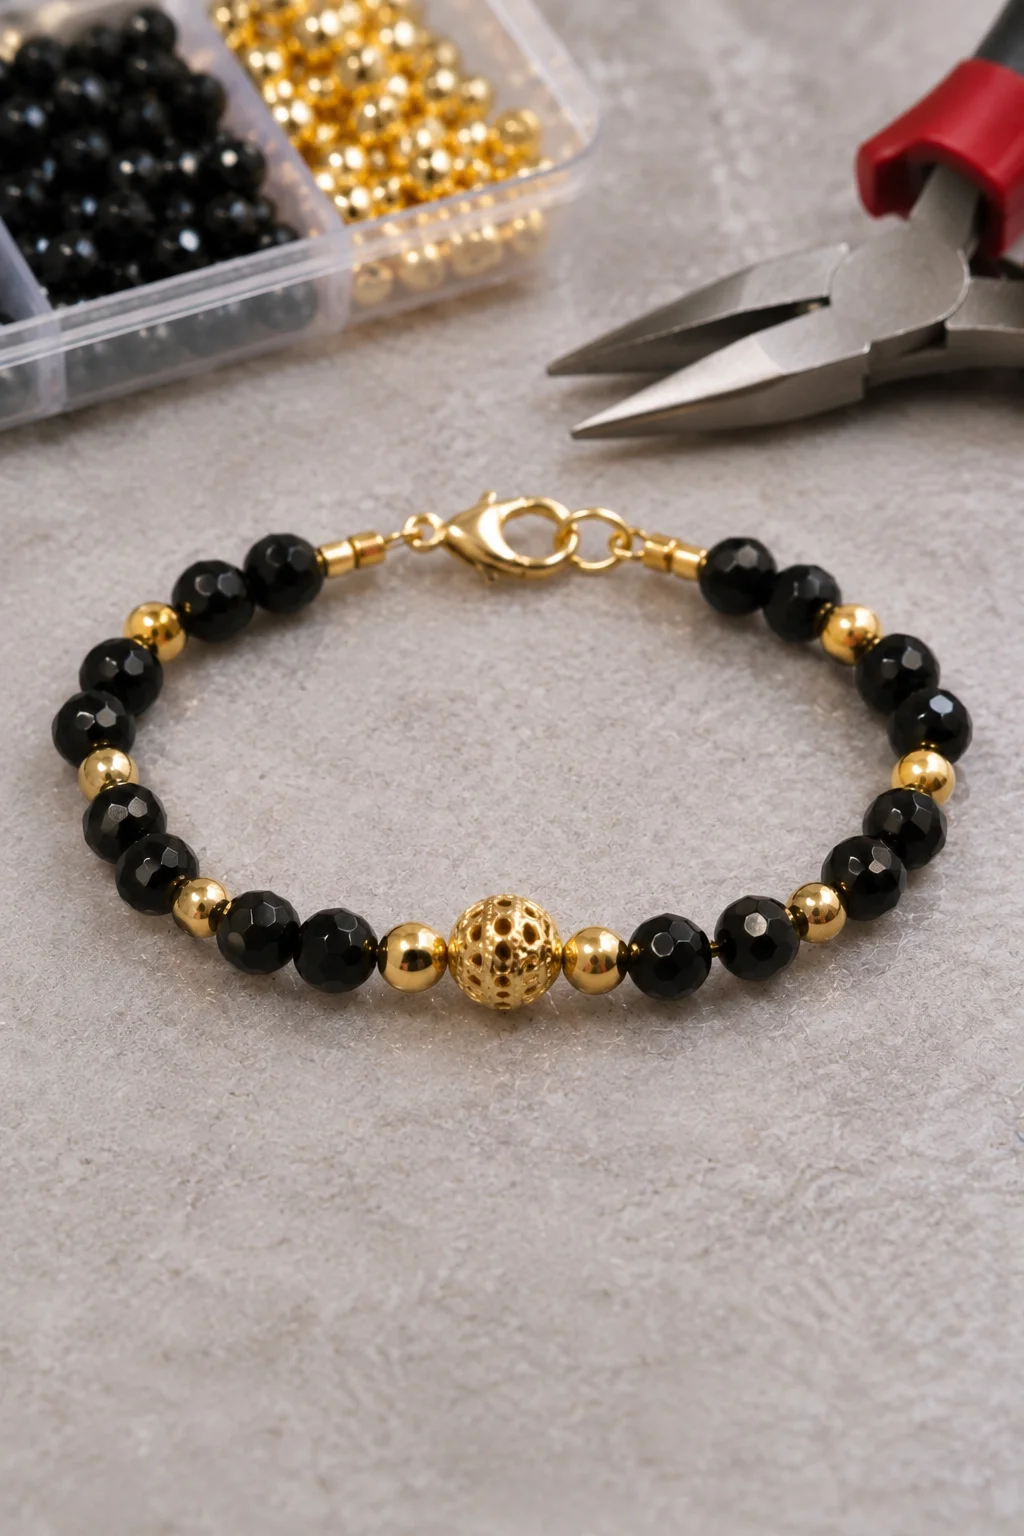
Gently inspect both ends, the clasp, and the bead arrangement. Make sure the crimps are secure and the bracelet bends naturally without sharp wire ends sticking out.
If desired, add compatible gold-tone crimp covers to conceal the crimp beads. Your black and gold beaded bracelet is ready to wear.
How to Make a Matching Black and Gold Beaded Necklace
Once you understand the basic stringing technique, you can use the same materials to create a coordinated necklace.
Choose Your Necklace Design
For a simple necklace, use 4–6 mm black glass beads with small gold spacers. Keep the gold accents relatively subtle so the black beads remain the main feature.
For a more decorative design, create a central focal section with a larger gold-tone pendant or several faceted black beads surrounded by gold spacers.
String and Finish the Necklace
- Measure the desired necklace length before cutting your wire.
- Arrange the black beads and gold accents on a bead tray.
- Attach one end of the wire to a compatible clasp using a crimp bead.
- String the beads in your chosen pattern.
- Check the symmetry of the necklace, especially around the focal point.
- Attach the second clasp component using another compatible crimp.
- Trim excess wire and inspect the finished connections.
A simple 18-inch necklace can be a useful starting point, but you can make it shorter or longer depending on your preferred style and the design.
How to Create Matching Black and Gold Beaded Earrings
Matching earrings complete a coordinated jewelry set without requiring a complicated bead-weaving technique.
Materials for Simple Drop Earrings
- Two gold-tone earring hooks
- Two black glass or crystal beads
- Two gold spacer beads
- Two headpins compatible with the bead holes
- Round-nose pliers
- Flat-nose pliers
- Wire cutters
Step-by-Step Instructions
- Slide one gold spacer bead onto a headpin.
- Add one black bead above the spacer.
- Leave enough wire above the bead to form a wrapped loop.
- Use round-nose pliers to bend the wire into a loop.
- Wrap the remaining wire around the section below the loop.
- Trim the excess wire neatly.
- Open the earring hook loop sideways, attach the beaded drop, and close it securely.
- Repeat the process for the second earring.
Check that both earrings have the same overall length and that their loops are securely closed.
Beautiful Black and Gold Beaded Jewelry Design Ideas
You can change the look of your jewelry simply by adjusting the bead finish, accent placement, and overall pattern. Here are several combinations to try.
1. Minimalist Black and Gold Bracelet
Use small glossy black beads with one gold spacer between every few beads. Keep the pattern consistent and avoid oversized focal pieces. This design works well for everyday outfits.
2. Black Crystal and Gold Statement Necklace
Combine larger faceted black crystals with gold-tone spacer beads. Place a decorative gold focal bead or pendant at the center to create a more noticeable necklace.
3. Matte Black and Brushed Gold Jewelry
Pair matte black beads with brushed gold-tone spacers for a softer metallic finish. This combination creates a contemporary look without relying on excessive sparkle.
4. Black Seed Bead Bracelet with Gold Details
Use black 11/0 seed beads as the main material and add small gold seed beads to create stripes, geometric patterns, or symmetrical accents. This design is particularly suitable for bead-weaving techniques.
5. Black and Gold Layered Bracelets
Create two or three separate bracelets using different bead sizes. One can feature mostly black beads, another can use more gold accents, and the third can combine both colors in a repeating pattern.
6. Black Pearl and Gold Accent Earrings
Use black pearl-style beads with small gold spacers and simple gold-tone earring hooks. The smooth bead surface gives the earrings a classic appearance.
Common Mistakes When Making Black and Gold Beaded Jewelry
A few small mistakes can affect the appearance and durability of handmade jewelry. Check these details before finishing your project.
Using Too Many Gold Accents
Too many metallic beads can make the design look crowded. Keep black as the dominant color and use gold to highlight specific sections.
Choosing Wire That Is Too Thick
If the wire cannot pass through the bead holes, you won’t be able to complete the design properly. Check the smallest hole before buying wire, and choose the largest compatible diameter for your materials.
Crimping the Wire Incorrectly
A poorly secured crimp can allow the wire to slip out. Use crimps that match your wire and the manufacturer’s recommendations. A proper crimping tool helps create a secure connection.
Making the Bracelet Too Tight
A bracelet that fits too closely can feel uncomfortable and put additional strain on its connections. Measure your wrist first and leave enough room for natural movement.
Mixing Different Gold Finishes
Combining bright yellow gold, antique gold, and rose gold can make a simple design look inconsistent. Choose one main gold finish and repeat it throughout the piece.
Tips for Making Black and Gold Jewelry Last Longer
- Store jewelry separately: Keep finished pieces in individual pouches or compartments to reduce scratches and tangling.
- Avoid unnecessary moisture: Remove jewelry before swimming, showering, or using household cleaning products.
- Protect plated findings: Perfume, lotions, and harsh chemicals may affect some metallic finishes.
- Inspect the connections: Check crimps, clasps, jump rings, and wire ends periodically.
- Choose skin-friendly materials: Look for nickel-free findings if metal sensitivity is a concern.
- Handle delicate beads carefully: Avoid dropping glass beads onto hard surfaces.
Frequently Asked Questions
What beads look best with black and gold?
Black glass beads, faceted crystals, matte black seed beads, and black pearl-style beads all work well with gold accents. Choose the finish according to the style you want. Glossy beads create a classic look, while matte beads give jewelry a more understated appearance.
What size beads should beginners use for jewelry making?
Round beads measuring 4–6 mm are a practical starting point for simple bracelets and necklaces. They are easy to arrange and create visible patterns without requiring intricate beadwork. Smaller 11/0 seed beads are useful for detailed designs but require more careful handling.
Can I make black and gold jewelry without a jewelry-making machine?
Yes. Simple beaded bracelets, necklaces, and earrings can be assembled using basic hand tools. You’ll need suitable stringing wire, beads, findings, and pliers. More complicated woven patterns may require additional tools, such as a bead loom or fine beading needles.
How do I keep gold-tone beads from losing their finish?
Choose quality beads and findings with clearly described plating or protective finishes. Keep them away from perfume, moisture, and cleaning chemicals. Store finished jewelry in a dry place and follow the care instructions supplied by the manufacturer.
How do I make a black beaded bracelet look more elegant?
Use a limited number of gold accents, keep the bead spacing consistent, and choose a single gold finish. A symmetrical design with a central gold focal bead can look especially polished. Neat crimping and a well-fitted clasp also make a noticeable difference.
Make Your Own Black and Gold Jewelry Set
Making black beaded jewelry with gold accents is a simple way to explore jewelry design while creating accessories that match your personal style. Start with a basic bracelet, experiment with different bead finishes, and use the same color combination to make a matching necklace or pair of earrings.
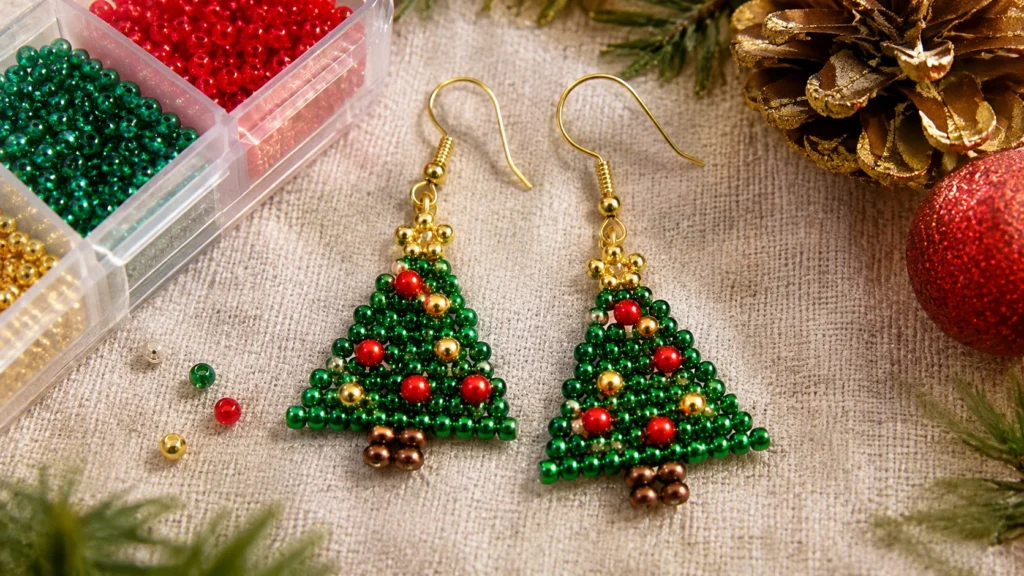
If you enjoy working with beads, you can also explore these DIY beaded Christmas tree earrings and this beaded Christmas angel ornament for more handmade jewelry and beading inspiration.