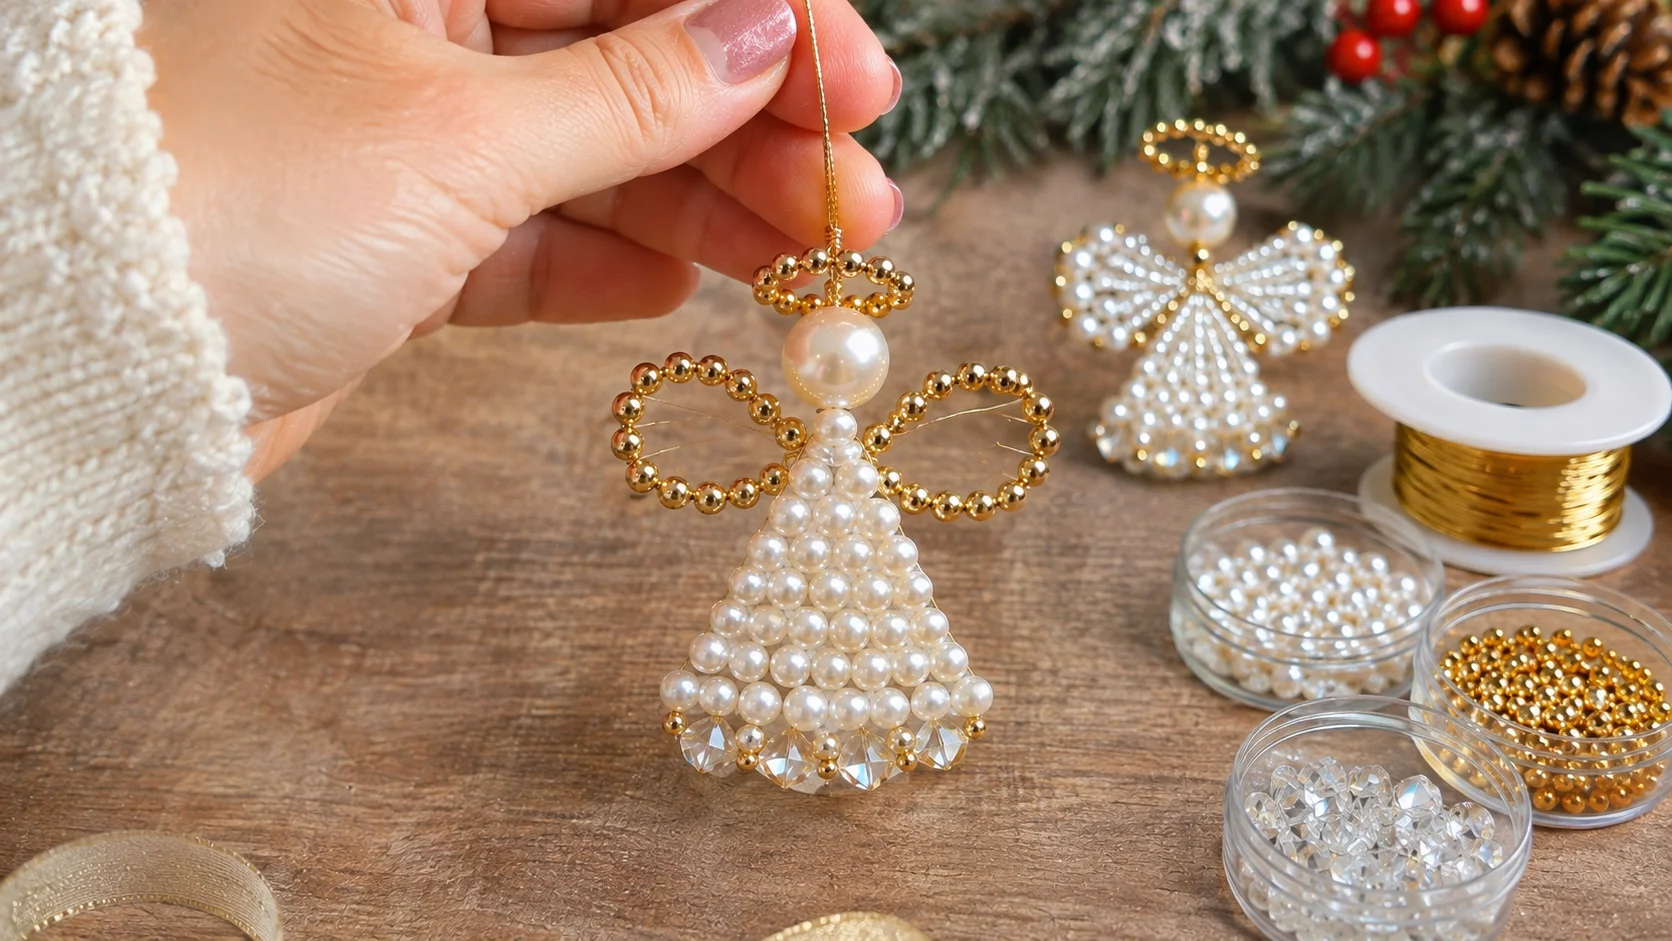
A handmade angel ornament brings a delicate touch to Christmas decorations. With sparkling beads, a little craft wire, and a few jewelry-making tools, you can create a beautiful angel that hangs from the Christmas tree or becomes part of a handmade holiday gift.
This beaded Christmas angel ornament features a round bead for the head, a decorative body, and two shaped wings. Silver, white, and pearl beads create a traditional winter look, while gold details give the finished angel a warmer appearance.
To make a beaded Christmas angel ornament, you need craft wire, assorted beads, jewelry pliers, and wire cutters. The basic construction involves arranging beads into the angel’s body, forming the wings, securing the head, and finishing the wire with a hanging loop.
Materials Needed to Make a Beaded Angel Ornament
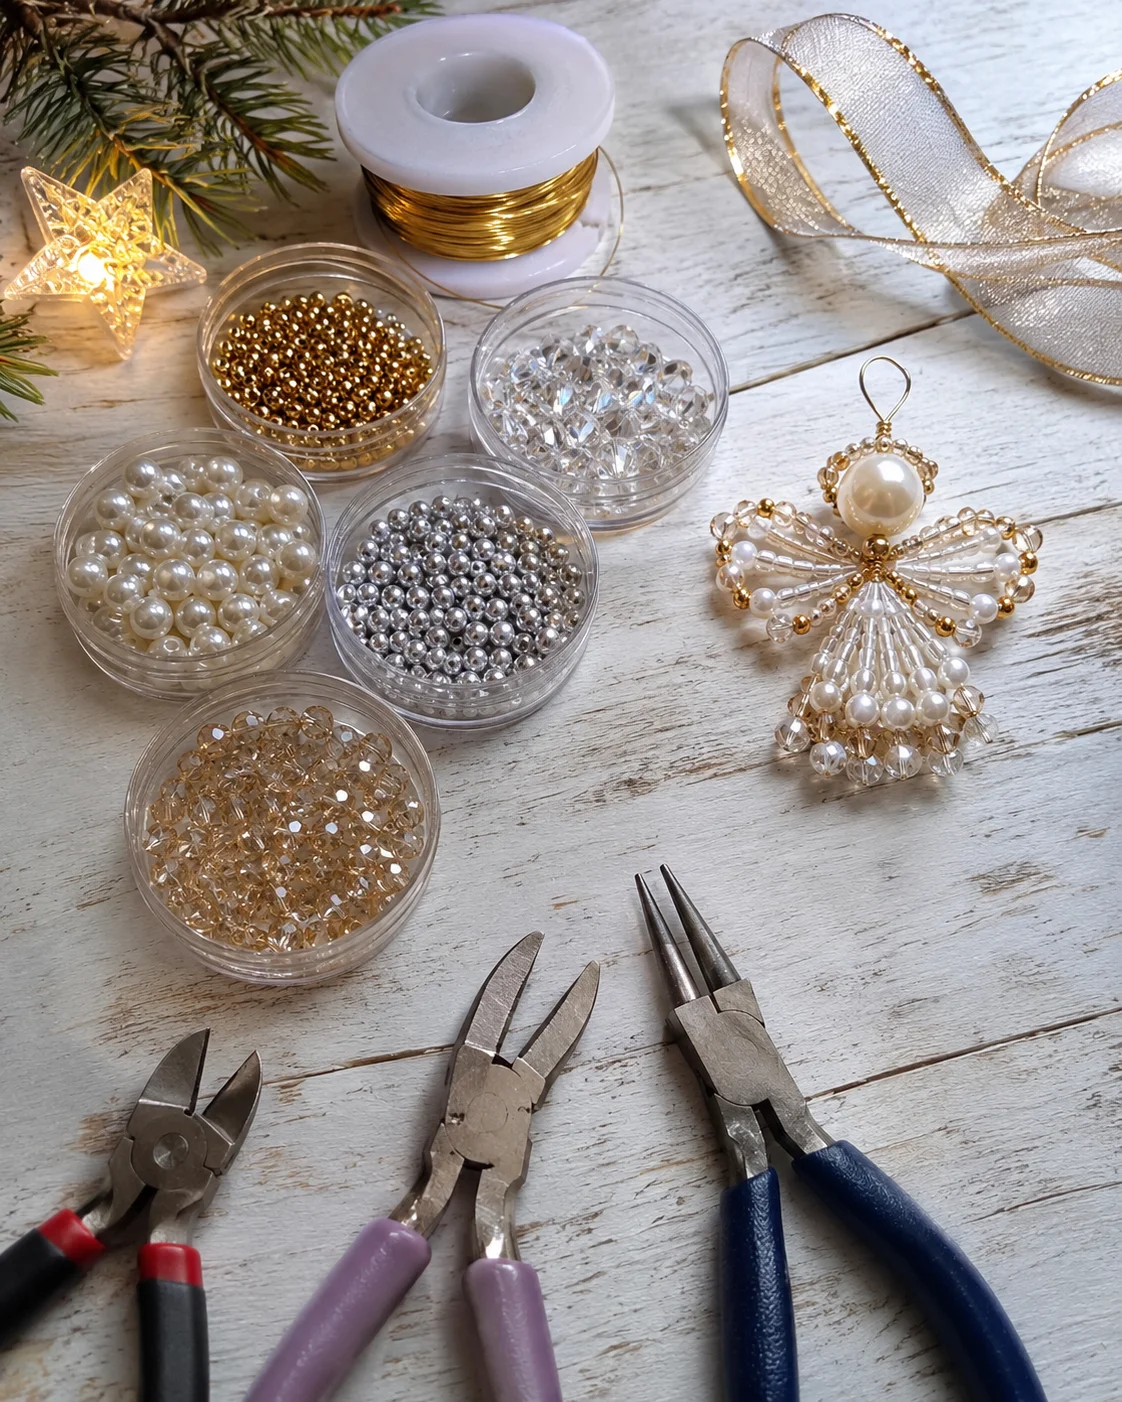
Prepare the following supplies before beginning your project. The exact bead quantities will depend on the size and style of angel you want to create.
- 28-gauge craft wire, preferably silver or gold plated
- One larger round bead or pearl for the angel’s head
- Small round beads for the body
- Decorative crystal or glass beads
- White or silver beads for the wings
- Gold seed beads for decorative details
- Jewelry chain-nose pliers
- Round-nose pliers
- Wire cutters
- Small ribbon for hanging, if desired
Silver wire with white pearls and clear crystal beads creates a delicate angel, while gold wire with champagne-colored beads gives the ornament a more traditional festive appearance.
How to Make a Beaded Christmas Angel Ornament Step by Step
Step 1: Prepare the Craft Wire
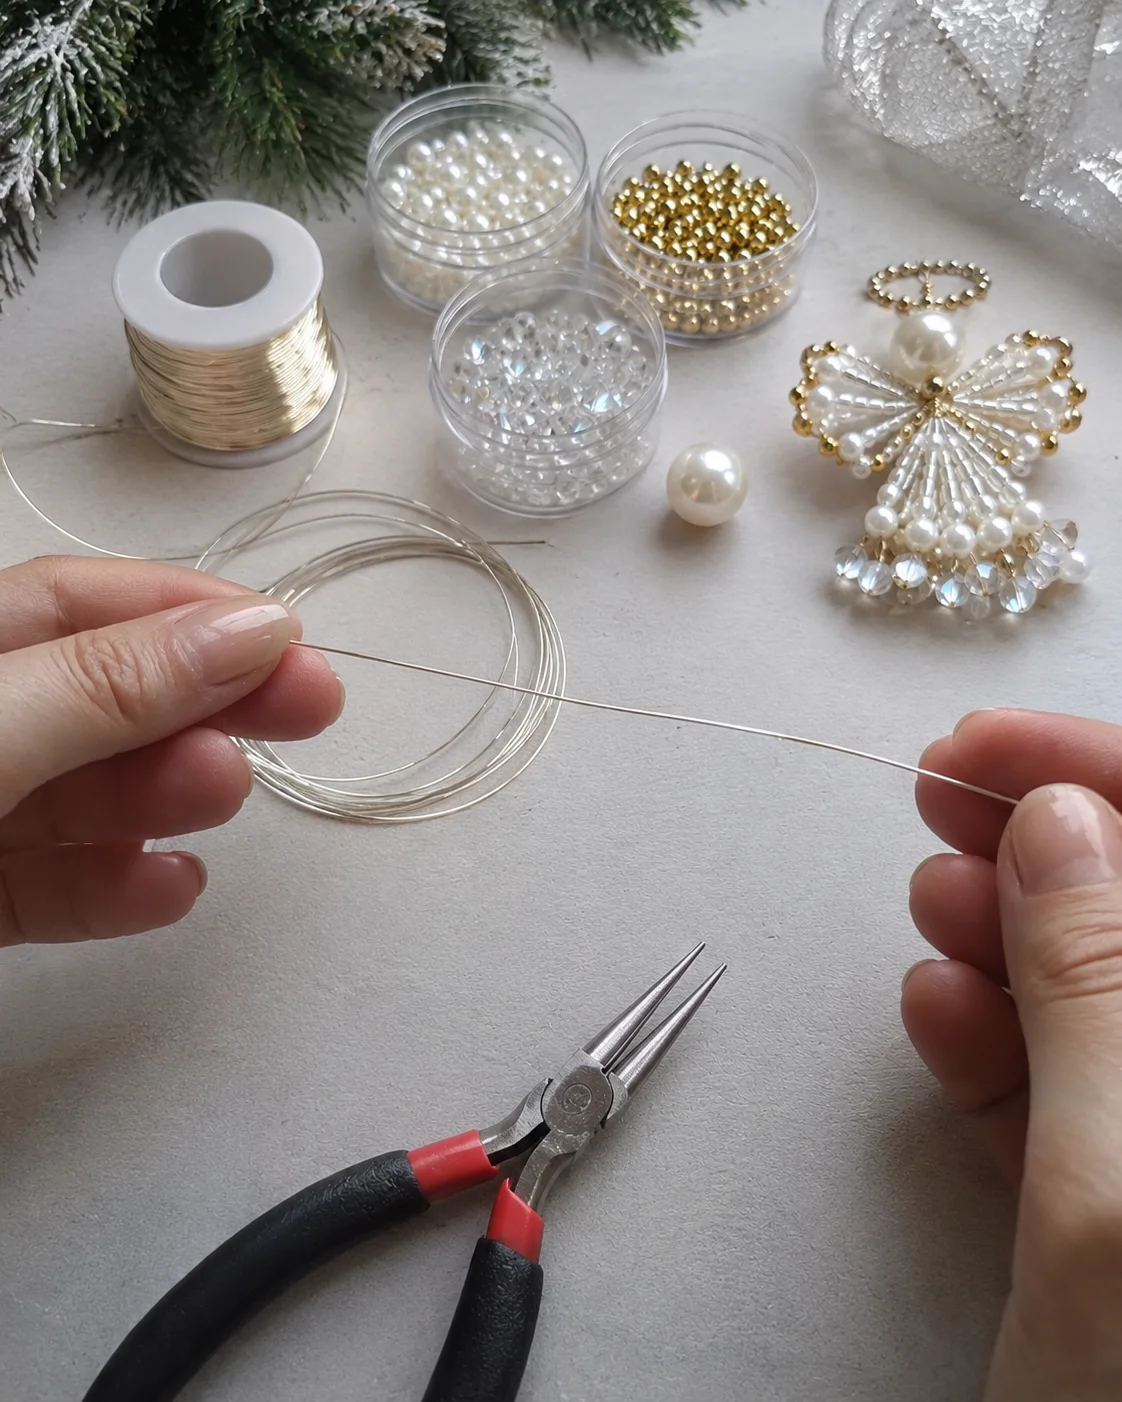
Cut a suitable length of craft wire and straighten it gently before adding the beads. Keeping the wire reasonably straight makes it easier to arrange the rows and shape the angel without unnecessary bends.
Leave enough wire at both ends to form the wings and secure the hanging loop later. Avoid cutting the wire too short because the remaining length is important for assembling the ornament.
Step 2: Create the Angel’s Body
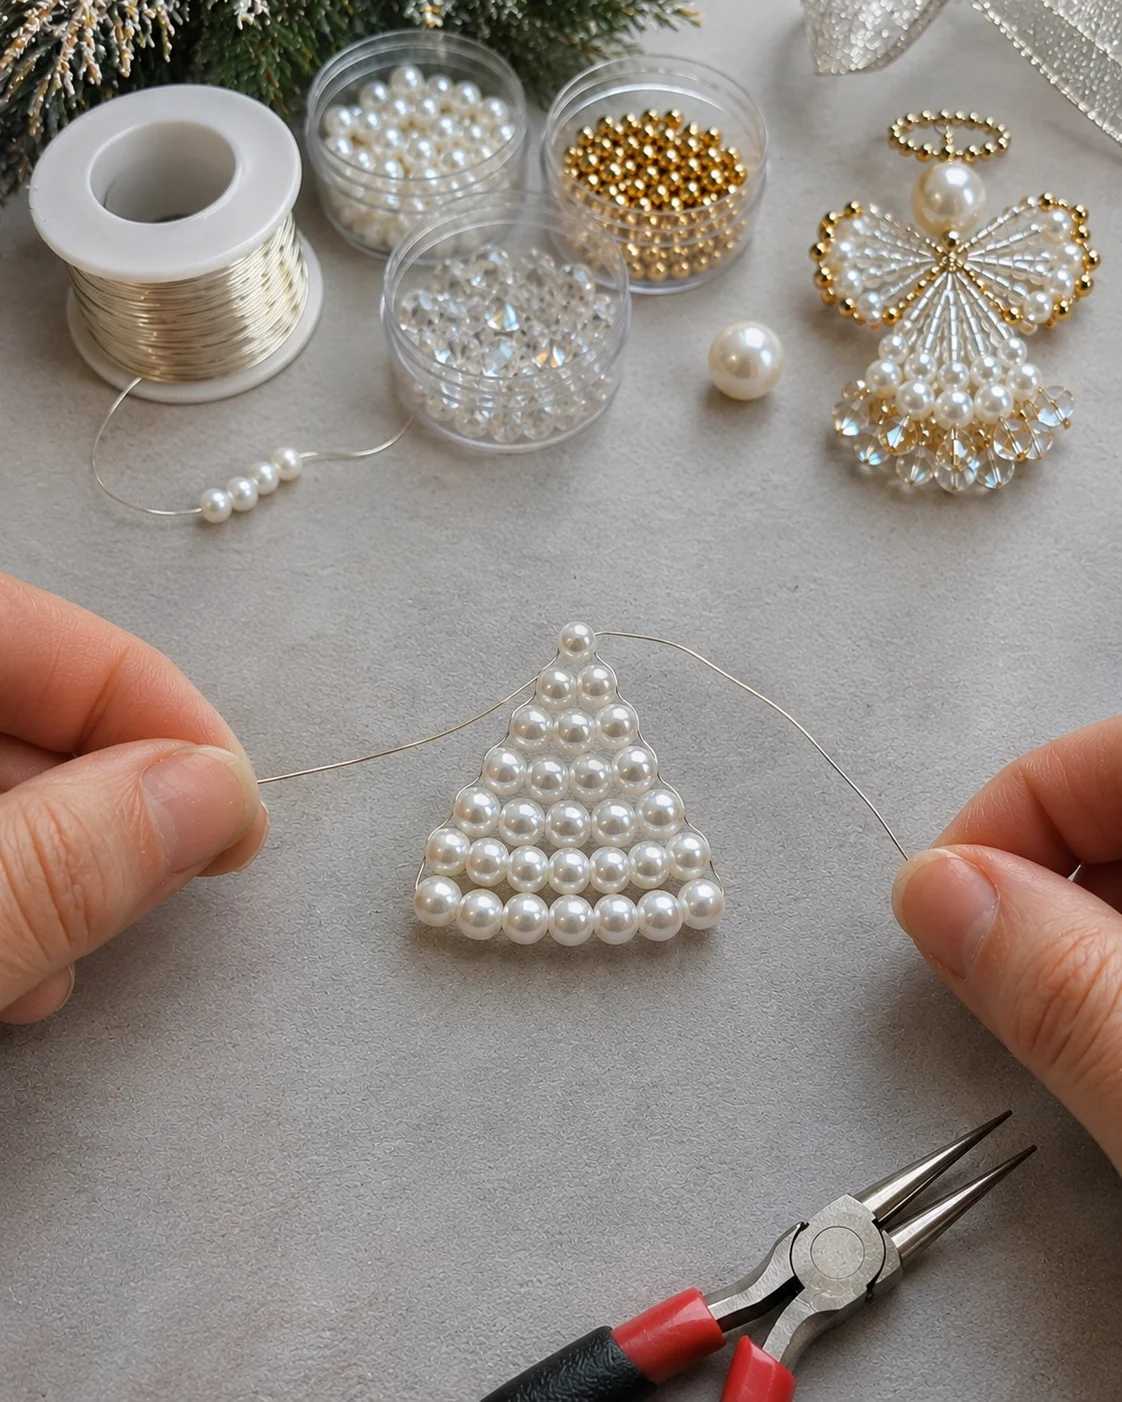
Begin by threading a row of small white or pearl beads onto the center section of the wire. These beads will form the upper part of the angel’s dress.
For a triangular body, arrange successive rows with gradually fewer beads. A wider bottom section and narrower top create the shape of a flowing angel dress.
One useful beading method is to pass the opposite end of the wire back through each new row. Pull the two ends gently in opposite directions to bring the beads together and keep the rows aligned.
Continue reducing the number of beads until the body forms a small triangle. Make sure each row sits close to the previous one without leaving large gaps.
Step 3: Shape the Angel’s Wings
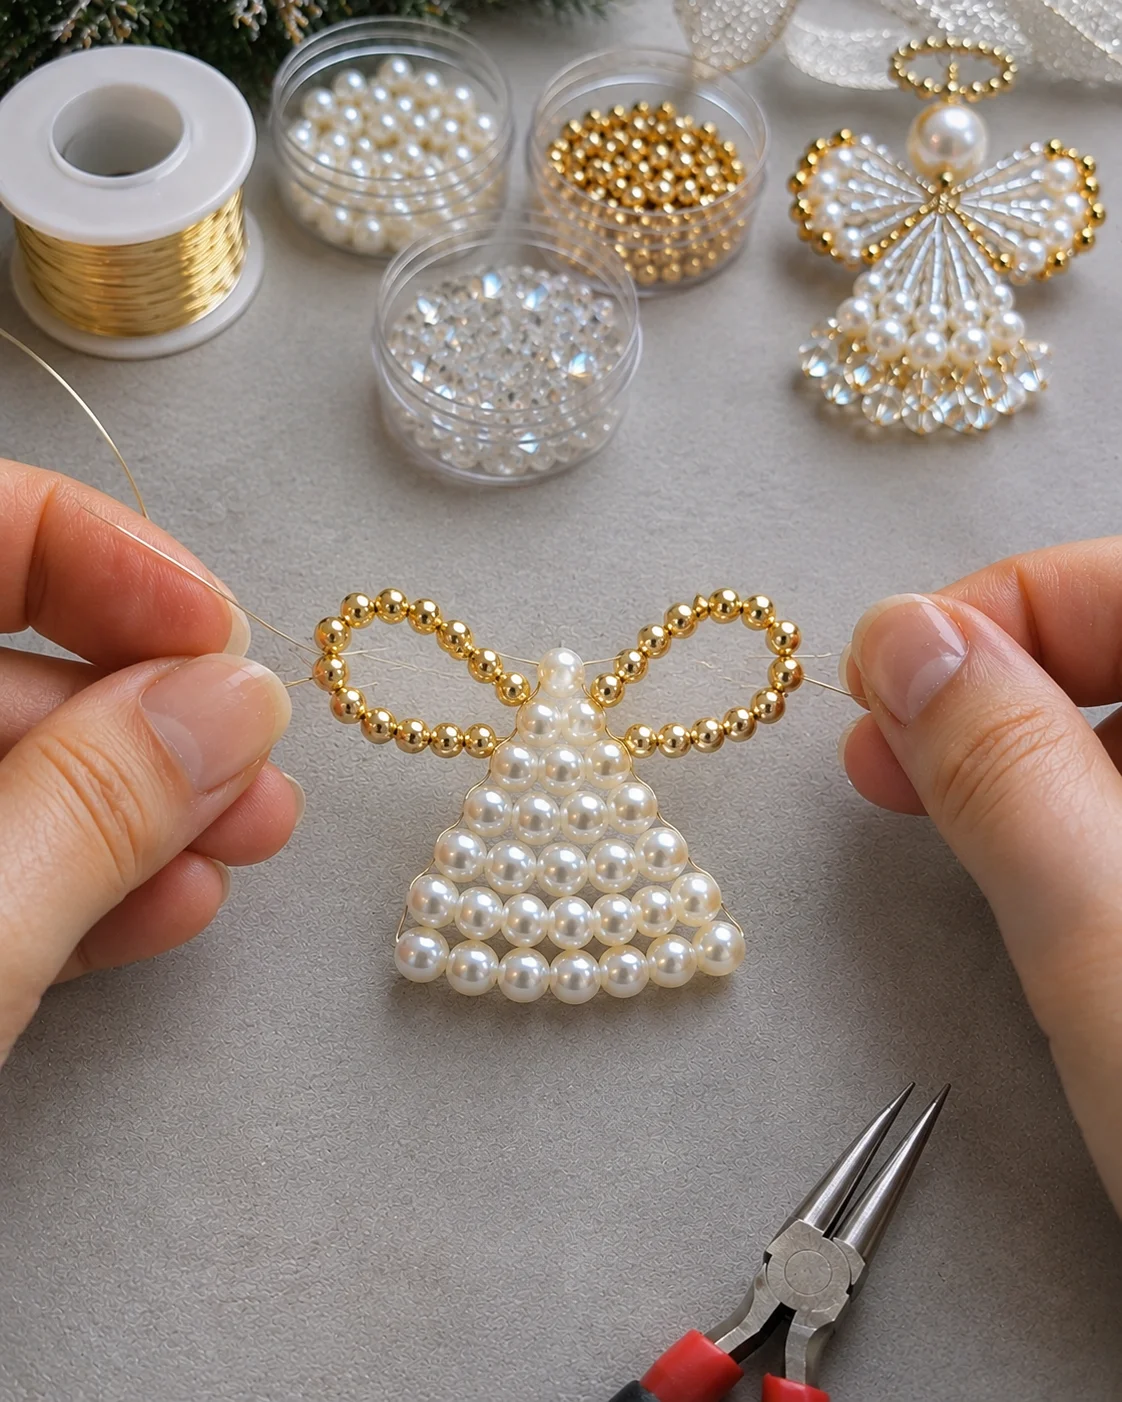
The wings give the ornament its recognizable angel silhouette. Use the remaining wire ends to create two matching loops on either side of the upper body.
Thread small gold, silver, or clear beads onto each wire end. Shape the beaded sections into gentle curves, making one wing on the left and the other on the right.
Try to keep both wings similar in size. You can use round-nose pliers to make smooth curves and adjust the shape until the wings sit evenly.
Step 4: Add the Angel’s Head
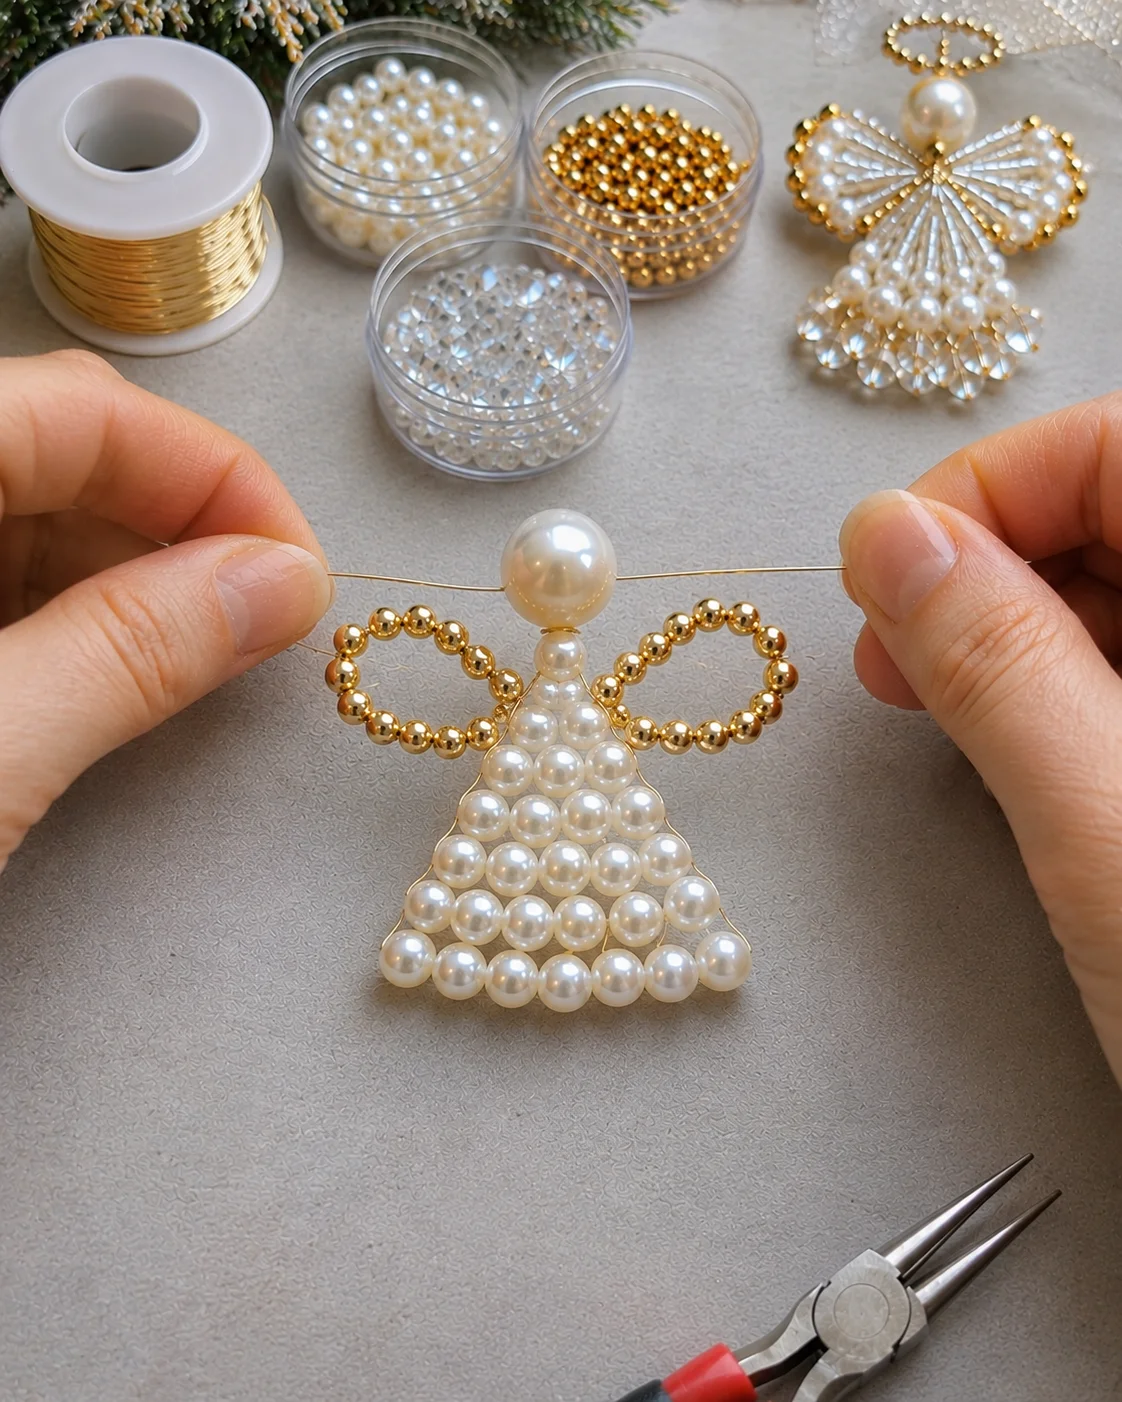
Choose a larger pearl or round bead for the head. White, ivory, and pale champagne beads all work nicely with traditional Christmas colors.
Thread the head bead onto the wire above the body and position it in the center. Secure it by passing the wire through or around the bead arrangement as appropriate for your chosen construction.
A round pearl gives the angel a simple, elegant appearance, while a crystal bead adds more sparkle when the ornament catches the Christmas lights.
Step 5: Create a Decorative Halo
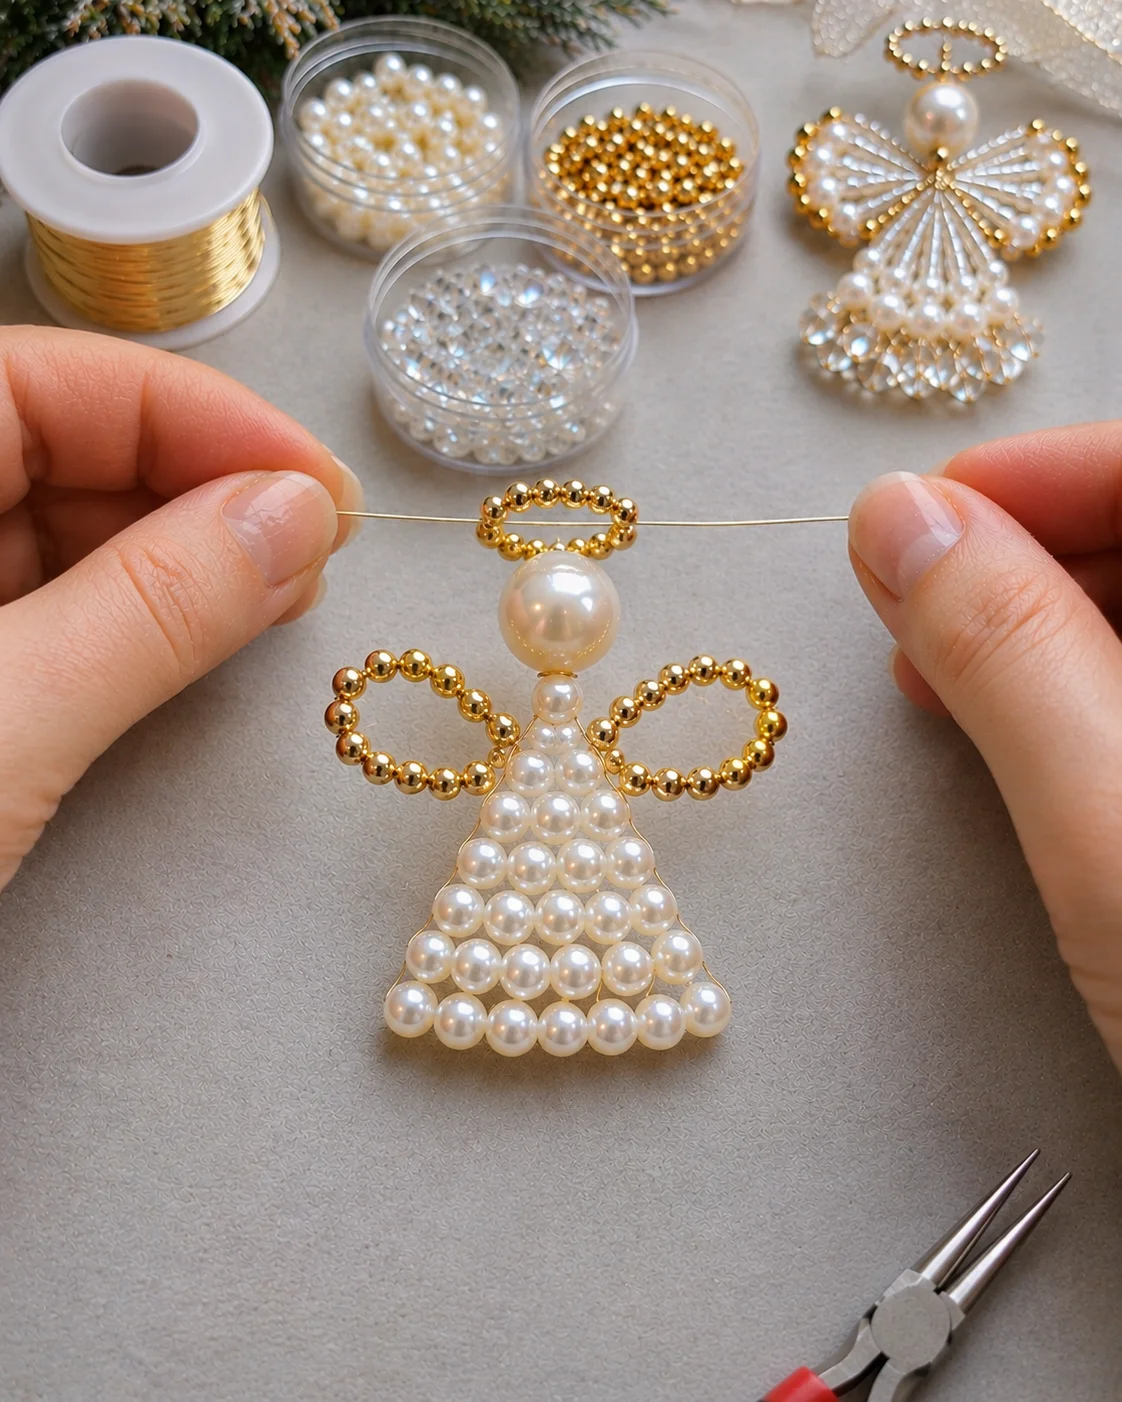
A halo is a lovely finishing detail. Use a short length of fine wire to create a small circular shape above the head, or incorporate a few gold beads into a curved wire section.
Keep the halo proportional to the head. It should be visible without overpowering the wings or the body.
Step 6: Secure the Wire and Add a Hanging Loop
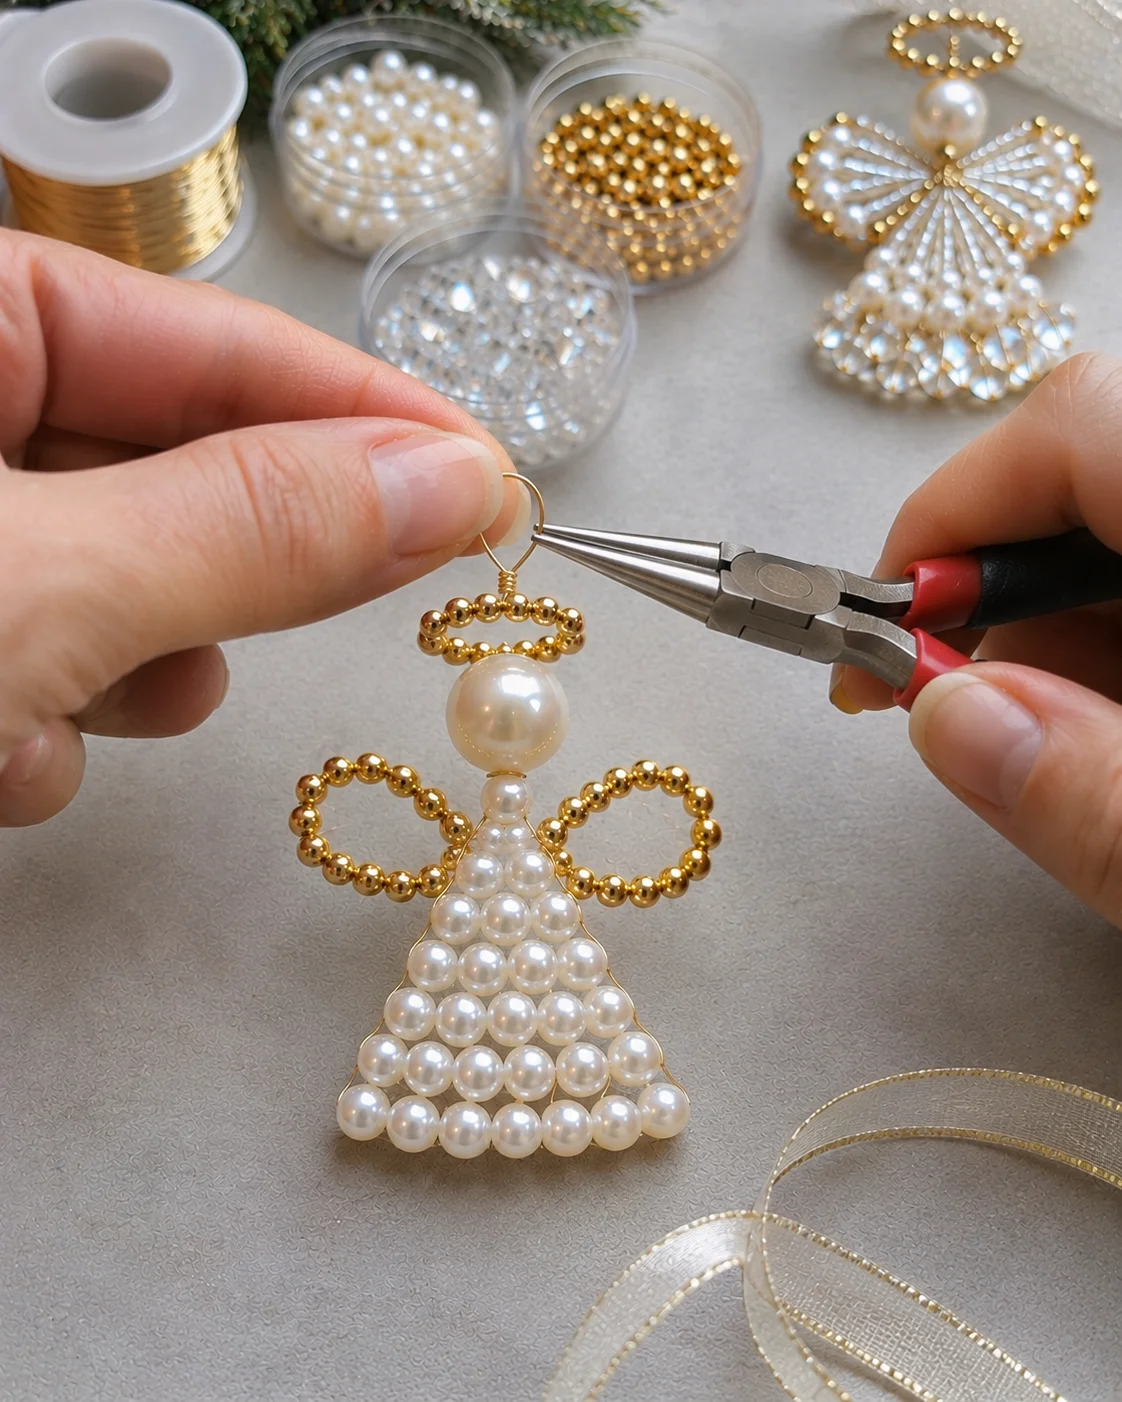
Bring the remaining wire ends together and twist them securely near the top of the angel. Use jewelry pliers to make a neat loop that can be used for hanging the ornament.
Check the wire ends carefully. Trim excess wire with cutters and tuck any sharp ends inward so they do not stick out from the finished design.
If you prefer a softer hanging detail, attach a narrow ribbon through the finished loop. A white, silver, or gold ribbon complements the beaded angel beautifully.
Choosing the Best Colors for Your Christmas Angel
Classic White and Silver
White pearls, clear crystal beads, and silver wire create a traditional angel ornament with a soft winter appearance. This combination works particularly well on trees decorated with white lights and silver accessories.
Gold and Champagne
For a warmer look, combine champagne pearls, gold seed beads, and gold-tone wire. The result feels elegant and pairs nicely with natural wood ornaments and warm Christmas lights.
Pastel Christmas Angel
Soft pink, pale blue, ivory, and clear beads offer a gentle alternative to traditional holiday colors. A small pearl head and delicate matching wings help keep the design balanced.
Helpful Tips for a Neat Beaded Angel
- Use compatible wire and beads: Check that the wire can pass through the bead holes, especially when working with small seed beads.
- Keep the wings balanced: Similar wing sizes make the ornament look more symmetrical.
- Do not overtighten: Pulling the wire too firmly can distort the bead arrangement.
- Use pliers for neat loops: Round-nose pliers help create smooth hanging loops and decorative curves.
- Hide sharp wire ends: Carefully tuck the ends away from the outside of the ornament.
- Check the hanging point: Make sure the loop is securely attached before displaying the angel.
Other Ways to Use a Handmade Beaded Angel
A beaded angel does not have to stay on the Christmas tree. You can use a smaller version as a gift topper, attach one to a holiday wreath, or hang it near a window where the beads can catch natural light.
Several angels in different sizes can also make a lovely coordinated Christmas decoration. Try using the same bead palette for the entire set while changing the wing shape or decorative details slightly.
For more inspiration, Natalie Patten’s Beaded Festive Angel tutorial provides an original beginner-level wire and bead project with a detailed sequence for constructing the angel, shaping its wings, and creating a hanging loop.
You can also explore the Beaded Guardian Angel Ornament tutorial by Soft Flex Company, which uses craft wire and decorative beads to create a keepsake-style Christmas ornament.
With a few carefully selected beads and neatly finished wire details, a simple angel ornament can become a meaningful addition to your Christmas decorations year after year.