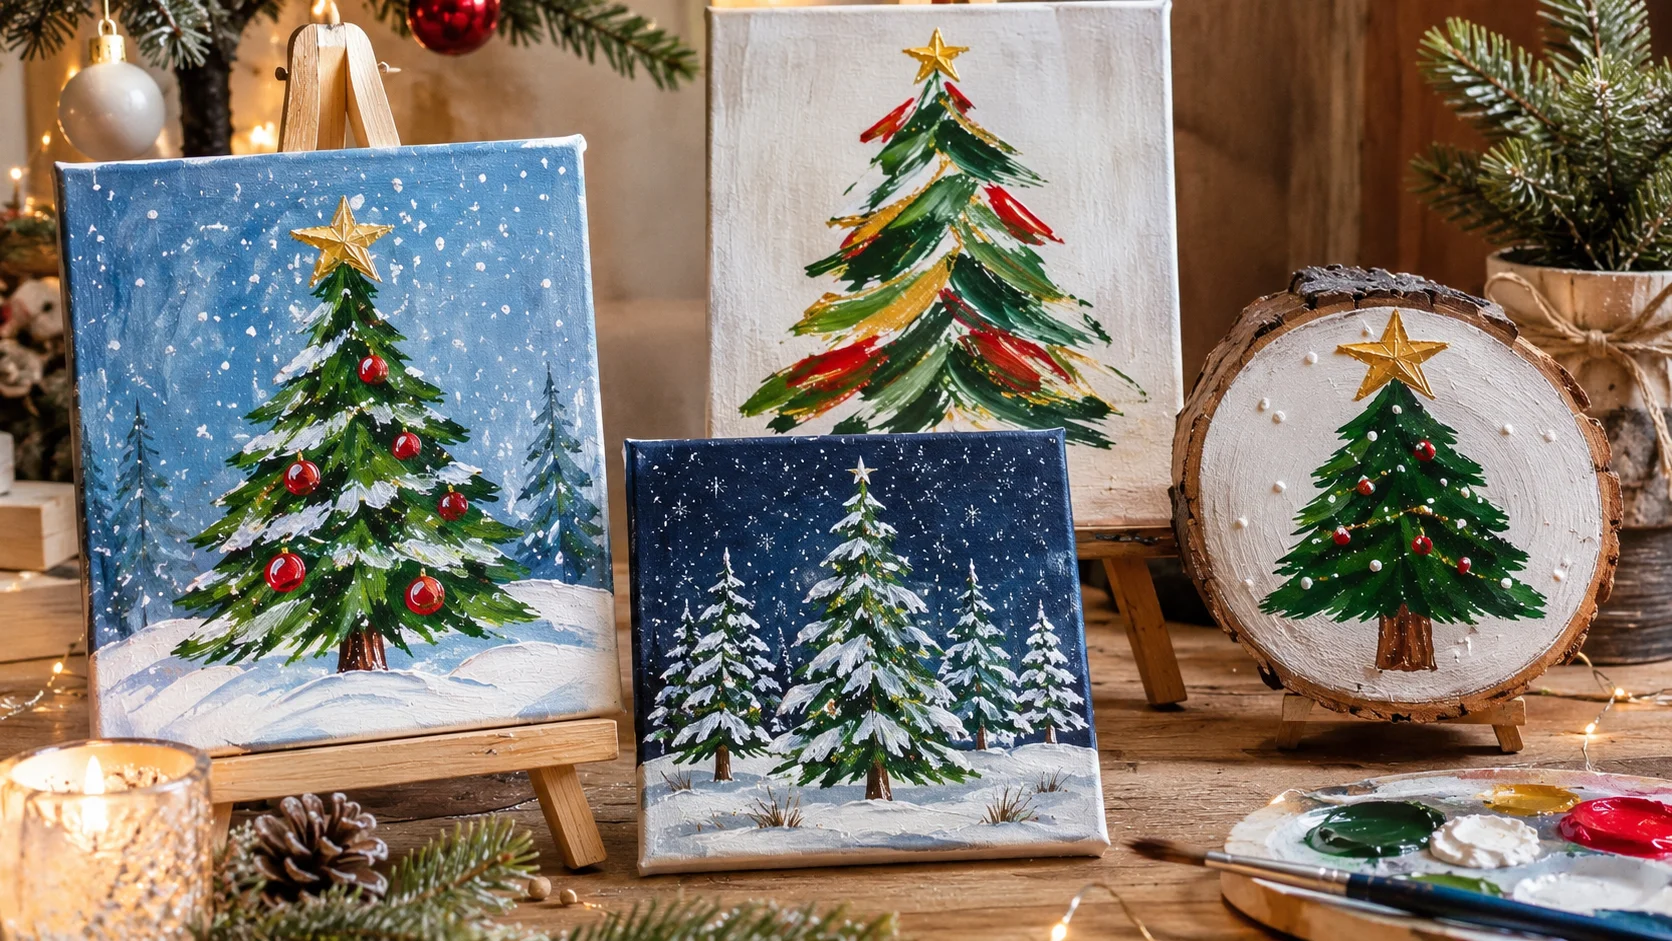
Christmas tree painting is a lovely beginner-friendly project because you can create festive designs using simple triangles, dots, brushstrokes, and a few acrylic paint colors. You don’t need drawing experience or expensive supplies to make a Christmas painting that looks good on canvas.
This guide covers 12 easy Christmas tree painting ideas, from minimalist green trees to snowy forest scenes and colorful decorated trees. Each idea includes a simple technique to help you recreate it at home.
What You Need for Easy Christmas Tree Painting
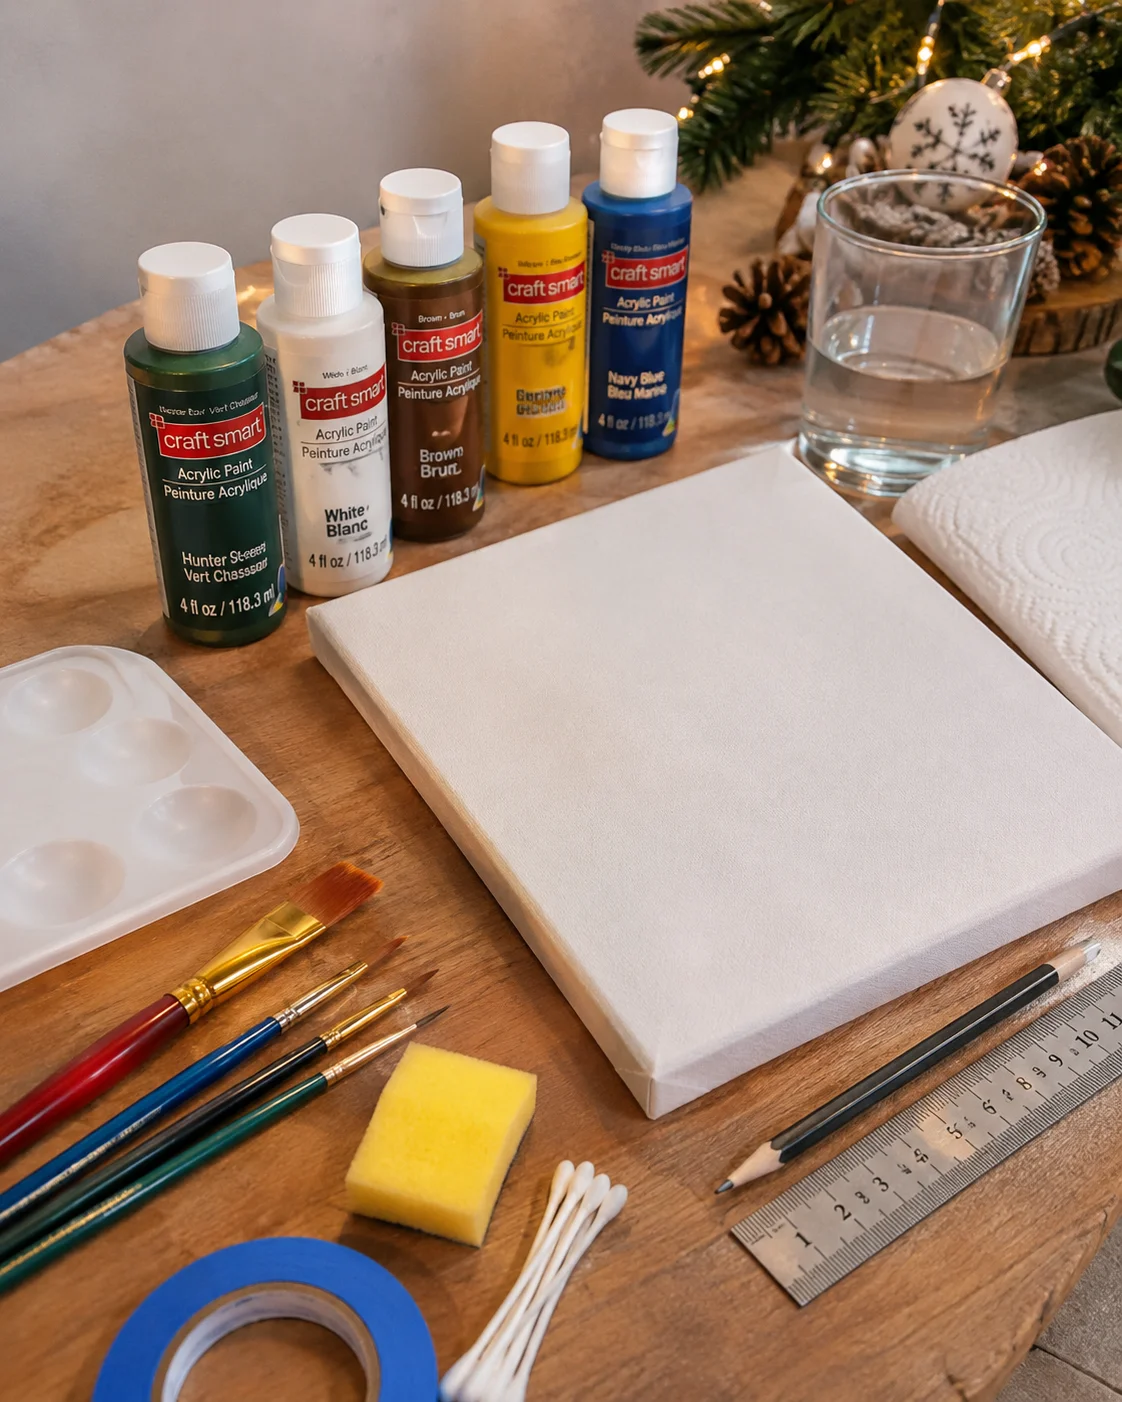
Before starting, gather a few basic painting supplies. Acrylic paint is a practical choice for these projects because it works on canvas and wood, comes in a wide range of colors, and dries relatively quickly.
- Canvas: A 8 x 10-inch or 10 x 10-inch primed canvas is a comfortable size for beginners.
- Acrylic paints: Dark green, light green, white, red, yellow, brown, and navy blue.
- Paintbrushes: A medium flat brush for backgrounds, a small round brush for tree shapes, and a fine detail brush for ornaments.
- Other supplies: A pencil, palette, water cup, paper towels, and a ruler.
- Optional tools: A sponge, cotton swabs, painter’s tape, and the end of a paintbrush for making dots.
If you’re painting on an old wooden surface or an unprimed canvas, check whether it needs preparation first. Gesso is a common acrylic primer that helps prepare suitable surfaces for painting. You can find more advice in Canson’s guide to preparing acrylic painting materials.
12 Easy Christmas Tree Painting Ideas for Beginners
1. Simple Triangle Christmas Tree
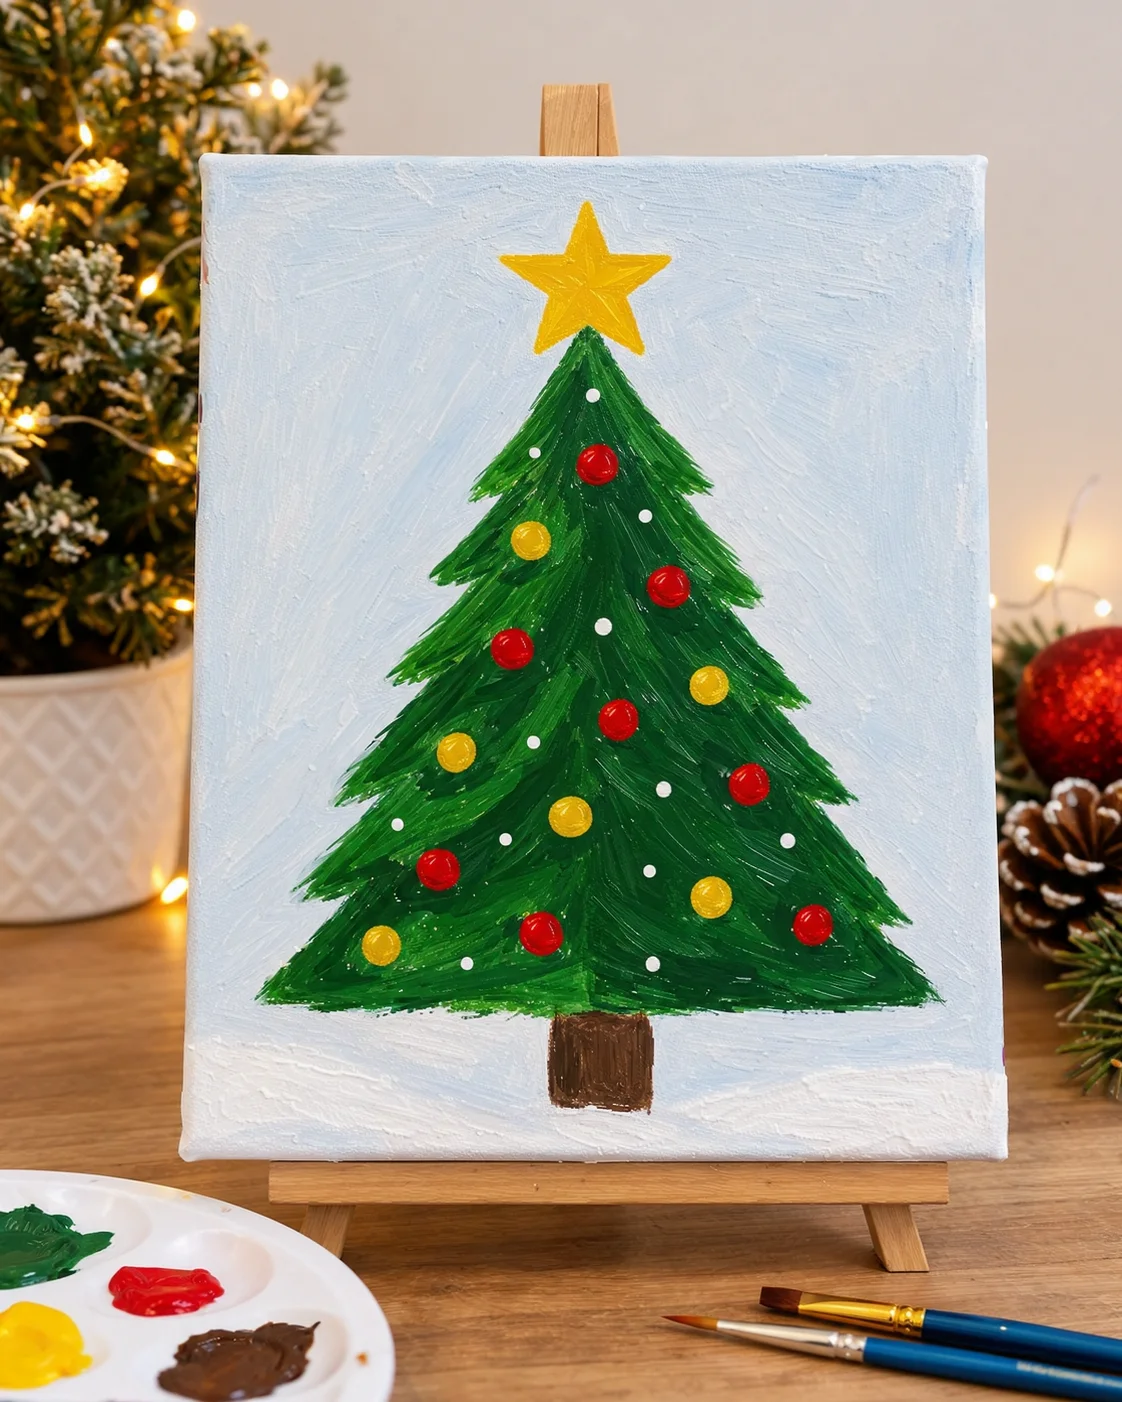
A triangle Christmas tree is one of the easiest designs to try if you’re picking up a paintbrush for the first time. It uses basic shapes and doesn’t require detailed drawing.
Start with a light cream or pale blue background. Once it’s dry, draw a large triangle in the center of the canvas and fill it with dark green acrylic paint. Add a small brown rectangle underneath for the trunk, then finish with a yellow star at the top.
Beginner tip: Use a ruler to sketch the triangle before painting. You can leave the edges slightly imperfect for a relaxed, handmade look.
2. Christmas Tree with Colorful Dot Ornaments
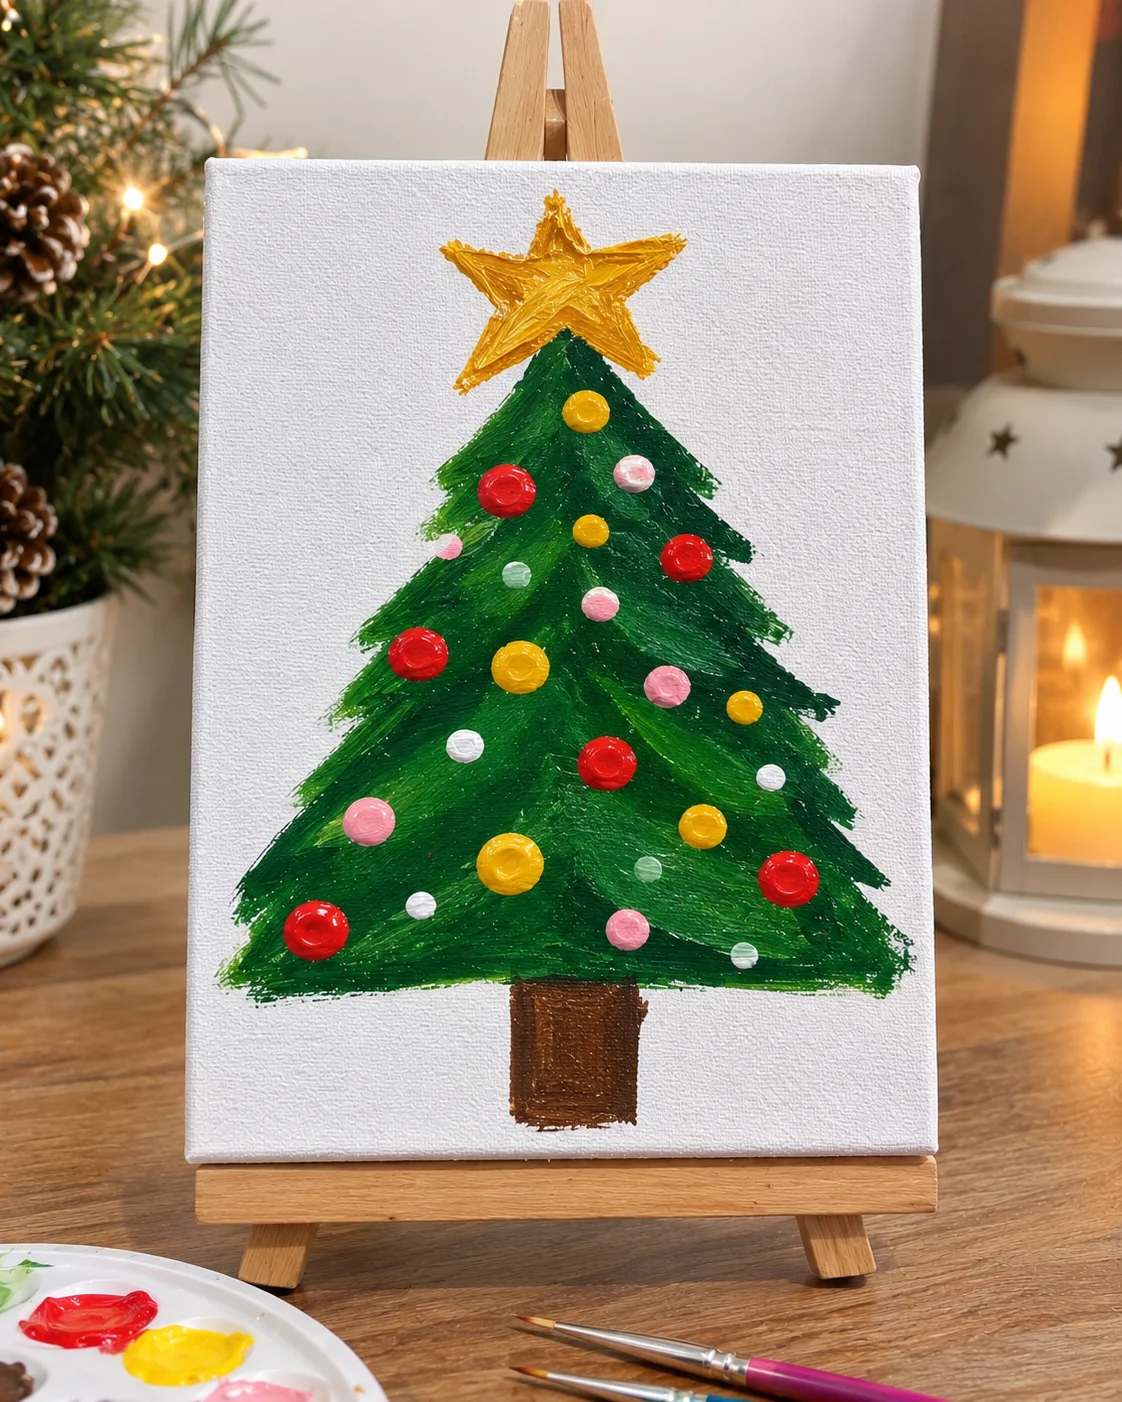
This cheerful design turns a simple green tree into a colorful Christmas decoration. It’s especially easy because you don’t need to paint tiny ornament shapes by hand.
Paint a green triangle on a white, cream, or navy background. After the tree dries, dip the rounded end of a paintbrush into red, gold, white, and pink paint. Press it gently against the tree to create round ornaments in different sizes.
Add a small brown trunk and a gold star to finish the painting.
3. Snowy Christmas Tree on a Blue Background
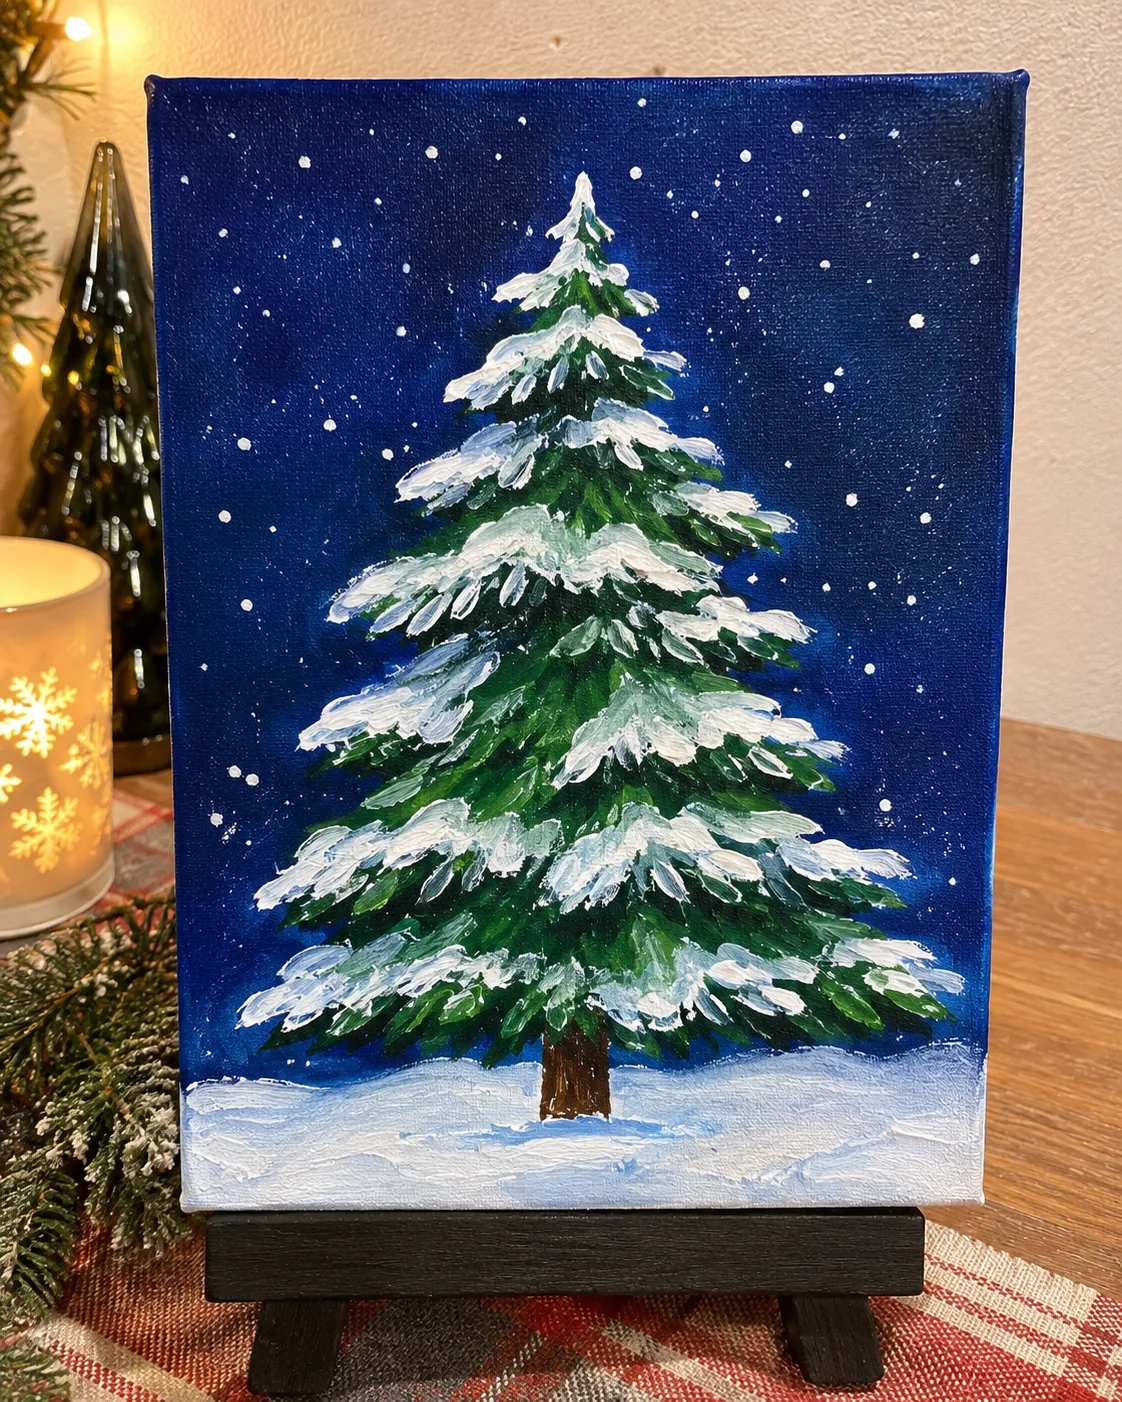
A dark blue background makes white snow stand out beautifully against green branches. This is a simple way to create a winter-inspired Christmas painting.
Cover the canvas with navy or midnight blue acrylic paint. Once dry, paint a green pine tree using short horizontal strokes that become smaller toward the top. Add white paint along the edges of the branches to suggest freshly fallen snow.
Finish with small white dots scattered around the tree. Use a light touch so the snow looks natural rather than crowded.
4. Minimalist White Christmas Tree
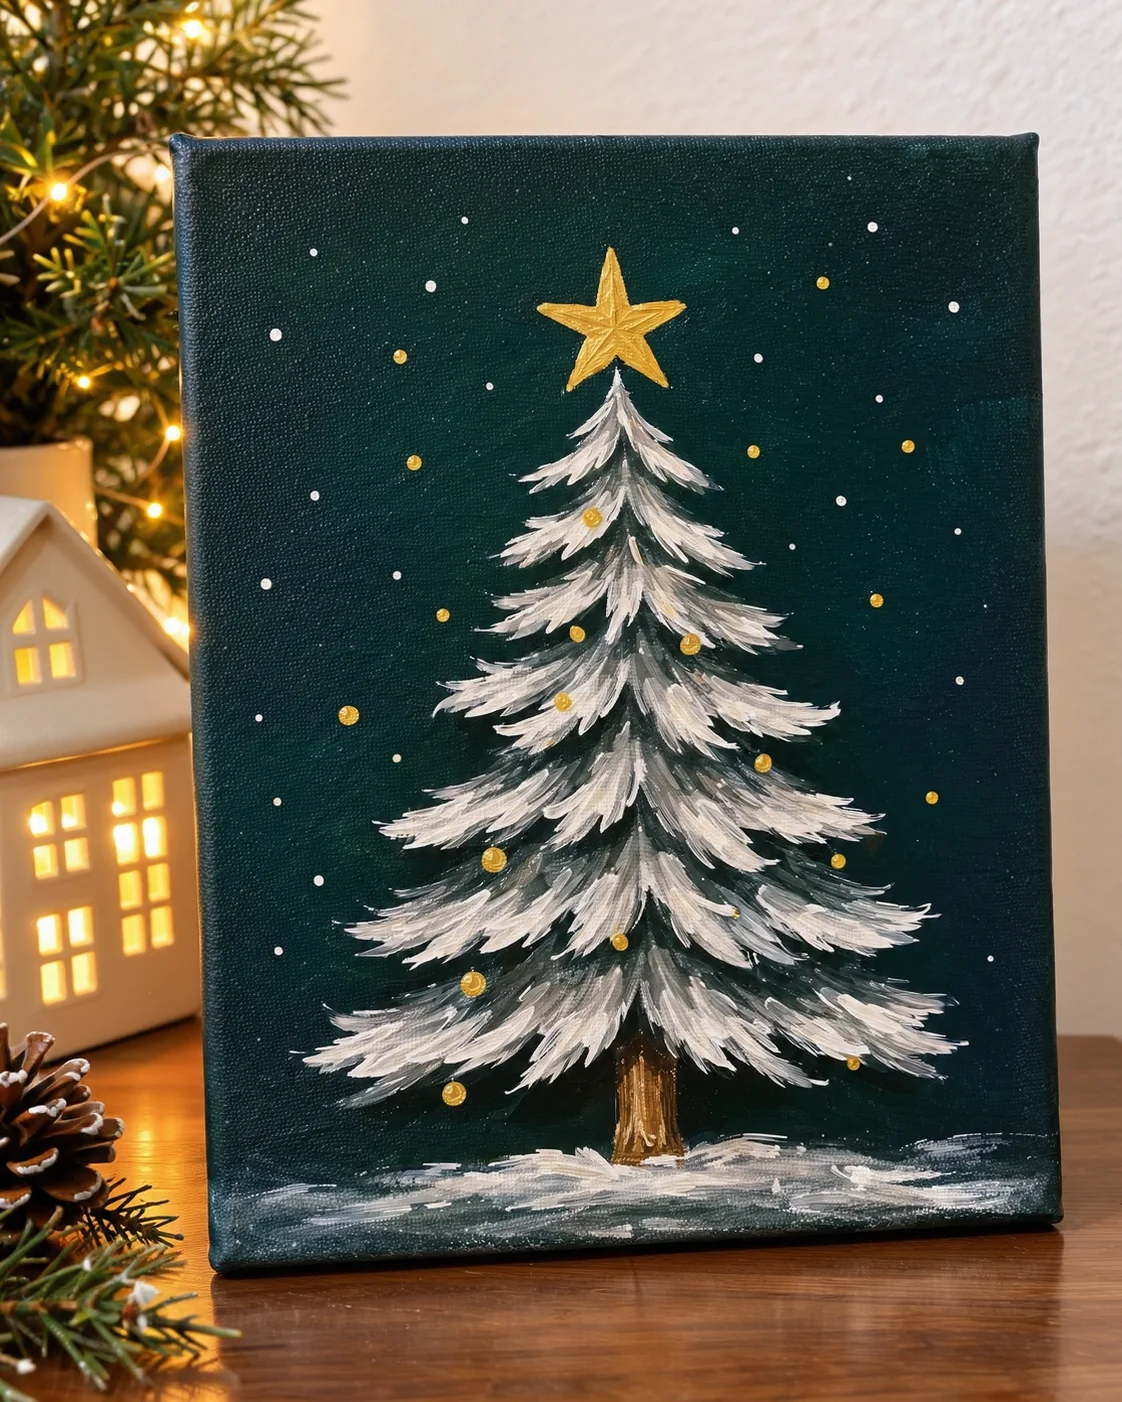
If you prefer simple home decor, try painting a white Christmas tree on a dark background. The design looks clean and doesn’t require complicated details.
Paint the canvas dark green, charcoal, or navy blue. Draw a thin tree outline with a pencil, then use a small brush to create short white horizontal strokes along both sides of an imaginary center line.
Keep the branches loose and slightly uneven. Add a few tiny gold dots and a small star for a subtle festive finish.
5. Christmas Tree Made with Sponge Stamps
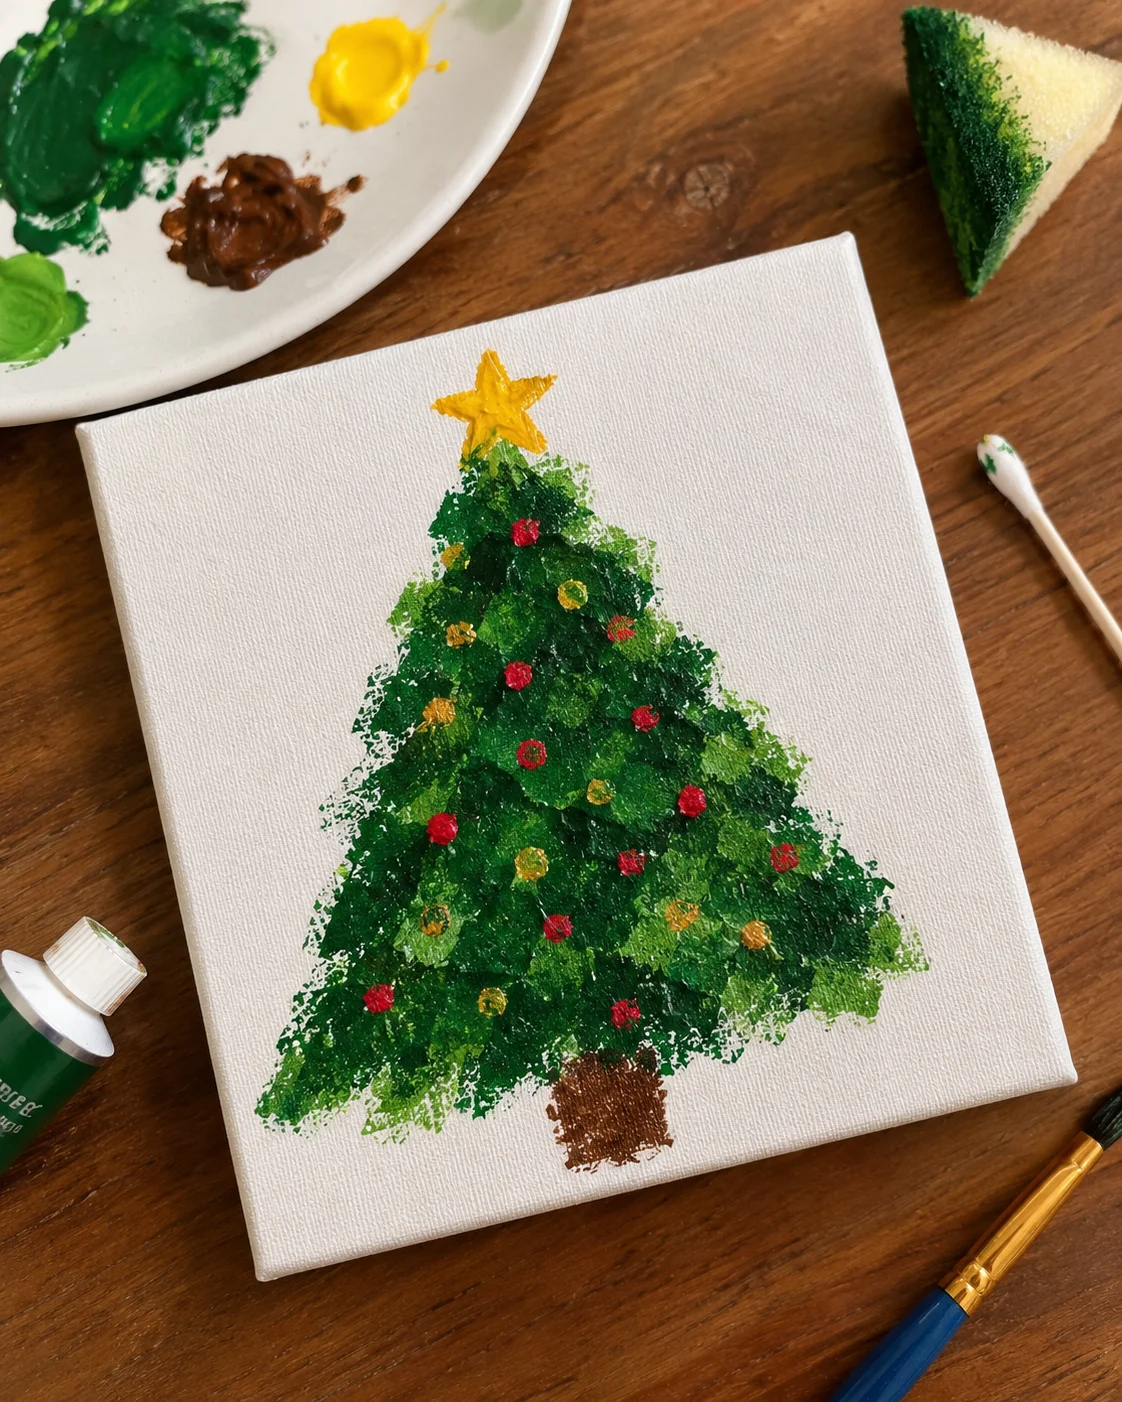
A kitchen sponge can help create a textured Christmas tree without needing precise brushwork. This is a good option if you find it difficult to paint even branches.
Cut a clean sponge into a small triangular shape. Apply dark green acrylic paint to the sponge, then press it gently onto the canvas to form the tree silhouette. Repeat with lighter green paint in a few areas to create depth.
Once the paint is dry, add small red and gold ornaments using a fine brush or cotton swab. Finish with a brown trunk and a yellow star.
6. Rustic Christmas Tree with Gold Decorations
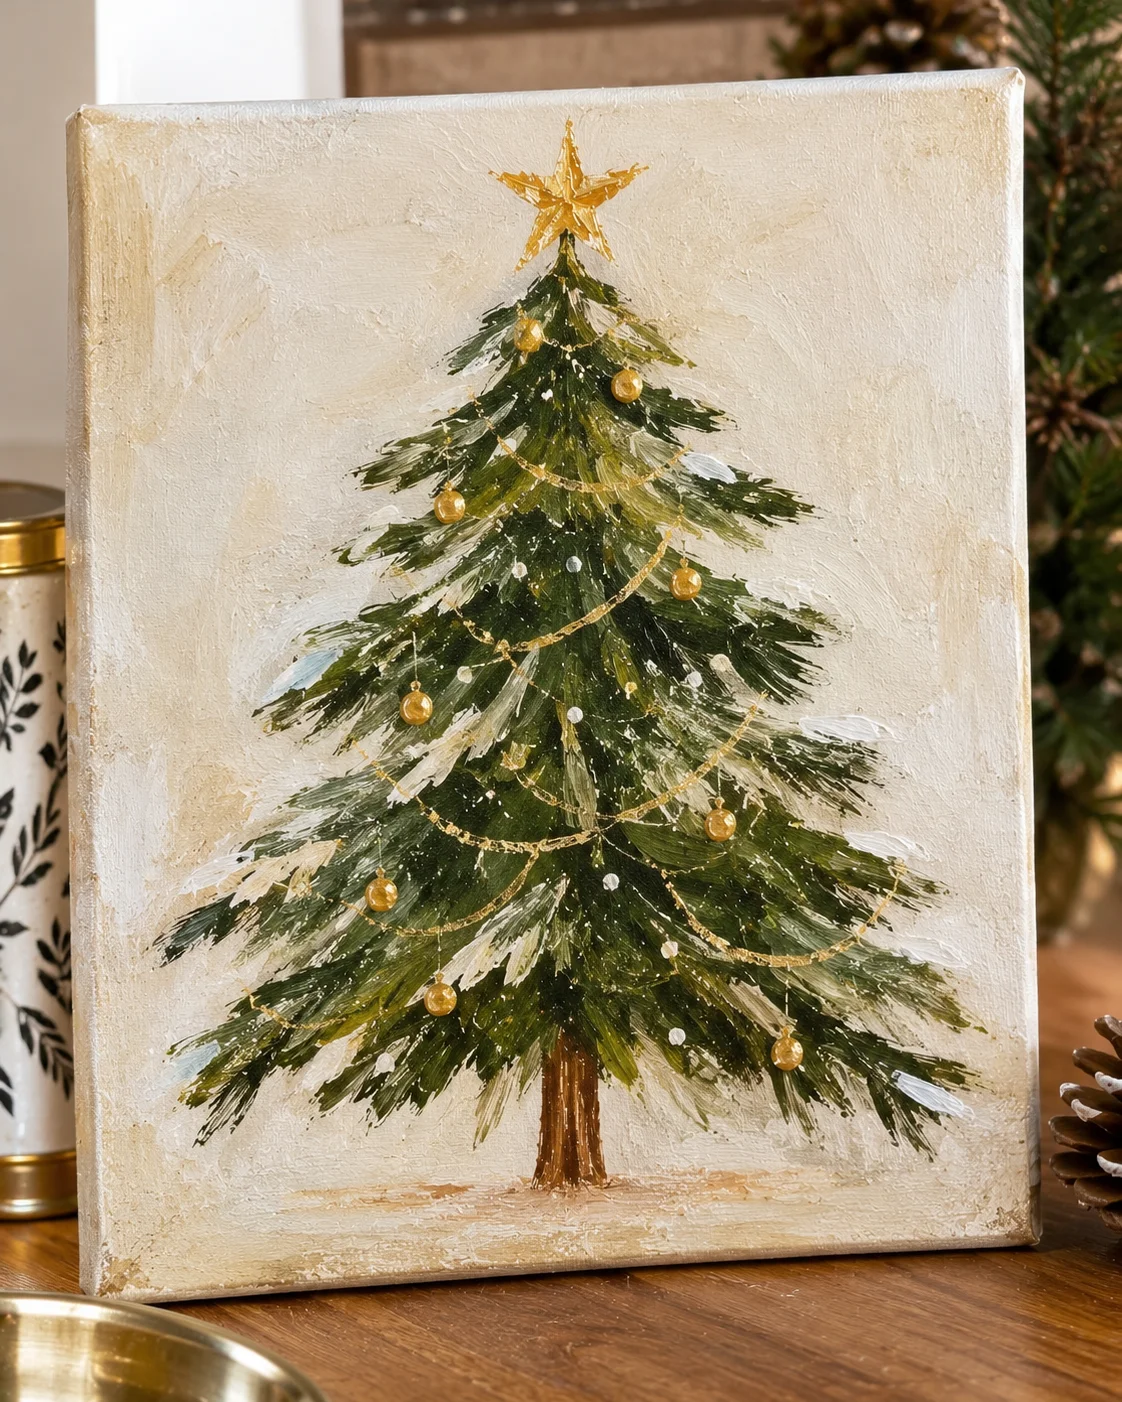
This rustic design uses natural colors and a few metallic details. It works particularly well on a cream or warm beige background.
Paint a simple evergreen tree using dark olive green and a little brown. Add short, uneven branches with a small round brush. Instead of filling every space, leave some background visible between the branches.
Use metallic gold acrylic paint for small ornaments and a star. A few tiny white dots can represent snow or Christmas lights.
7. Pastel Christmas Tree Painting
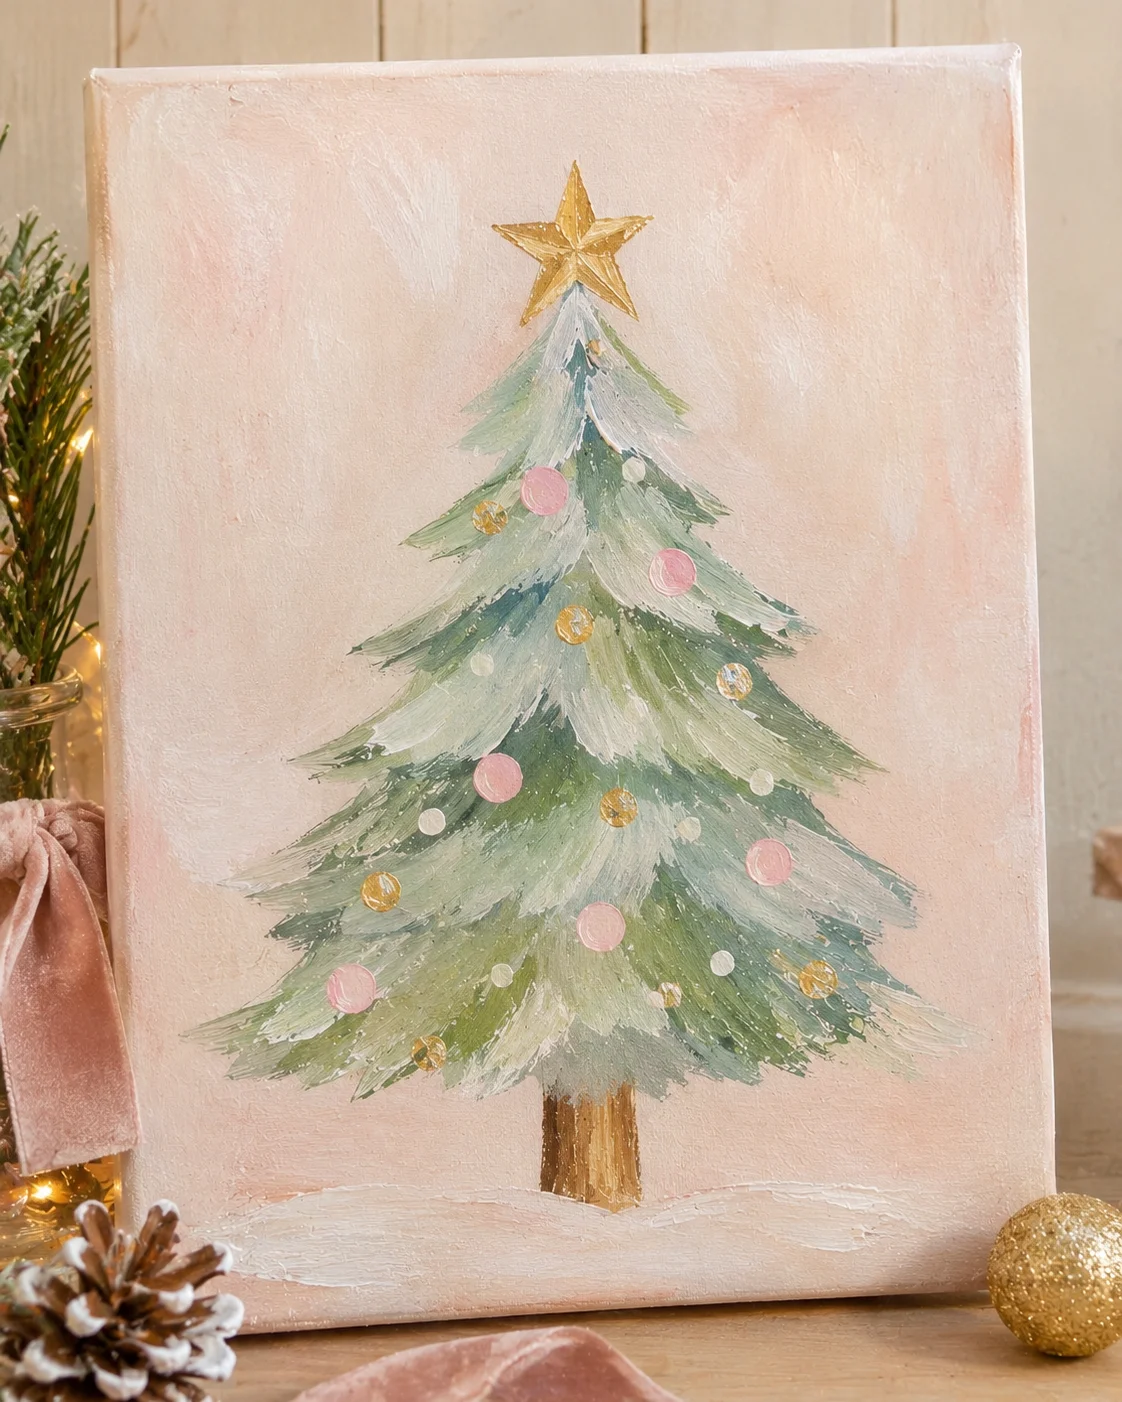
For something softer, replace traditional dark green with sage, mint, blush, and pale blue. Pastel colors give a Christmas tree painting a gentle look that works well with neutral room decor.
Paint a light beige or pale pink background. Create a simple tree using three or four overlapping sections in different shades of sage green. Add tiny pink, white, and gold dots as decorations.
Keep the branches simple and avoid adding too many details. A small gold star at the top completes the design.
8. Christmas Tree with Fingerprint Lights
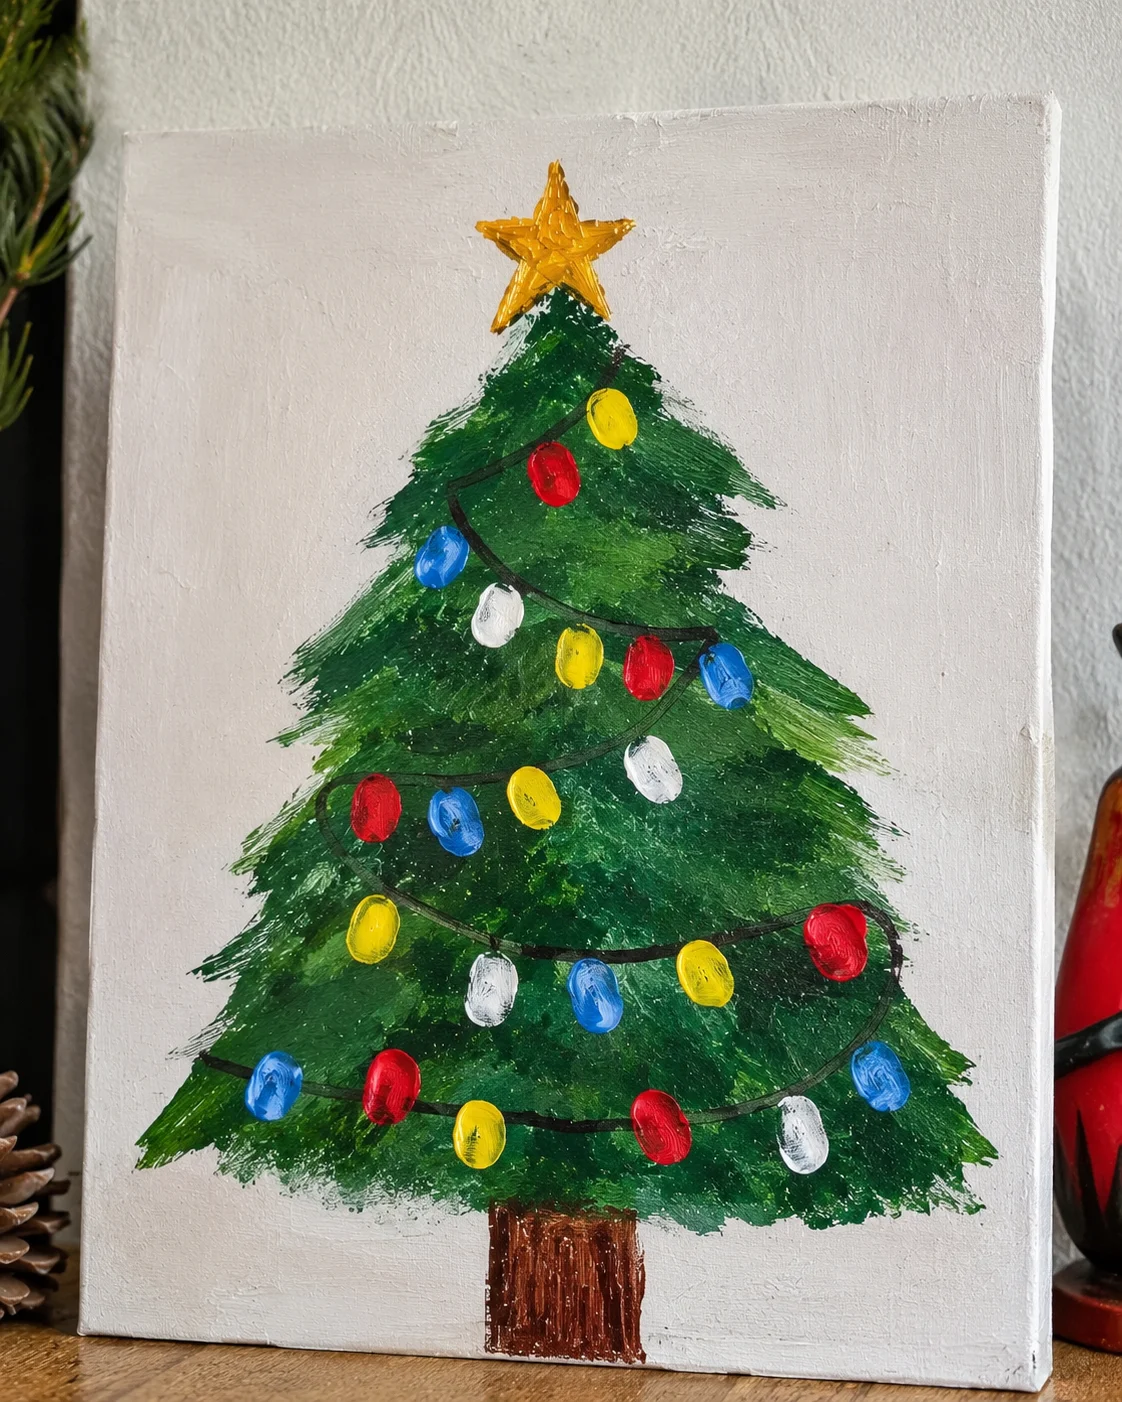
Turn a basic tree painting into a playful design using fingerprints as Christmas lights. You only need a few paint colors and a simple green tree shape.
Paint a dark green triangle on a light background. Once dry, use a thin brush to draw a curved string across the tree. Dip your fingertip into small amounts of red, yellow, blue, and white acrylic paint, then gently press along the string to make colorful lights.
Keep a damp paper towel nearby to clean your fingers between colors.
9. Snowy Pine Tree Forest
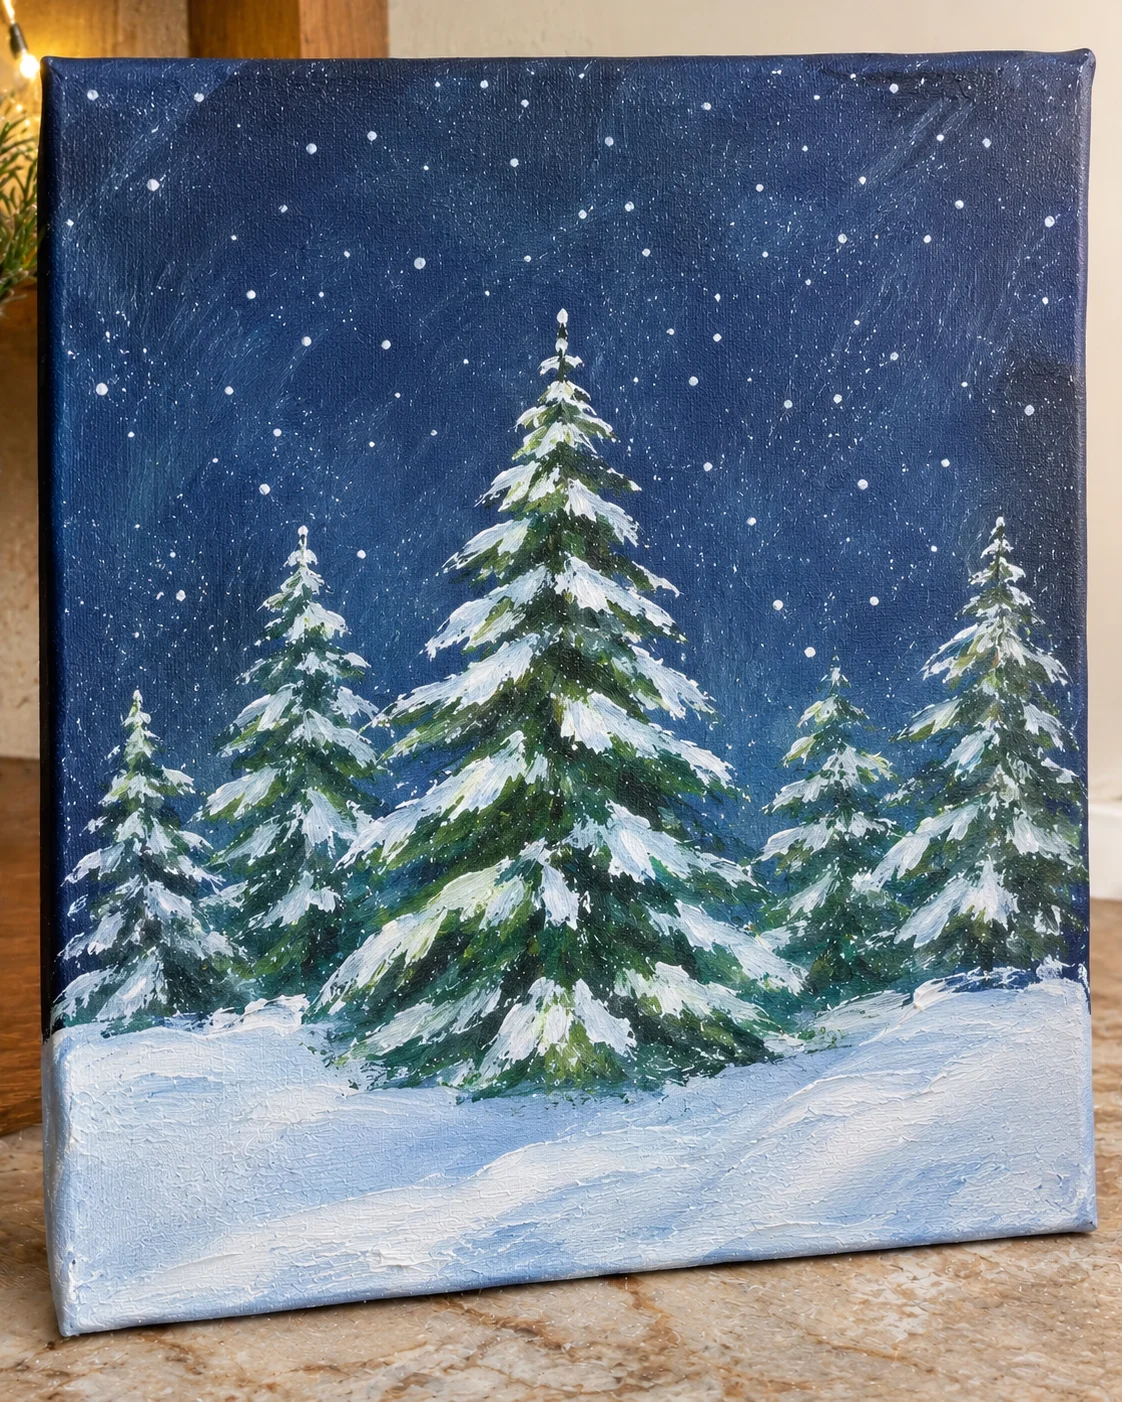
Instead of painting one large Christmas tree, create a small winter forest with several pine trees. Different heights make the scene look more natural.
Start with a pale blue or navy background. Paint three to five pine trees using dark green acrylic paint. Make the middle tree slightly taller and place smaller trees on either side.
Use short zigzag strokes to build the branches, then add white paint to the tips for snow. Paint a white snowy ground along the bottom of the canvas.
For extra detail, add a few tiny white dots in the sky to create falling snow.
10. Abstract Christmas Tree with Loose Brushstrokes
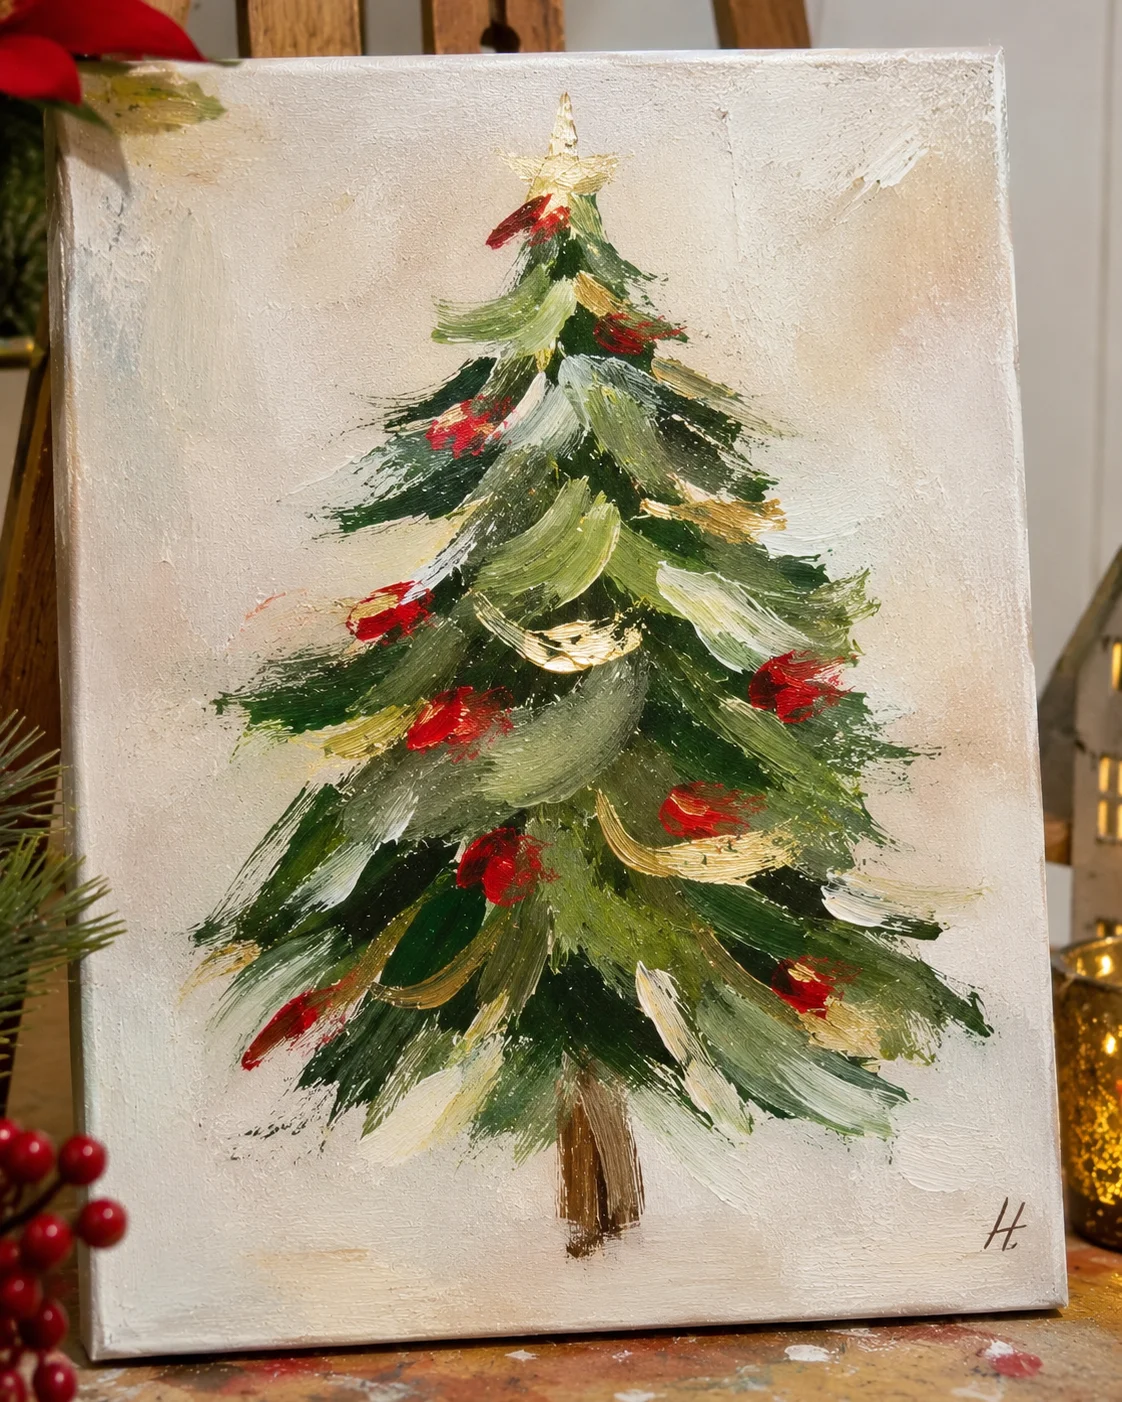
You don’t need perfectly shaped branches to make a beautiful Christmas tree. An abstract design allows you to experiment with brushstrokes while keeping the overall tree shape recognizable.
Paint a neutral background, then create a loose triangular arrangement of green brushstrokes. Alternate dark green, olive, and light green to give the tree movement and texture.
Add a few red and gold strokes between the branches. A simple brown line underneath can represent the trunk.
11. Christmas Tree with Dripping Paint
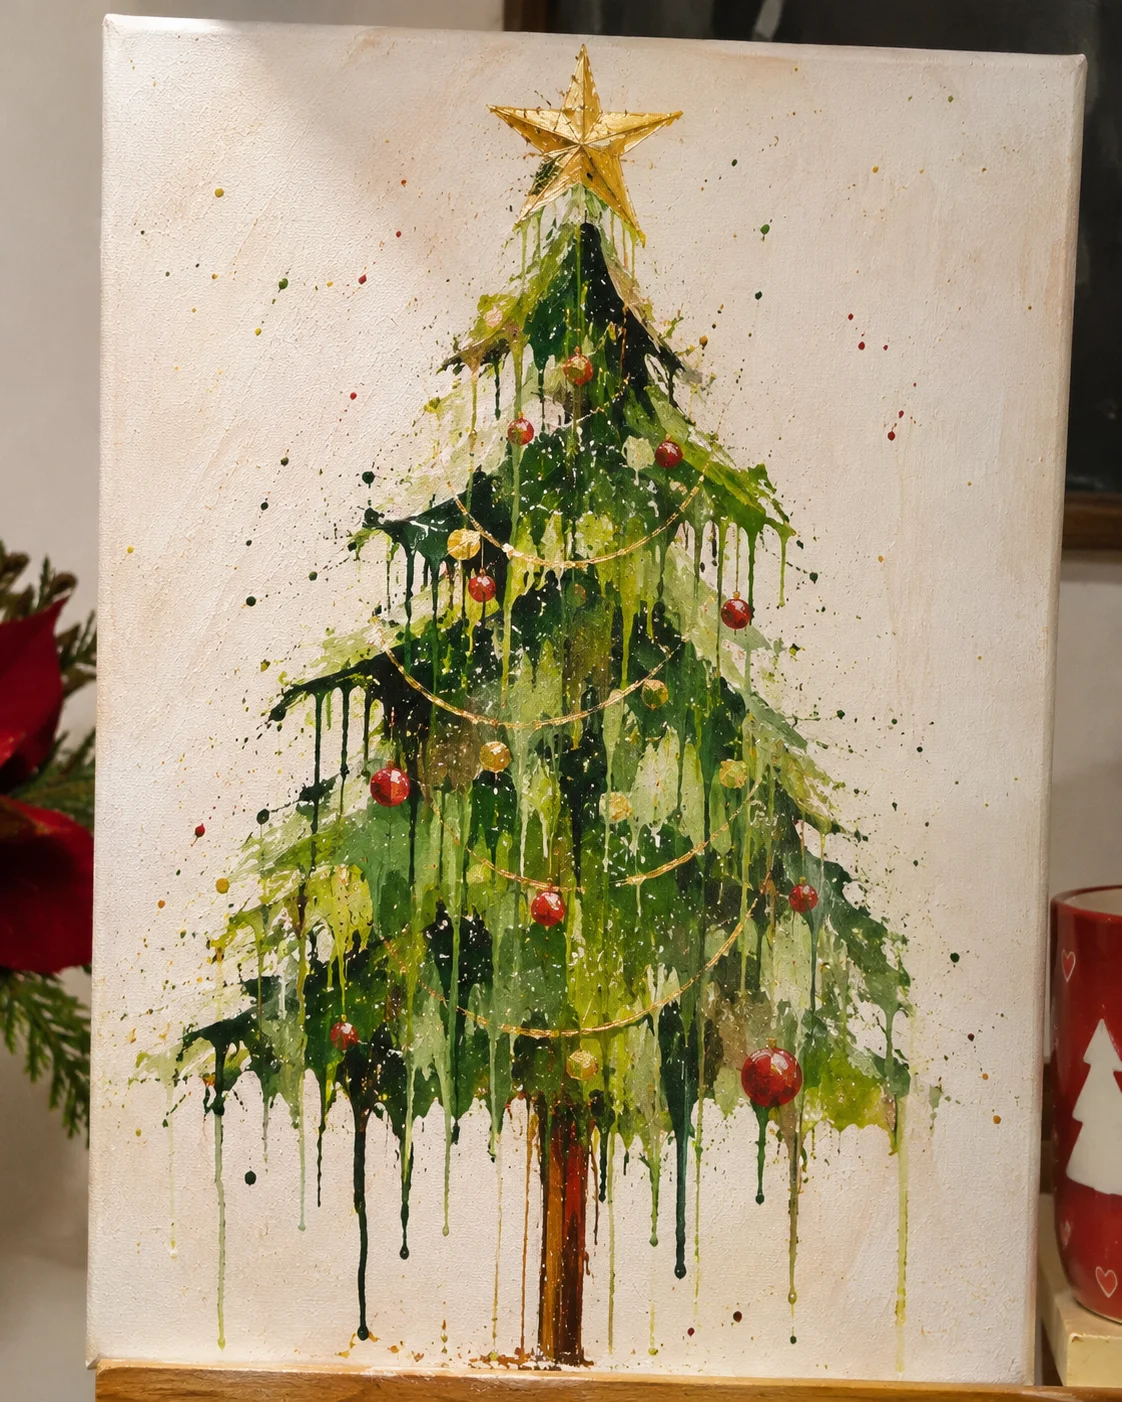
For a more unusual painting, try a dripping paint technique. The result has an artistic, slightly abstract appearance and doesn’t require carefully painted branches.
Begin by painting the canvas in a background color and allowing it to dry. Lightly draw a triangular tree shape with chalk. Thin some acrylic paint slightly with water, then apply it in controlled drips within the tree outline.
Layer darker and lighter shades of green, allowing some of the colors to run naturally. Add small red or gold accents once the paint has settled.
Work over a protected surface and keep the paint thin enough to flow without becoming excessively watery. For a more detailed version of this technique, see Hallmark’s dripping Christmas tree art tutorial.
12. Rustic Christmas Tree on a Wooden Slice
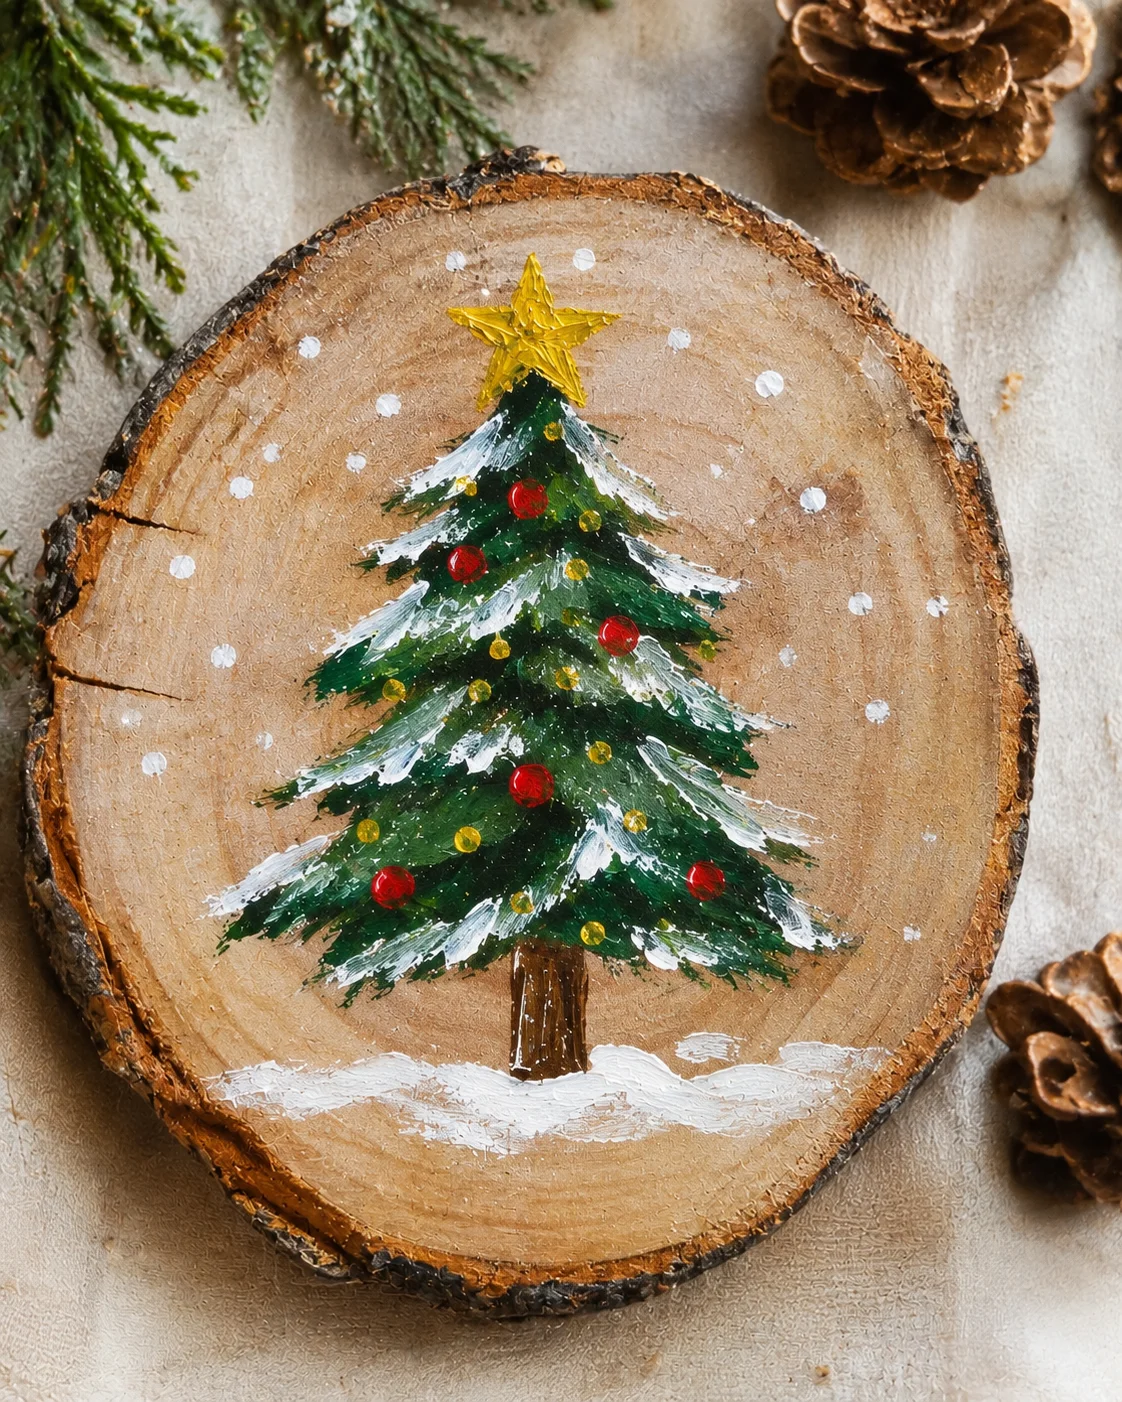
A painted wooden slice makes a lovely alternative to a traditional canvas. The natural wood grain adds texture and gives the finished tree a rustic holiday look.
Start with a clean, dry wooden slice. If the surface is rough, sand it gently and remove the dust. Check that the wood is suitable for acrylic paint; an appropriate primer may help prepare particularly absorbent or uneven surfaces.
Paint a small green triangle in the center, add a brown trunk, and decorate it with white snow dots and a gold star. You can leave some of the natural wood visible around the tree.
If you plan to hang the finished piece, add the hanging hardware only after the paint has dried and the surface is ready for handling.
How to Paint a Simple Christmas Tree Step by Step
If you aren’t sure which design to choose, start with a basic decorated Christmas tree. This simple tutorial combines a triangle shape, colorful dots, and a star.
Step 1: Prepare Your Canvas
Place your canvas on a flat, protected surface. If you’re using a primed canvas, you can usually begin painting directly. Choose a white, cream, or pale blue background and apply an even coat with a flat brush.
Step 2: Draw the Tree Shape
Use a pencil to draw a large triangle in the middle of the canvas. Make sure there’s enough room underneath for the trunk and above the tree for the star.
Step 3: Paint the Green Tree
Fill the triangle with dark green acrylic paint. You can use a flat brush for a smooth finish or short zigzag strokes if you’d like to suggest individual branches.
Allow the green paint to dry before adding the decorations.
Step 4: Add the Christmas Ornaments
Dip the end of a small paintbrush into red, yellow, white, and gold paint. Press gently against the tree to create round ornaments. Vary their sizes and leave enough space between them.
Step 5: Paint the Star and Trunk
Use yellow or gold paint to create a small star at the top. Paint a short brown rectangle at the bottom of the tree to make the trunk.
Step 6: Add the Finishing Details
Once the main shapes are dry, add a few white dots around the tree for snow. You can also paint a thin gold garland or small white highlights on the ornaments.
Let the finished painting dry according to the paint manufacturer’s instructions before storing or displaying it.
Tips for Getting Better Results with Christmas Tree Painting
A few small adjustments can make beginner paintings look much neater. Keep these tips in mind while working on your design.
- Start with simple shapes: Triangles, lines, and dots are easier to control than detailed branches.
- Use fewer colors: Begin with two shades of green, white, and one or two accent colors.
- Work in layers: Paint the background first, then the tree, followed by decorations and small details.
- Let each layer dry: Acrylic drying time depends on the paint range and how thickly it’s applied. Thin coats may dry much faster than thick ones. Winsor & Newton’s acrylic painting guide explains the differences.
- Practice your brushstrokes: Try making short zigzags and dots on scrap paper before working on the canvas.
- Don’t overdecorate: A few well-spaced ornaments often look better than filling every empty space.
Common Christmas Tree Painting Mistakes and How to Fix Them
The Tree Looks Too Much Like a Triangle
If your painted tree looks flat, add small uneven strokes along both sides to suggest branches. Use a lighter shade of green to create a little variation.
The Green Paint Looks Patchy
Some acrylic colors need more than one coat for even coverage. Let the first coat dry, then apply another thin layer instead of repeatedly brushing over wet paint.
The Ornaments Look Uneven
Use the rounded end of a paintbrush or a cotton swab to make more consistent dots. If the ornaments are too close together, add a few smaller dots in the empty spaces rather than painting over the existing ones.
The Snow Looks Too Heavy
Use a nearly dry brush to add small touches of white along the branches. If you’ve added too much, let the paint dry and carefully repaint some of the green areas.
The Background Has Visible Brush Marks
Use a wider flat brush and apply the paint in thin, even strokes. Try to keep your brushstrokes going in the same direction, and allow the first coat to dry before adding another.
Frequently Asked Questions
What is the easiest Christmas tree painting for beginners?
A simple green triangle with a brown trunk and colorful dot ornaments is one of the easiest designs to start with. It requires only a few paint colors and basic brushwork. You can also use a sponge or the end of a paintbrush to create decorations without drawing them by hand.
What kind of paint should beginners use for Christmas tree painting?
Acrylic paint is a practical option for beginners working on canvas or suitably prepared wood. It is versatile, easy to apply, and dries faster than traditional oil paint. A basic set of green, white, red, yellow, and brown is enough for most Christmas tree designs.
Can I paint a Christmas tree without drawing it first?
Yes. You can create a tree using short horizontal brushstrokes, sponge prints, or dots arranged in a triangular shape. These methods are especially useful if you’re not comfortable drawing straight lines or symmetrical shapes.
What size canvas is best for beginner Christmas paintings?
An 8 x 10-inch or 10 x 10-inch canvas is a convenient starting point. It gives you enough room for a tree and a few decorations without requiring complicated details. Smaller canvases are also useful when practicing several different designs.
How do you make a Christmas tree look snowy?
Use white acrylic paint to add short strokes along the tips of the branches. You can also dab a little white paint along the bottom of the tree to represent snow on the ground. For falling snow, use the rounded end of a small brush to make scattered dots.
Can I paint Christmas trees on wood instead of canvas?
Yes. Acrylic paint can be used on suitable wood surfaces. Clean and dry the wood first, sand rough areas if needed, and use an appropriate primer when the surface requires it. Test your paint on a small area before starting the full design.
Choose a Christmas Tree Painting to Try This Season
You don’t need advanced painting skills to make a festive Christmas tree canvas. Start with a simple triangle, experiment with dots and short brushstrokes, and add your favorite holiday colors as you go.
If you’re new to painting, try the decorated triangle or sponge-stamped tree first. Once you’re comfortable with those shapes, move on to snowy pine forests and abstract designs. A few small paintings can make lovely seasonal decorations or handmade gifts.