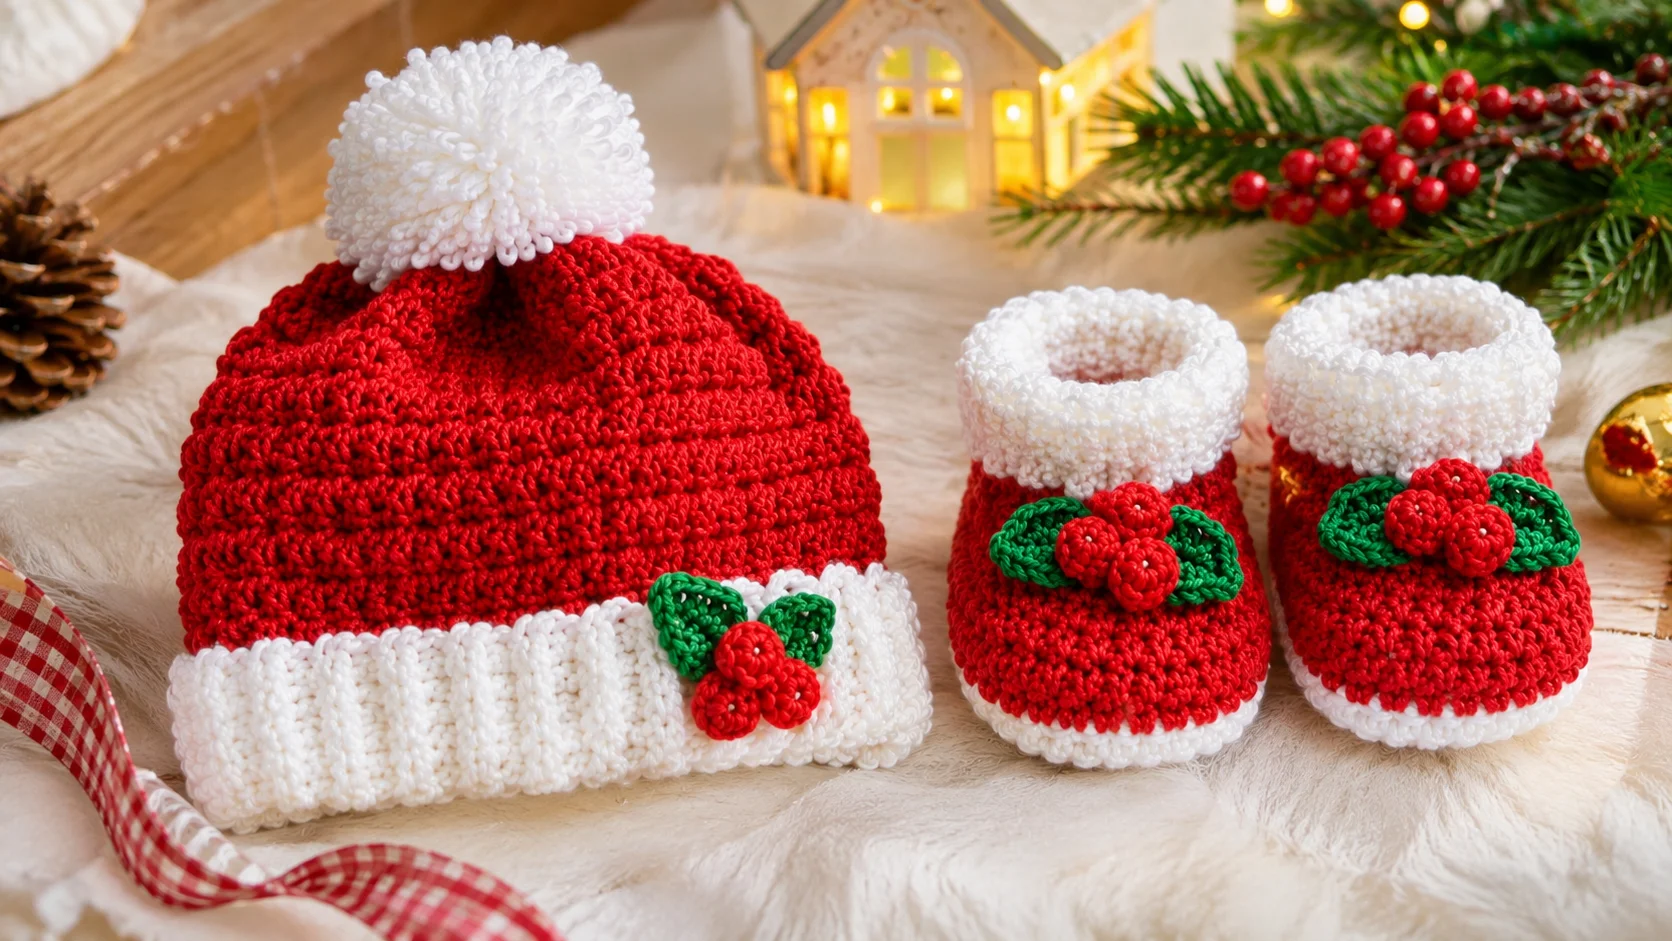
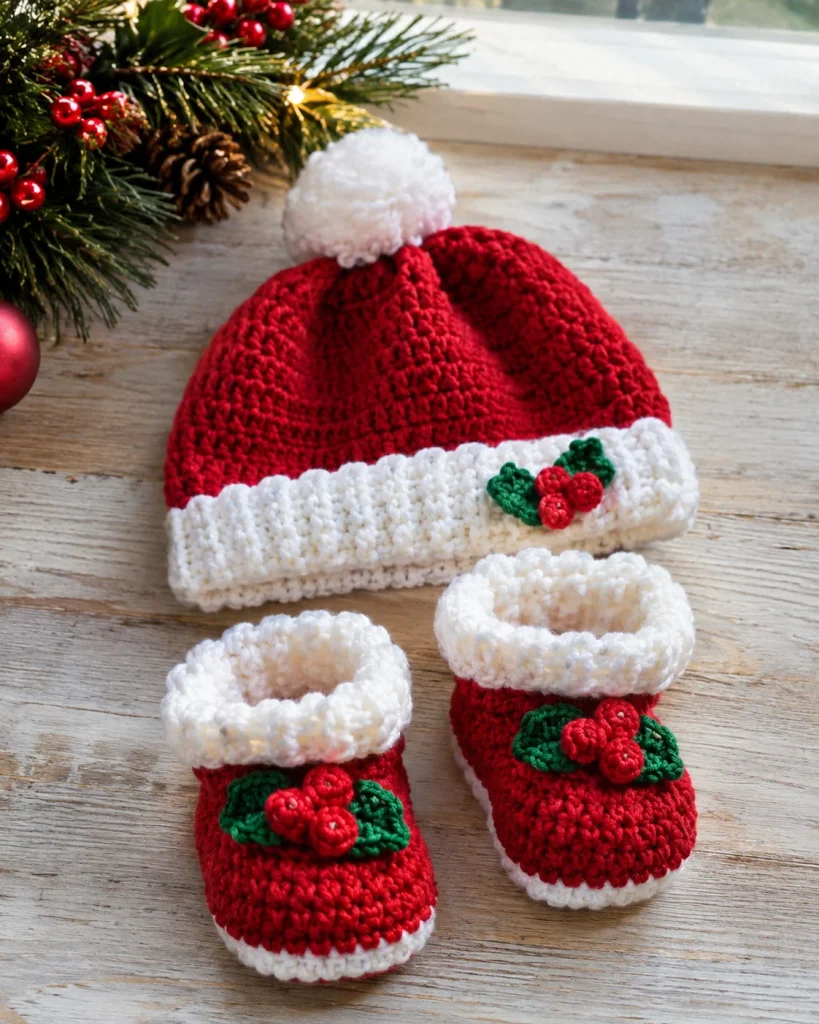
A crochet Christmas baby hat and booties set is a sweet handmade project for celebrating a baby’s first holiday season. This matching set features a cozy red hat with a soft white brim and coordinating little booties with festive red, white, and green details. You can make both pieces using basic crochet stitches and adjust the measurements to fit the baby.
This tutorial walks you through choosing the yarn, measuring for a comfortable fit, crocheting the hat, shaping the booties, and adding simple Christmas details. It uses US crochet terminology and beginner-friendly techniques. If you’re new to crochet abbreviations, the Craft Yarn Council’s Crochet Abbreviations Master List is a helpful reference for understanding US stitch terms and pattern instructions.
Christmas Baby Hat and Booties Set: Project Details
- Skill level: Beginner to advanced beginner
- Project type: Crochet baby accessories
- Finished pieces: One baby hat and two matching booties
- Style: Christmas and Santa-inspired
- Yarn weight: Sport or fine baby yarn (Category 2)
- Suggested hook: 3.5–4.5 mm (US E-4 to 7), adjusted to your yarn and gauge
- Techniques: Chain, single crochet, half double crochet, slip stitch, increases, decreases, and working in back loops
- Terminology: US crochet terms
Important: This is a technique-based tutorial rather than a tested, fixed-size stitch-count pattern. The finished measurements depend on your yarn, hook, tension, and the baby’s actual measurements. Make a gauge swatch and check the fit before finishing the pieces.
Materials Needed for a Crochet Christmas Baby Hat and Booties Set
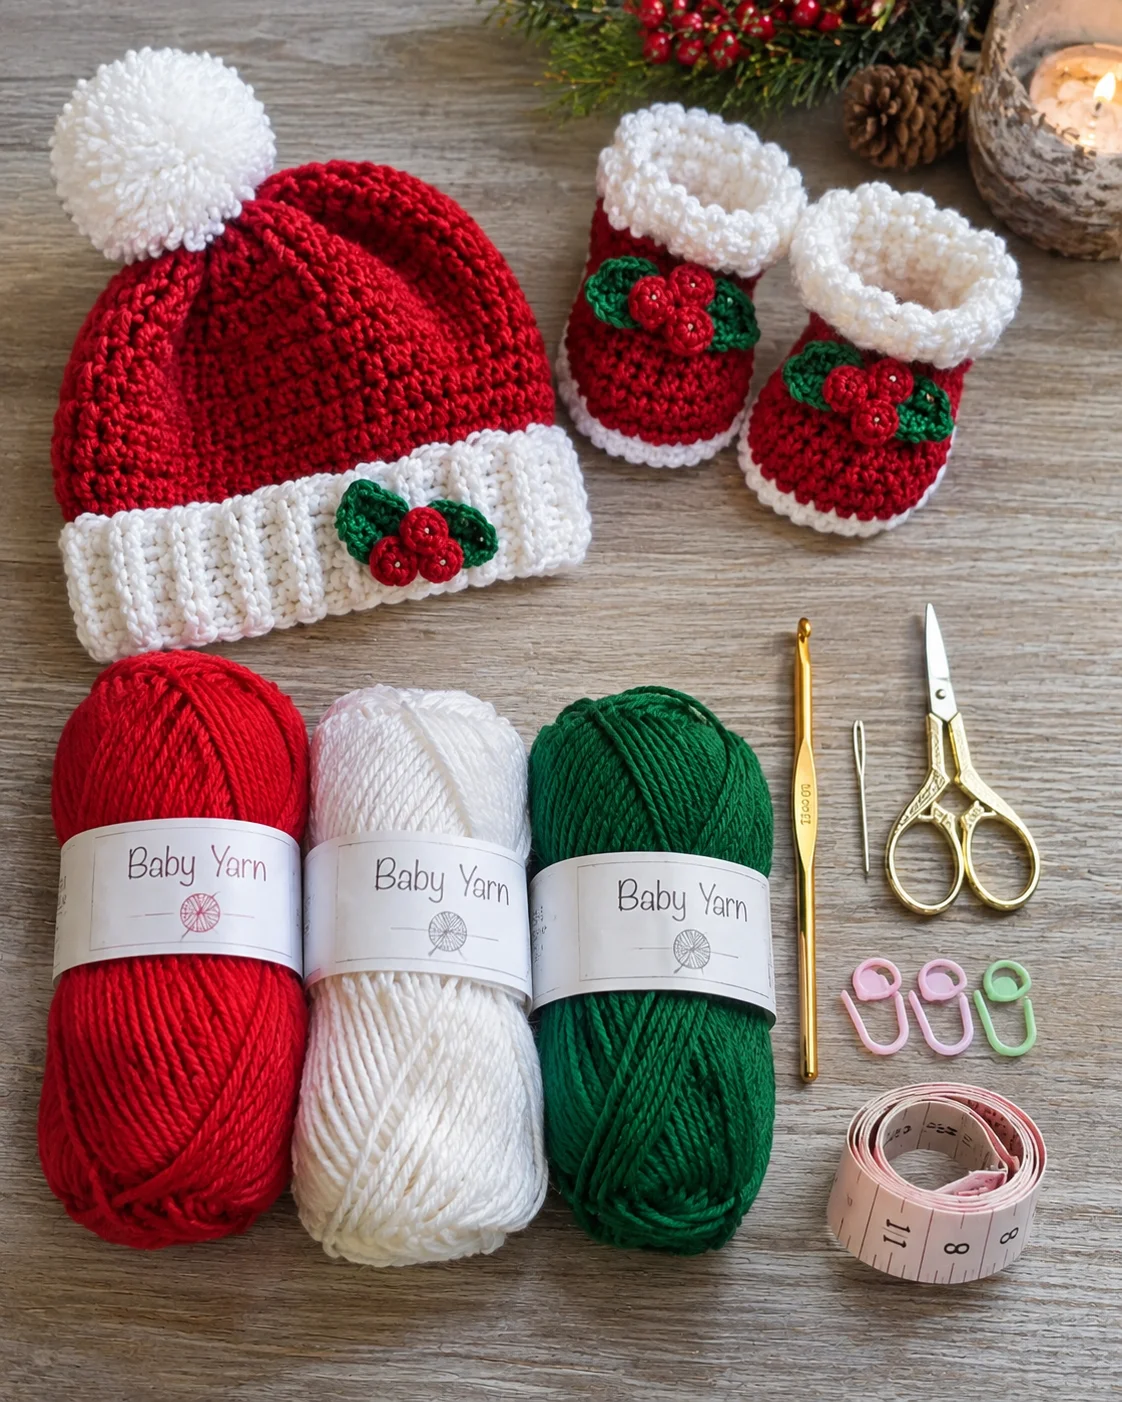
Gather your supplies before starting. Choose soft yarn with a comfortable texture and a care label that provides clear washing instructions.
- Red baby yarn for the main hat and booties
- White baby yarn for the hat brim and bootie cuffs
- Small amount of green yarn for optional Christmas details
- 3.5–4.5 mm crochet hook, selected according to your yarn and gauge
- Yarn needle for sewing and weaving in ends
- Stitch markers
- Scissors
- Flexible measuring tape
Choosing the Right Baby Yarn
Sport-weight or fine baby yarn is a useful choice for a lightweight set. Look for a smooth, washable yarn that feels comfortable against delicate skin. Avoid rough fibers and yarns that shed easily.
The Craft Yarn Council lists fine Category 2 yarn with a commonly recommended crochet hook range of 3.5–4.5 mm. These are general guidelines, so check your yarn label and make a gauge swatch before beginning.
How to Measure for a Baby Crochet Hat and Booties
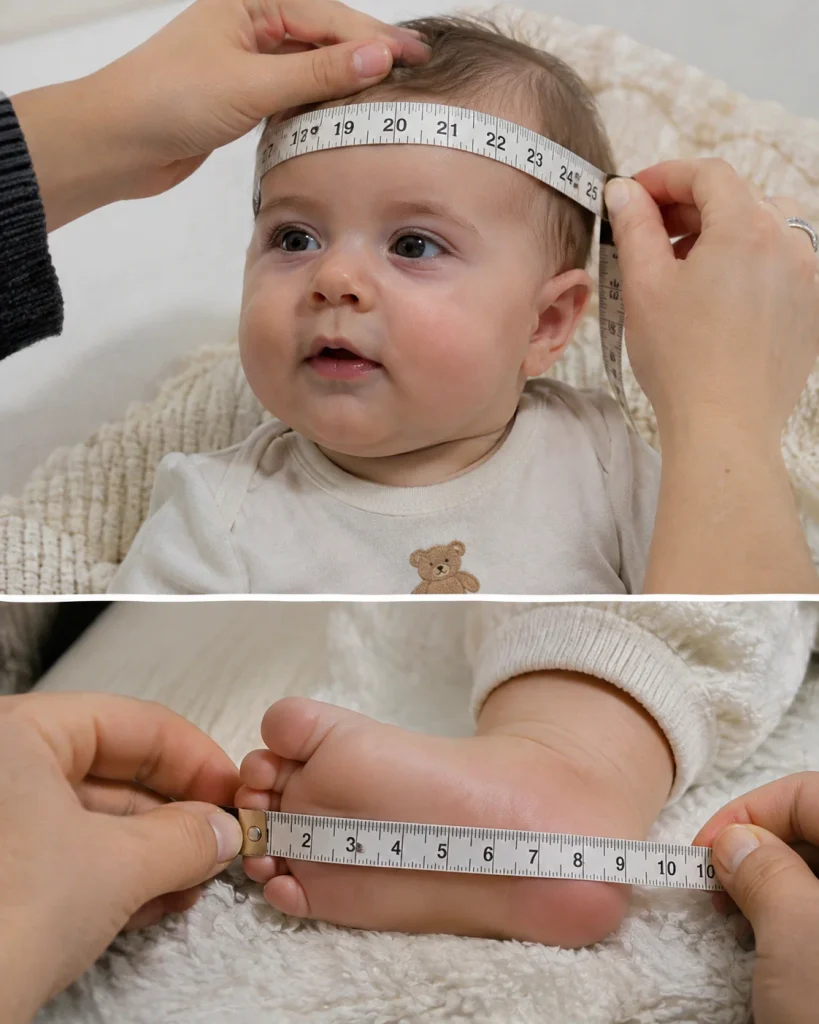
Measuring the baby before crocheting is the easiest way to avoid a hat that slips down or booties that are too tight.
Measure the Baby’s Head
- Place a flexible measuring tape around the widest part of the baby’s head.
- Position it just above the eyebrows and ears.
- Record the circumference without pulling the tape tightly.
- Use this measurement to plan the hat circumference and check the finished fabric for comfortable stretch.
If you cannot measure the baby because the set is a gift, use a reputable baby-size chart as a starting point. Remember that age-based measurements are approximate, not a guarantee of fit.
Measure the Baby’s Feet
- Measure from the back of the heel to the tip of the longest toe.
- Record the foot length in inches.
- Use this measurement to determine the length of each crocheted sole.
- Allow a little room for comfortable movement without making the booties loose enough to slip off easily.
How to Crochet the Christmas Baby Hat Step by Step
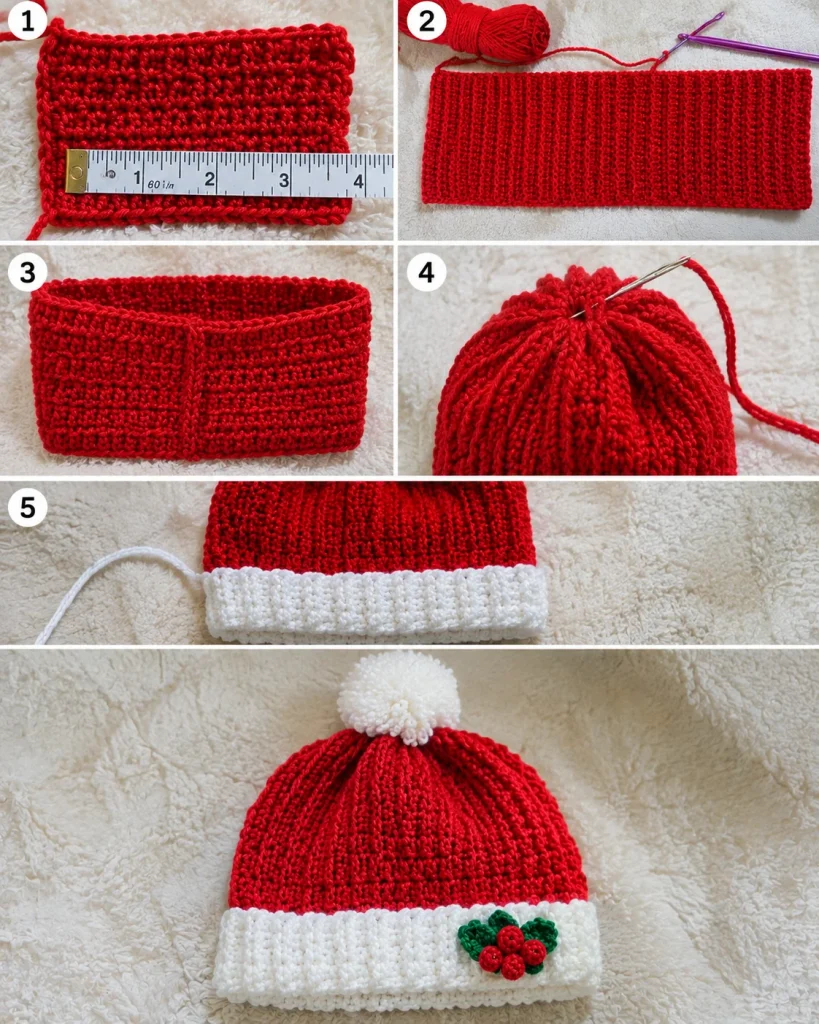
The hat is made from a simple ribbed crochet rectangle. You will join the short edges to create a tube, gather the top, and finish it with a contrasting white brim. This construction makes it easy to adjust the size.
Step 1: Make a Gauge Swatch
Start by crocheting a small swatch using your selected yarn and hook. Work several rows of the stitch you plan to use for the hat, then measure the fabric across its center.
Check whether the fabric feels soft and flexible. If the stitches are too tight, try a larger hook. If the fabric is too loose, try a smaller hook.
Step 2: Crochet the Red Hat Body
- Choose a starting chain based on the desired height of the hat.
- Work single crochet stitches across the chain, beginning in the appropriate chain from the hook.
- Chain one and turn your work.
- Continue working single crochet stitches through the back loop only.
- Repeat the rows until the rectangle is long enough to wrap comfortably around the baby’s head.
- Check the fit as you work rather than relying only on an age label.
Working through the back loop creates a ribbed texture that gives the fabric more flexibility. Keep your tension consistent so the rectangle does not become wider or narrower as you progress.
Step 3: Join the Hat Edges
Fold the rectangle so its short edges meet. Join the edges with slip stitches or sew them together using a yarn needle. Keep the seam neat and avoid creating a bulky ridge on the inside.
Step 4: Close the Top of the Hat
- Thread a long piece of red yarn through a yarn needle.
- Pass the needle through the stitches along one open edge.
- Continue around the entire opening.
- Pull the yarn gently to gather the fabric into a closed top.
- Secure the gathered section and weave in the remaining yarn end.
Distribute the gathers evenly so the top looks rounded rather than lopsided.
Step 5: Add the White Christmas Hat Brim
Attach the white yarn around the bottom opening of the hat. Work a neat round of single crochet stitches, keeping the spacing even.
For a thicker Santa-inspired brim, add additional rounds of single crochet through the back loop only. You can fold the finished white band upward to create a traditional winter-hat appearance.
How to Crochet the Matching Baby Booties Step by Step
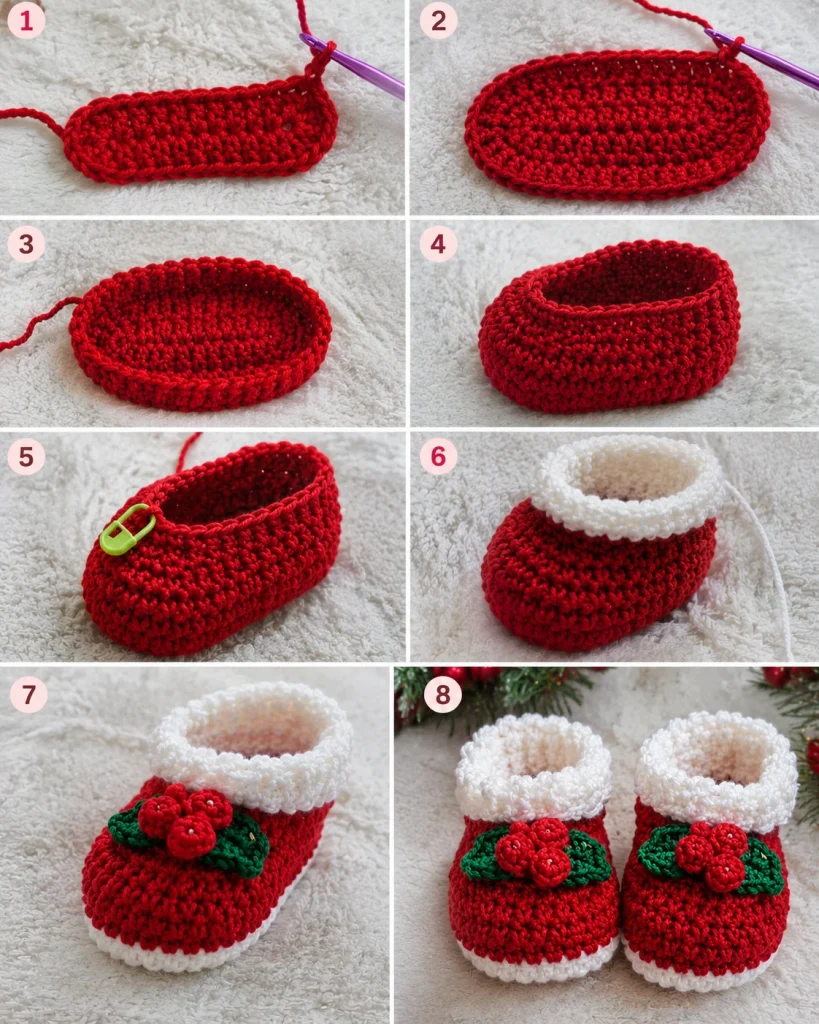
The booties are made in two matching pieces, each starting with an oval sole. You will build the sides upward, shape the toe, and finish with a soft white cuff.
Step 1: Crochet the Oval Sole
- Using red yarn, make a foundation chain based on the measured foot length.
- Work single crochet stitches along one side of the chain.
- At the final chain, work several stitches into the same space to turn around the end.
- Continue crocheting along the opposite side of the foundation chain.
- Work the necessary increases around both ends to create a smooth oval shape.
- Join the round with a slip stitch if you are working joined rounds.
Keep the sole flat while increasing around the ends. If the edges begin to curl upward too early, check that you have not missed an increase.
Step 2: Build the Bootie Sides
Once the sole reaches the desired length and width, begin working the sides upward. A round of stitches through the back loops only can help create a defined edge between the sole and upper section.
Continue with regular single crochet rounds until the bootie has the depth you want. Keep both booties the same height by checking their measurements as you work.
Step 3: Shape the Toe
- Identify the front center of the bootie and mark it with a stitch marker.
- Begin decreasing stitches gradually around the toe area.
- Work regular stitches along the remaining sides.
- Continue shaping until the front opening becomes comfortably rounded.
- Check the opening against the baby’s foot before completing the upper section.
Keep the decreases concentrated around the front rather than reducing stitches evenly around the entire bootie. This helps create a more natural toe shape.
Step 4: Crochet the White Bootie Cuffs
Join white yarn around the top opening of each bootie. Work several rounds of single crochet stitches, or use half double crochet for a slightly taller cuff.
For a ribbed finish, work through the back loop only. Keep the cuff flexible and make sure it does not squeeze the baby’s ankle.
Step 5: Make the Second Bootie
Repeat the same construction for the second bootie. Compare the sole lengths, widths, toe shapes, and cuff heights before fastening off. Small differences in tension can make matching pieces look noticeably different.
How to Add Christmas Decorations to the Baby Set
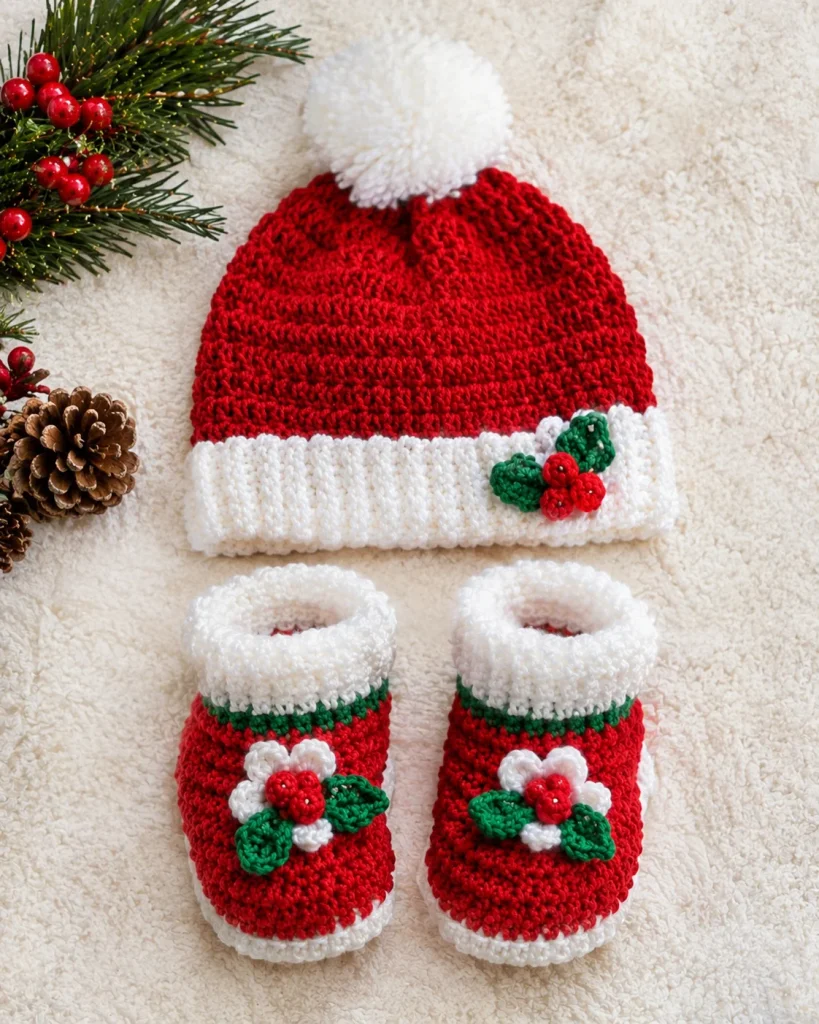
The red and white combination creates a classic Santa-inspired look, while small green accents add a traditional Christmas touch.
Santa-Inspired Hat
Keep the hat body red and the brim white. If you want a more festive appearance, add a small crocheted white decorative detail at the top. Avoid loose decorative pieces or attachments that could detach during use.
Christmas Bootie Details
Add a narrow green stripe above the white cuff by changing yarn colors for one round. You can also use a white stripe around the bootie’s upper section to coordinate with the hat.
For baby accessories, simple color changes are preferable to buttons, beads, bells, and other small detachable decorations.
Common Mistakes When Crocheting a Baby Hat and Booties
The Hat Is Too Tight
A tight hat can be uncomfortable and difficult to put on. Check your gauge, use a suitable hook, and make sure the finished fabric has enough flexibility for the baby’s head measurement.
The Hat Looks Uneven at the Top
Uneven gathering usually happens when the yarn is pulled too tightly in one area. Distribute the gathers around the opening before securing the yarn.
The Bootie Sole Curls
Curling can happen when the oval sole does not have enough increases around its ends. Check your stitch placement and add the increases needed to keep the sole flat.
The Booties Are Different Sizes
Different tension or missed stitches can make one bootie larger than the other. Count your stitches where applicable, compare measurements frequently, and use the first finished bootie as a reference for the second.
The White Trim Looks Wavy
Wavy trim can result from working too many stitches into the opening. Keep the spacing even and avoid forcing extra stitches into a small area.
Tips for Making a Beautiful Christmas Baby Crochet Set
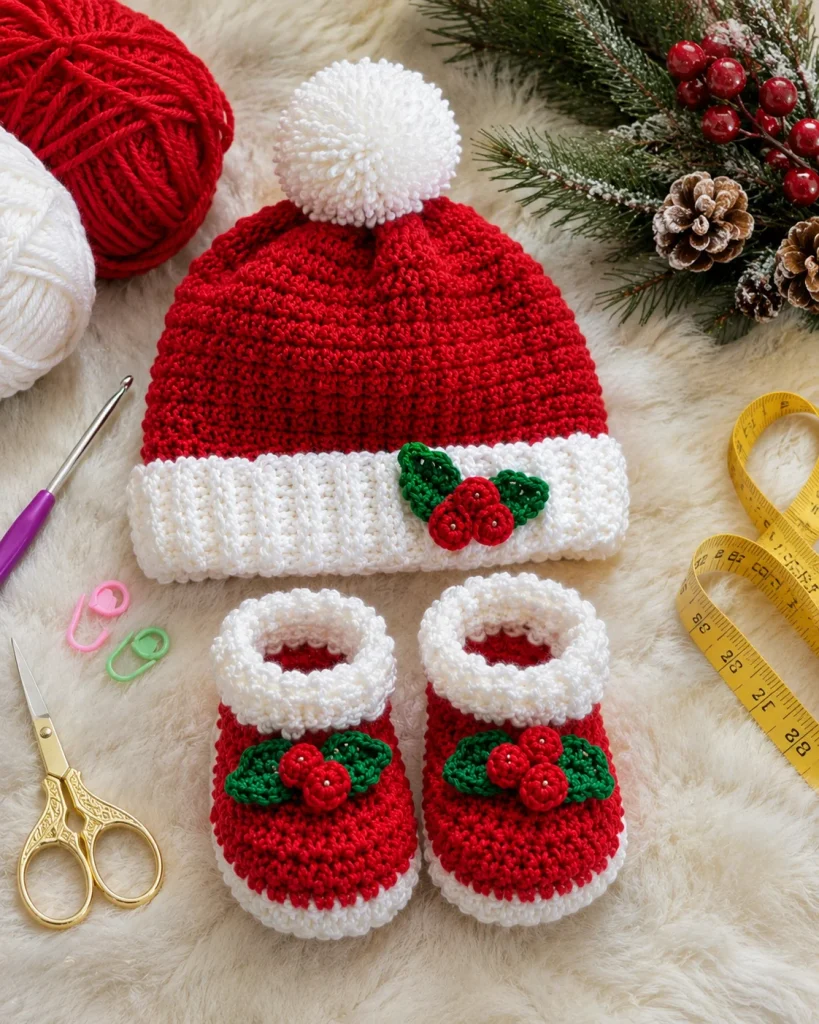
- Use a consistent yarn weight for both pieces to maintain a coordinated texture.
- Choose red, white, and green shades that complement each other.
- Check the fit before sewing seams and fastening off.
- Weave in yarn ends securely and trim excess yarn neatly.
- Wash and dry the finished set according to the yarn manufacturer’s care instructions.
- Keep the design simple, with no loose cords or small detachable decorations.
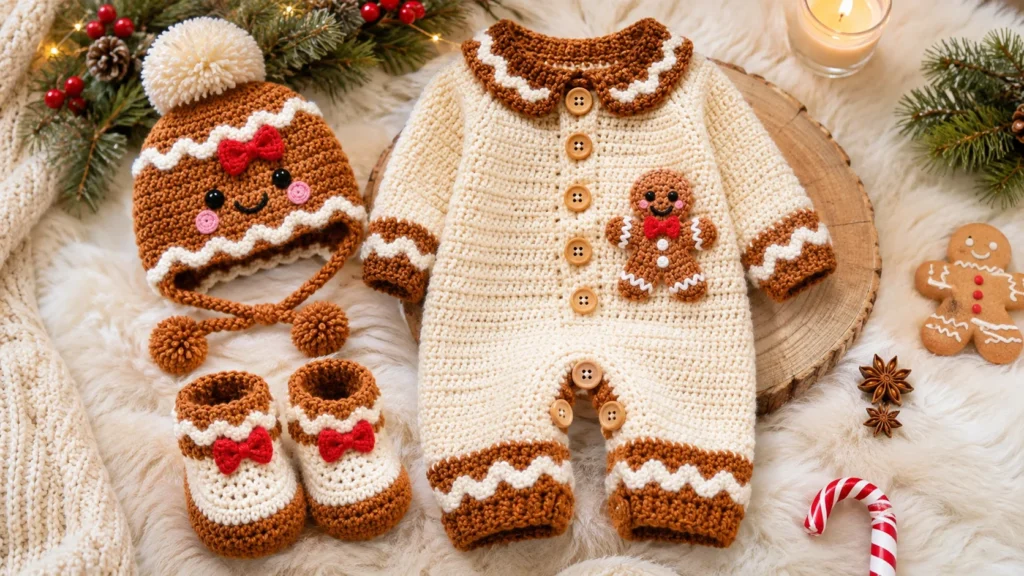
If you enjoy making handmade baby outfits, you can also explore this gingerbread-inspired crochet baby romper set for another festive project.
How to Care for a Handmade Crochet Baby Set
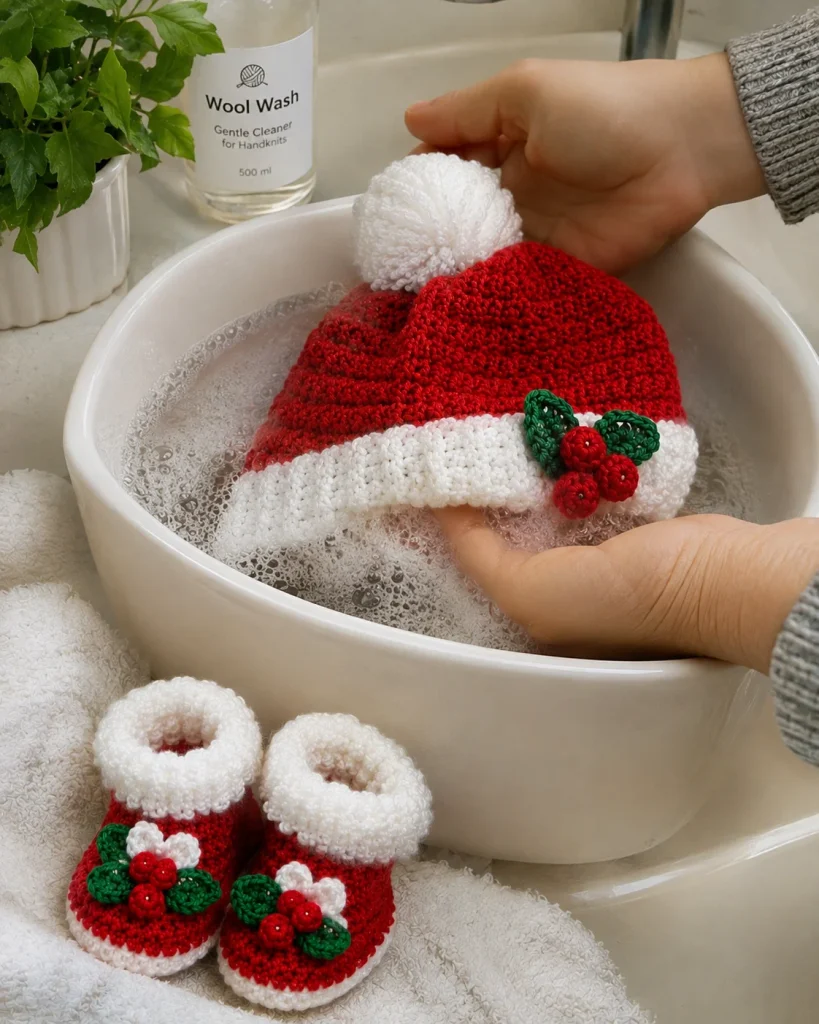
Always follow the yarn label’s washing and drying instructions. If the yarn is machine washable, use the recommended cycle and avoid harsh washing products that could affect its texture.
Check the hat and booties after washing for loose yarn ends, stretched stitches, or damaged seams. Allow the pieces to dry completely before storing them in a clean, dry place.
Remember that a crocheted hat is an accessory for supervised wear when appropriate, not sleepwear. The American Academy of Pediatrics advises keeping babies’ heads uncovered during indoor sleep, apart from specific exceptions such as the first hours after birth or care in a neonatal intensive care unit.
Frequently Asked Questions
What yarn is best for a crochet Christmas baby hat and booties set?
Soft, washable baby yarn is a practical choice. Sport-weight or fine yarn creates a lightweight fabric, while the final hook size should be selected according to the yarn label and your gauge. Avoid scratchy yarns and materials that shed easily.
How long does it take to crochet a baby hat and booties set?
The time depends on your crochet experience, yarn thickness, stitch choice, and the amount of decoration. Beginners may need several crochet sessions to complete both pieces. Working with basic stitches and simple color changes can make the project more manageable.
Can a beginner crochet a matching baby hat and booties?
Yes. Someone familiar with chain stitches, single crochet, slip stitches, and basic increases can work through this technique-based tutorial. Learning to shape the bootie toe and maintain consistent sizing may require a little extra practice.
How do I make sure the baby hat fits correctly?
Measure the baby’s head circumference and compare it with the finished hat. Check the stretch and depth before completing the top. Avoid making the hat excessively tight or loose, and do not rely on age alone to determine the correct size.
Are crocheted baby booties suitable for newborns?
Soft crocheted booties can be used as decorative or warming accessories when appropriately sized and supervised. They should never squeeze the baby’s feet or ankles. Check the fit regularly, and remember that newborns do not need shoes before they begin walking.
Can I sell handmade Christmas baby hat and booties sets?
You can make handmade sets for gifts or consider selling finished pieces, provided you comply with applicable product safety, labeling, and consumer requirements. Always describe the materials accurately and make sure the finished accessories are free from loose parts and construction defects.
Make a Handmade Christmas Gift for a Little One
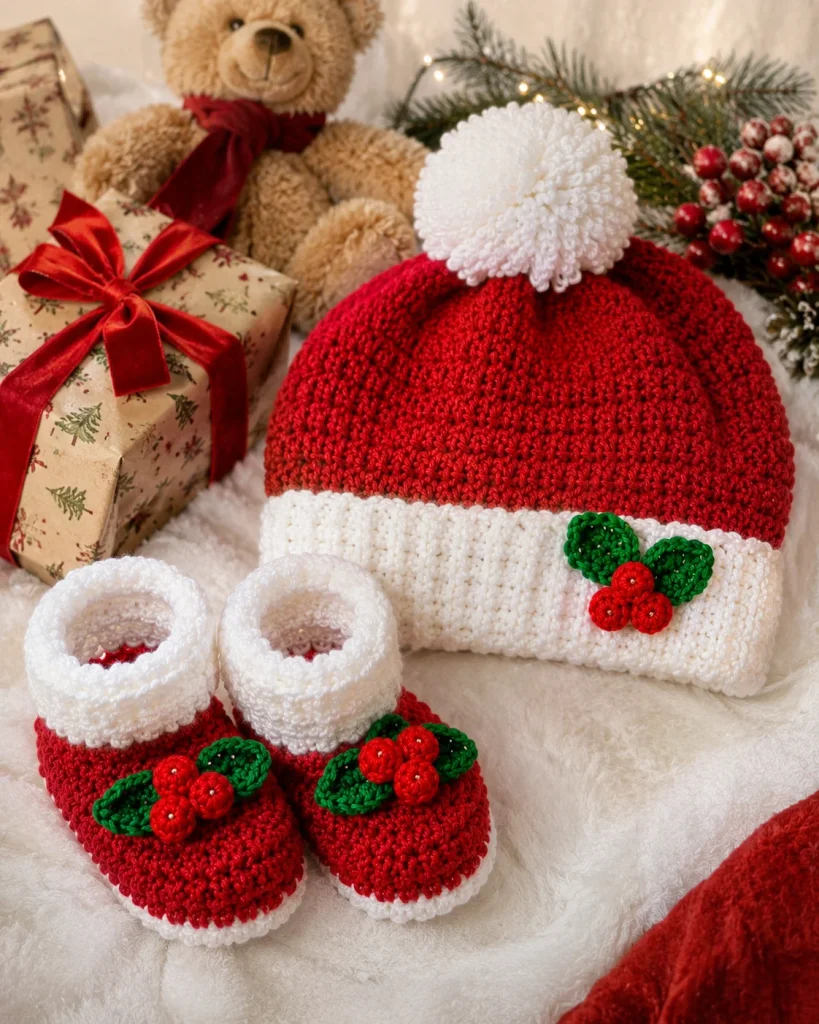
A crochet Christmas baby hat and booties set is a lovely way to add a handmade touch to the holiday season. With a simple ribbed hat, matching oval-soled booties, and classic Christmas colors, you can create a coordinated set that is easy to personalize. Take your time with the measurements and finishing details, and enjoy making a special handmade gift for a baby’s first Christmas.