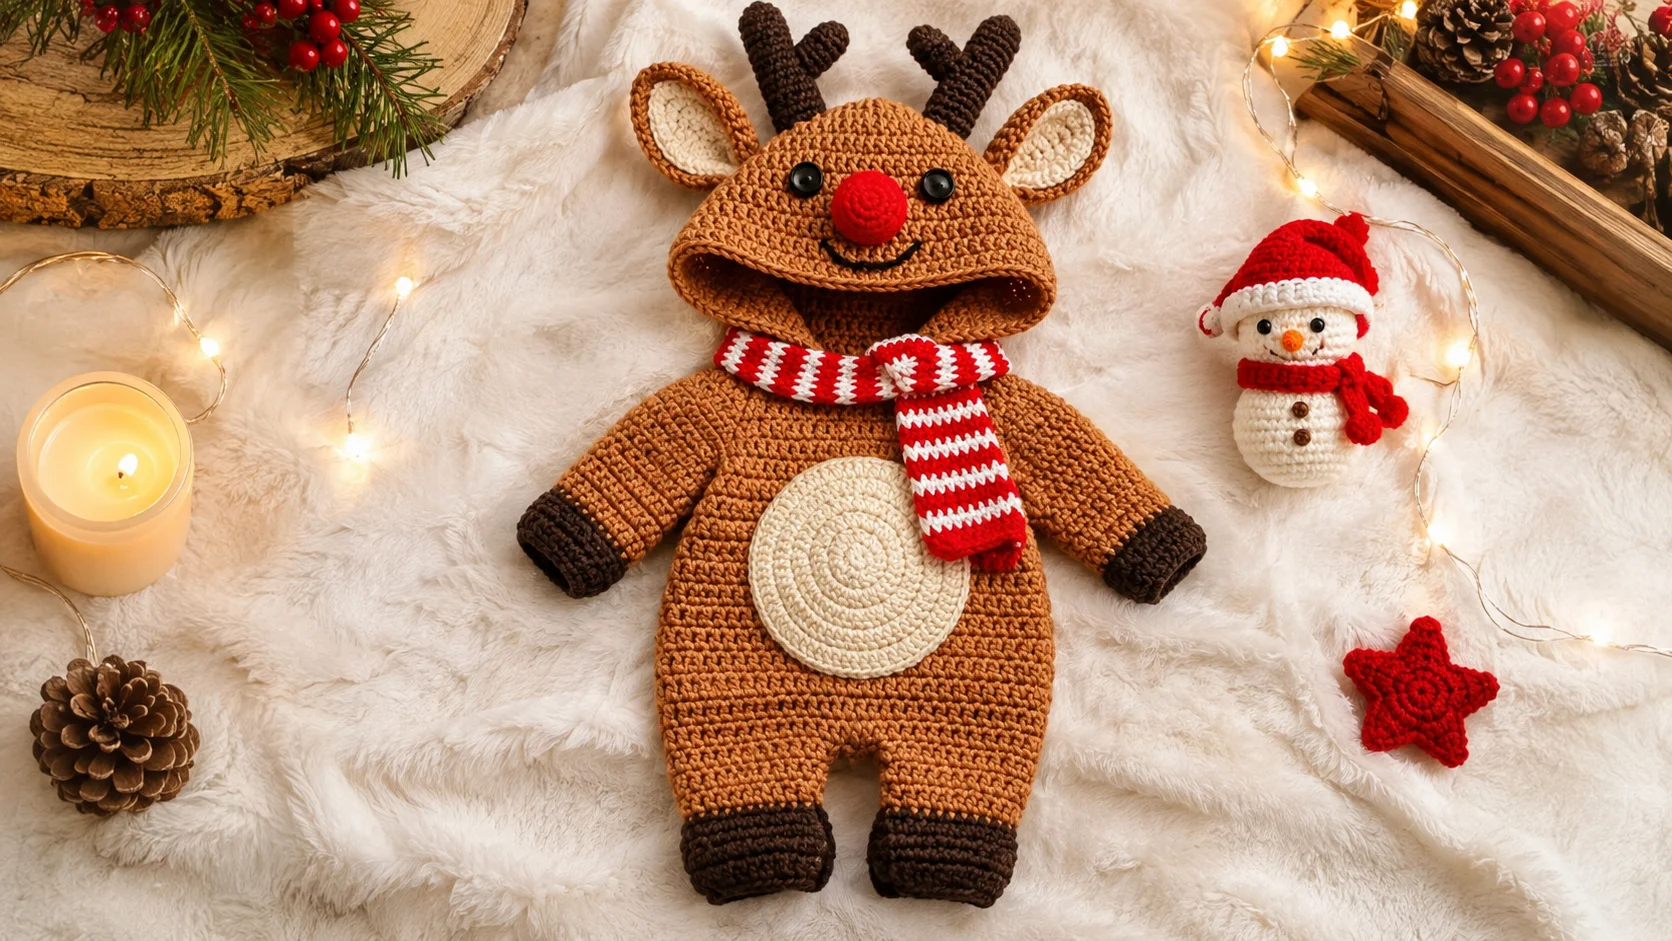
A tiny reindeer outfit is a lovely way to bring a little Christmas charm to a baby’s winter wardrobe. This crochet reindeer baby romper features a warm brown body, an adorable animal hood with antlers and ears, a bright red nose, and a matching red-and-white striped scarf. The cream-colored belly patch completes the classic Rudolph-inspired look.
This project combines basic crochet garment construction with small amigurumi-style details. The romper can be customized with different shades of brown, contrasting cuffs, embroidered facial features, and seasonal accessories. It is also a charming handmade idea for Christmas photography and festive family celebrations.
A crochet reindeer romper is made by creating the main garment, shaping the hood, adding the decorative reindeer features, and finishing with a matching scarf. The most important details are achieving a comfortable fit, keeping the stitches consistent, and securing every decorative component carefully.
What Makes This Crochet Reindeer Romper Special?
The design brings several recognizable Christmas details together in one handmade baby outfit. Instead of using a separate reindeer hat and ordinary baby jumpsuit, the hood becomes the character’s face, making the entire outfit look like a little reindeer costume.
- Reindeer hood: A brown crocheted hood with two soft antlers, rounded ears, black eyes, a red nose, and a smiling mouth.
- Brown romper: A matching one-piece body with long sleeves and separate legs.
- Cream belly patch: A circular crochet detail attached to the front of the romper.
- Striped Christmas scarf: A red-and-white accessory that adds a festive contrast to the brown yarn.
- Dark contrasting cuffs: Brown-black finishing details around the wrists and ankles complete the reindeer-inspired design.
Materials Needed for a Crochet Reindeer Baby Romper
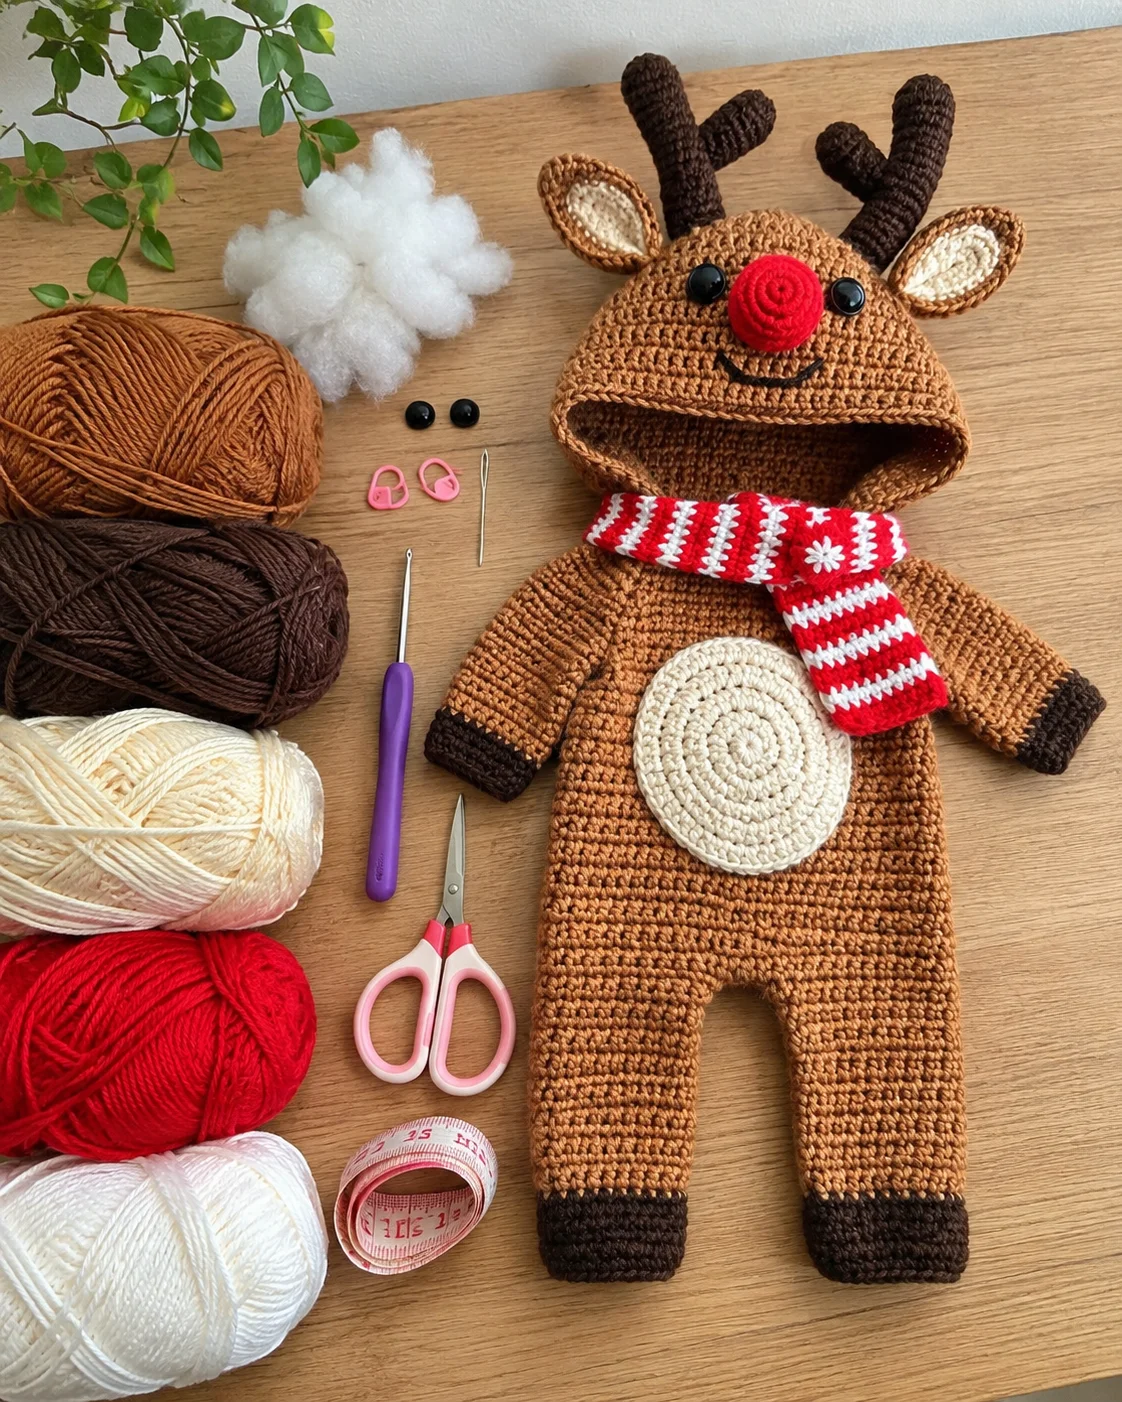
Gather all your materials before starting. Using yarn with a consistent thickness throughout the project helps the different pieces look balanced when assembled.
- Brown yarn for the main romper and hood.
- Dark brown yarn for the antlers and cuffs.
- Cream or ivory yarn for the inner ears and belly patch.
- Red yarn for the reindeer nose and scarf.
- White yarn for the scarf stripes.
- Black yarn for embroidered facial details.
- A crochet hook suitable for your chosen yarn.
- Stitch markers.
- Yarn needle for sewing the separate pieces.
- Scissors.
- Soft stuffing for shaping the nose and antlers, if needed.
- A measuring tape for checking the garment dimensions.
For a baby garment, choose a soft, washable yarn that feels comfortable against delicate skin. Cotton or a suitable baby-rated acrylic blend can be considered depending on the intended season and care requirements. Check the yarn label for fiber content and washing instructions.
Understanding the Crochet Stitches
The construction uses familiar crochet techniques, although shaping a wearable garment requires more attention to measurements than making a small amigurumi accessory.
- Chain (ch): Creates the foundation for many crochet pieces.
- Single crochet (sc): Produces a compact fabric that works well for the body and smaller decorative details.
- Half double crochet (hdc): Creates a slightly taller stitch and can be useful for garment panels.
- Slip stitch (sl st): Joins rounds and helps finish edges.
- Increase (inc): Adds stitches to widen a section.
- Decrease (dec): Reduces stitches to shape narrower sections.
If you are still learning these techniques, explore our collection of crochet patterns and beginner-friendly projects for additional practice with small crochet pieces.
How to Make the Crochet Reindeer Baby Romper
The reference design combines a hooded one-piece garment with several separately crocheted decorations. The following construction guide explains how to approach each component. It is not a graded, stitch-counted pattern: exact starting chains, row counts, gauge, and finished measurements need to be established for the baby’s measurements and chosen yarn.
Step 1: Crochet the Main Romper Body
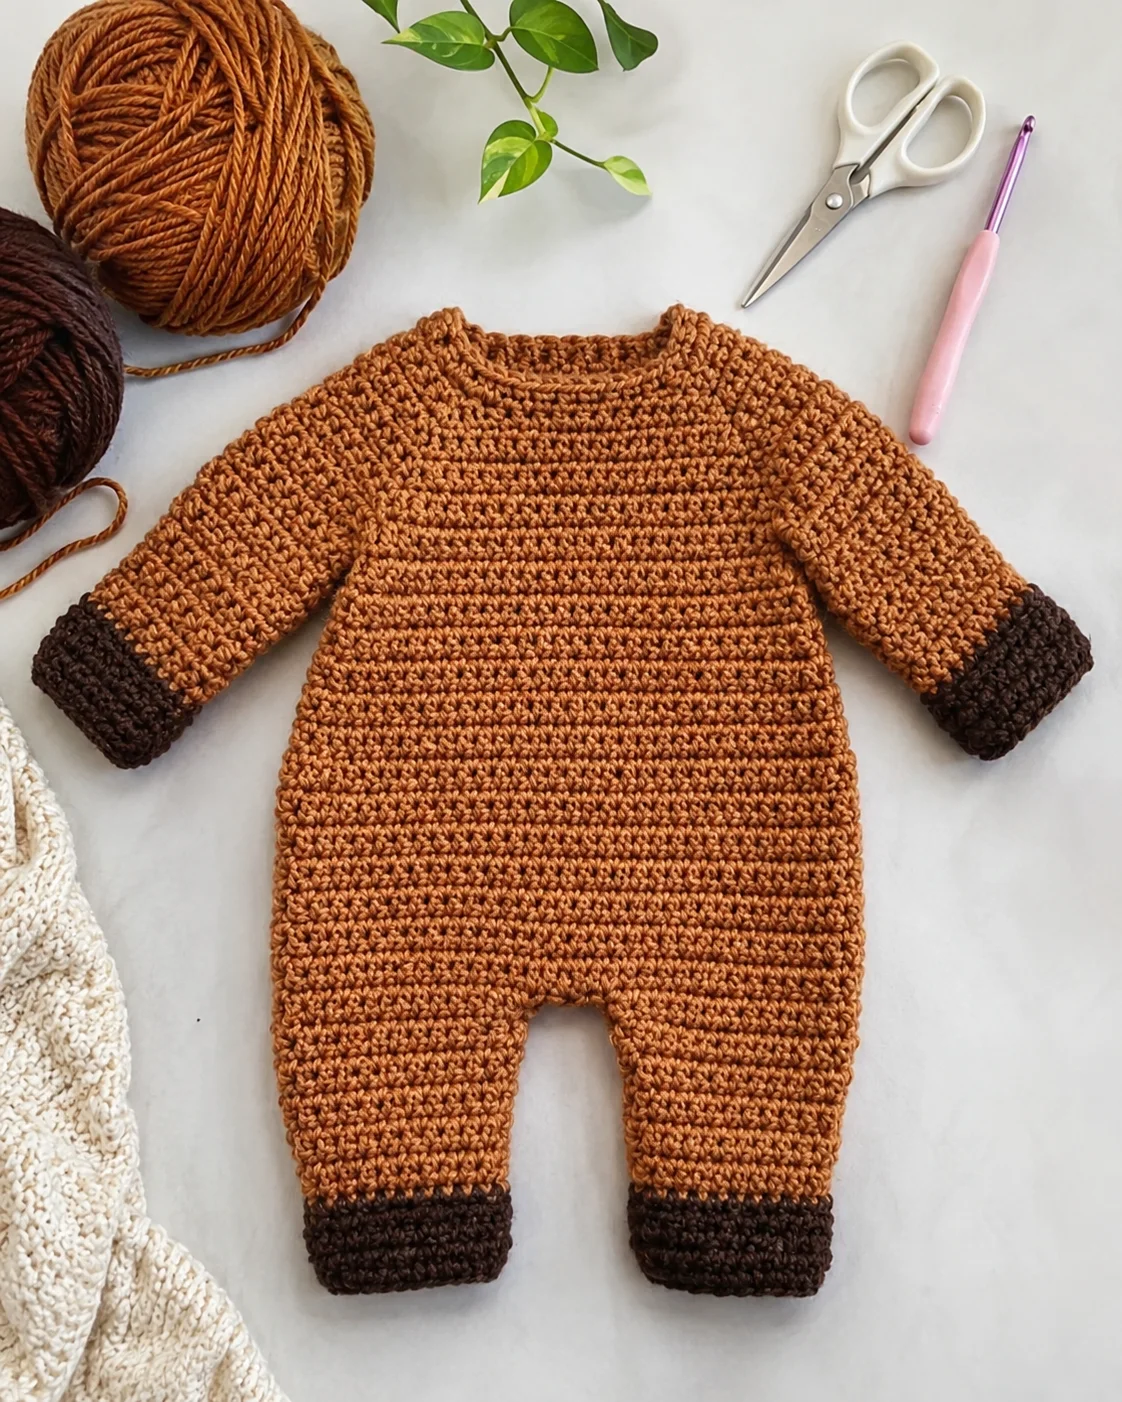
Start with the brown yarn and work the main body using the construction method selected for your romper. A top-down design can make it easier to adjust the length as you work, while separate front and back panels offer another straightforward construction option.
Shape the upper body to accommodate the chest and arm openings, then continue toward the waist and crotch. Divide the lower section into two leg openings and work each leg separately. Keep the stitch tension consistent so that both legs have similar lengths and widths.
Before finishing, compare the garment against the intended measurements. Pay attention to the chest circumference, torso length, crotch depth, sleeve length, and leg openings. A romper should allow comfortable movement and room for a diaper without pulling tightly around the body.
Step 2: Make the Sleeves and Dark Cuffs
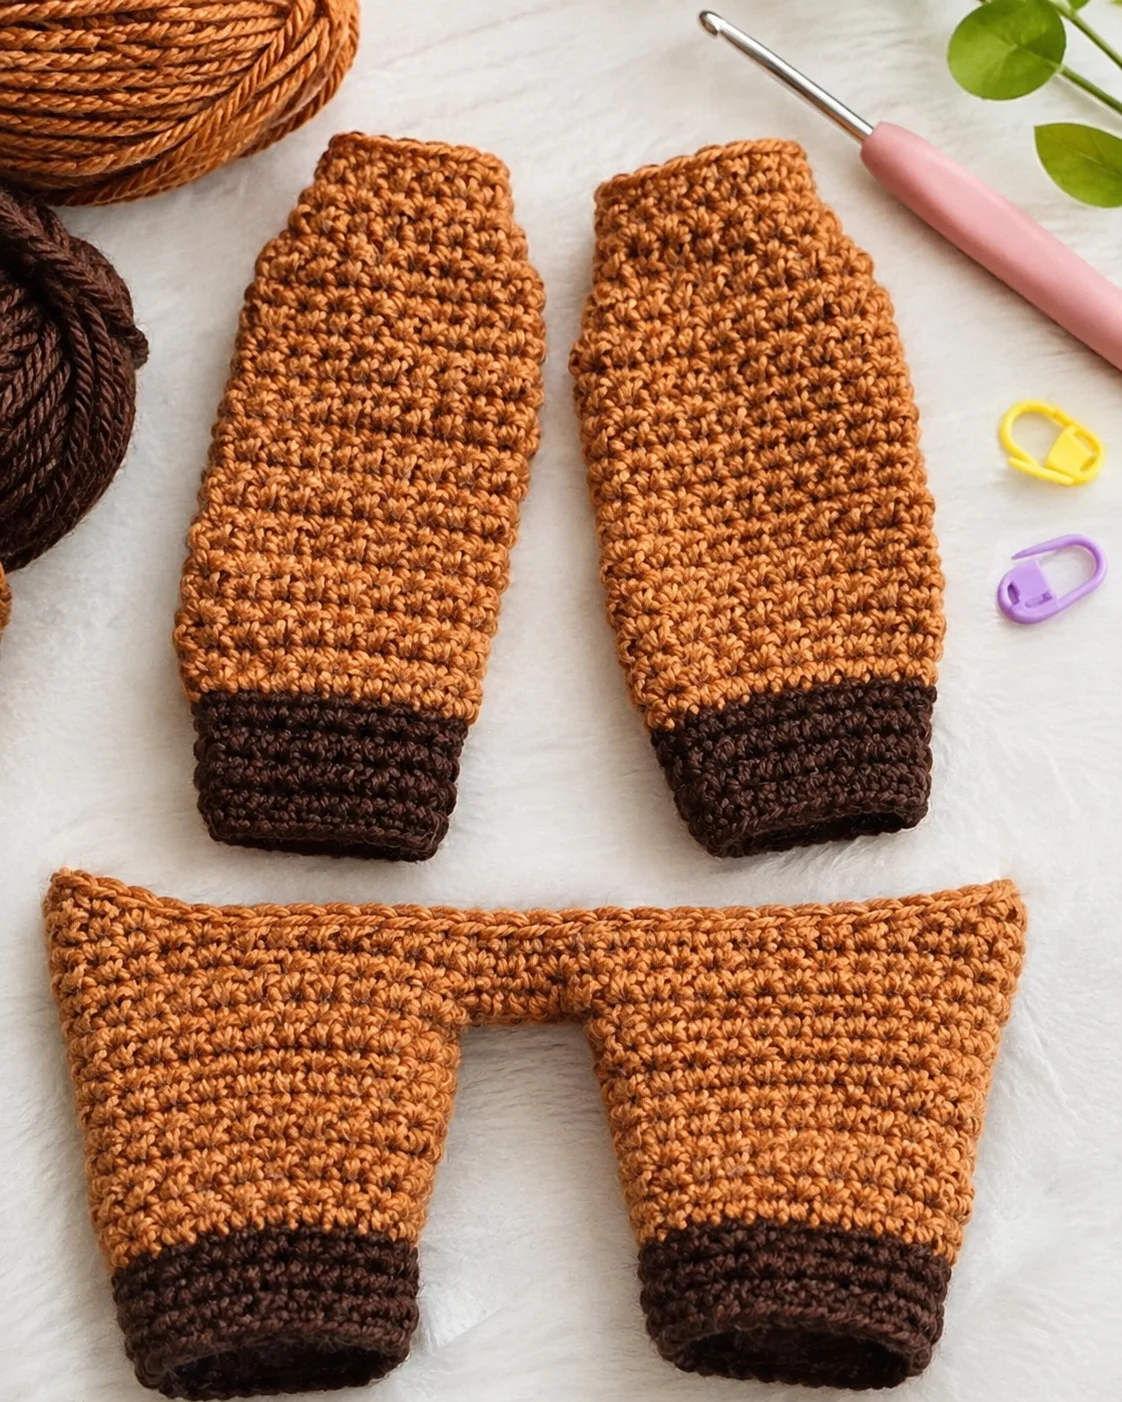
Use brown yarn to create the sleeves, keeping their width and length balanced. The sleeves can be worked directly from the arm openings or crocheted separately and sewn into place, depending on the body construction.
Switch to dark brown yarn near the wrist to create the contrasting cuffs. A few rounds of compact stitches can provide a neat finish and make the color change stand out.
Repeat the same color treatment at the ankles. Check that both leg cuffs have matching proportions and do not restrict movement.
Step 3: Create the Reindeer Hood
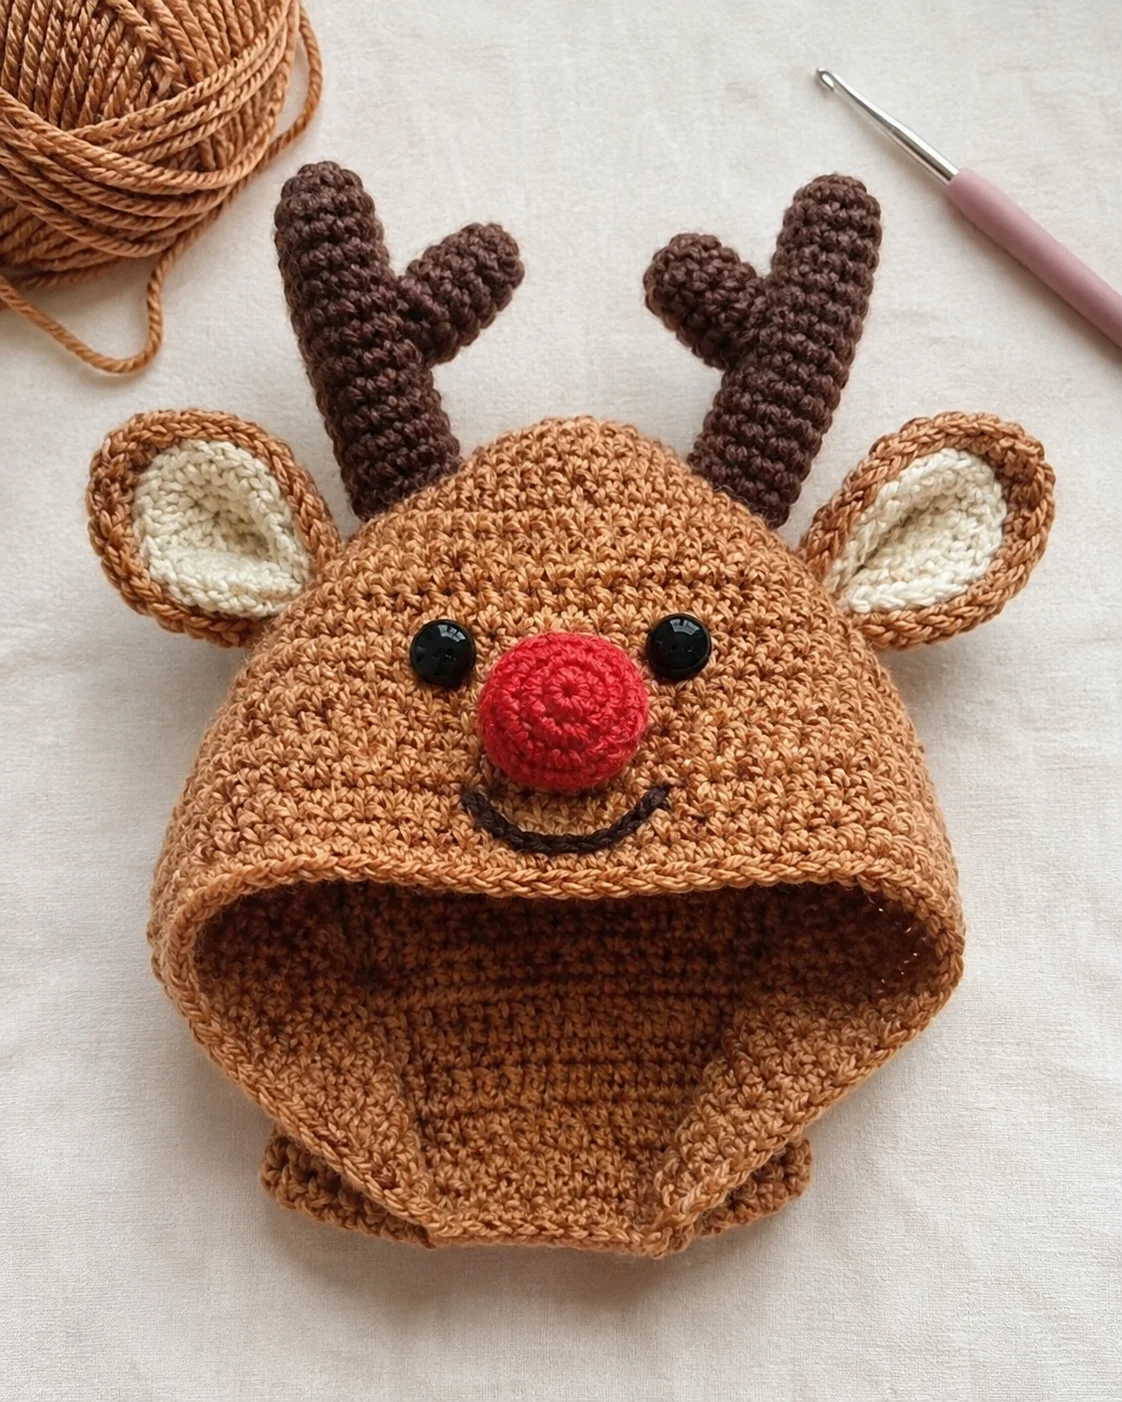
The hood is the main feature of this Christmas crochet design. Work it in brown yarn, shaping it to fit around the baby’s head without covering the face or sitting too tightly.
Depending on the chosen construction, the hood can be made as a separate piece and attached to the neckline, or crocheted directly around the neck opening. Finish the front edge neatly so it frames the face.
For the ears, crochet two brown outer shapes and two smaller cream inner shapes. Attach the cream sections to the brown pieces, then position one ear on each side of the hood. Slightly curved ears give the reindeer a softer, more recognizable appearance.
Step 4: Crochet the Reindeer Antlers
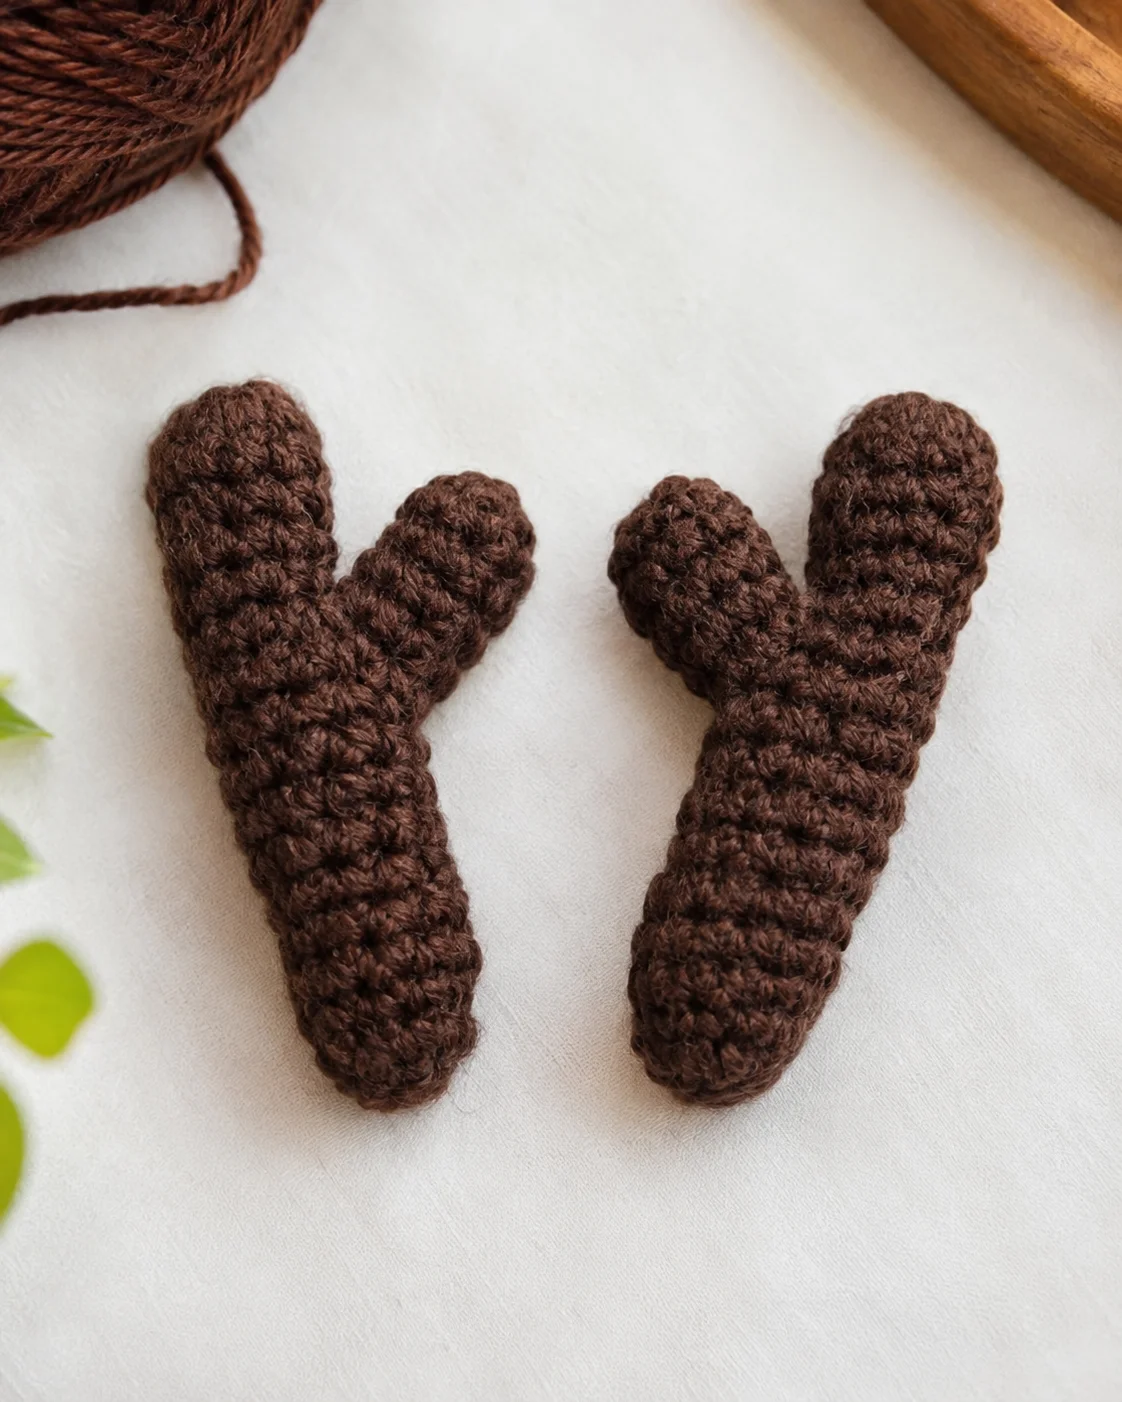
Use dark brown yarn to make two antlers. Each one needs a main upright section and smaller branches to create the familiar branching silhouette.
Keep the two antlers similar in size and shape. Their bases should be securely attached to the top of the hood, with the branches positioned symmetrically.
Take particular care with this part of the project. Decorative pieces on baby clothing must not become loose or detachable. Avoid long, exposed strands and inspect the attachment points carefully.
Step 5: Add the Red Nose and Facial Details
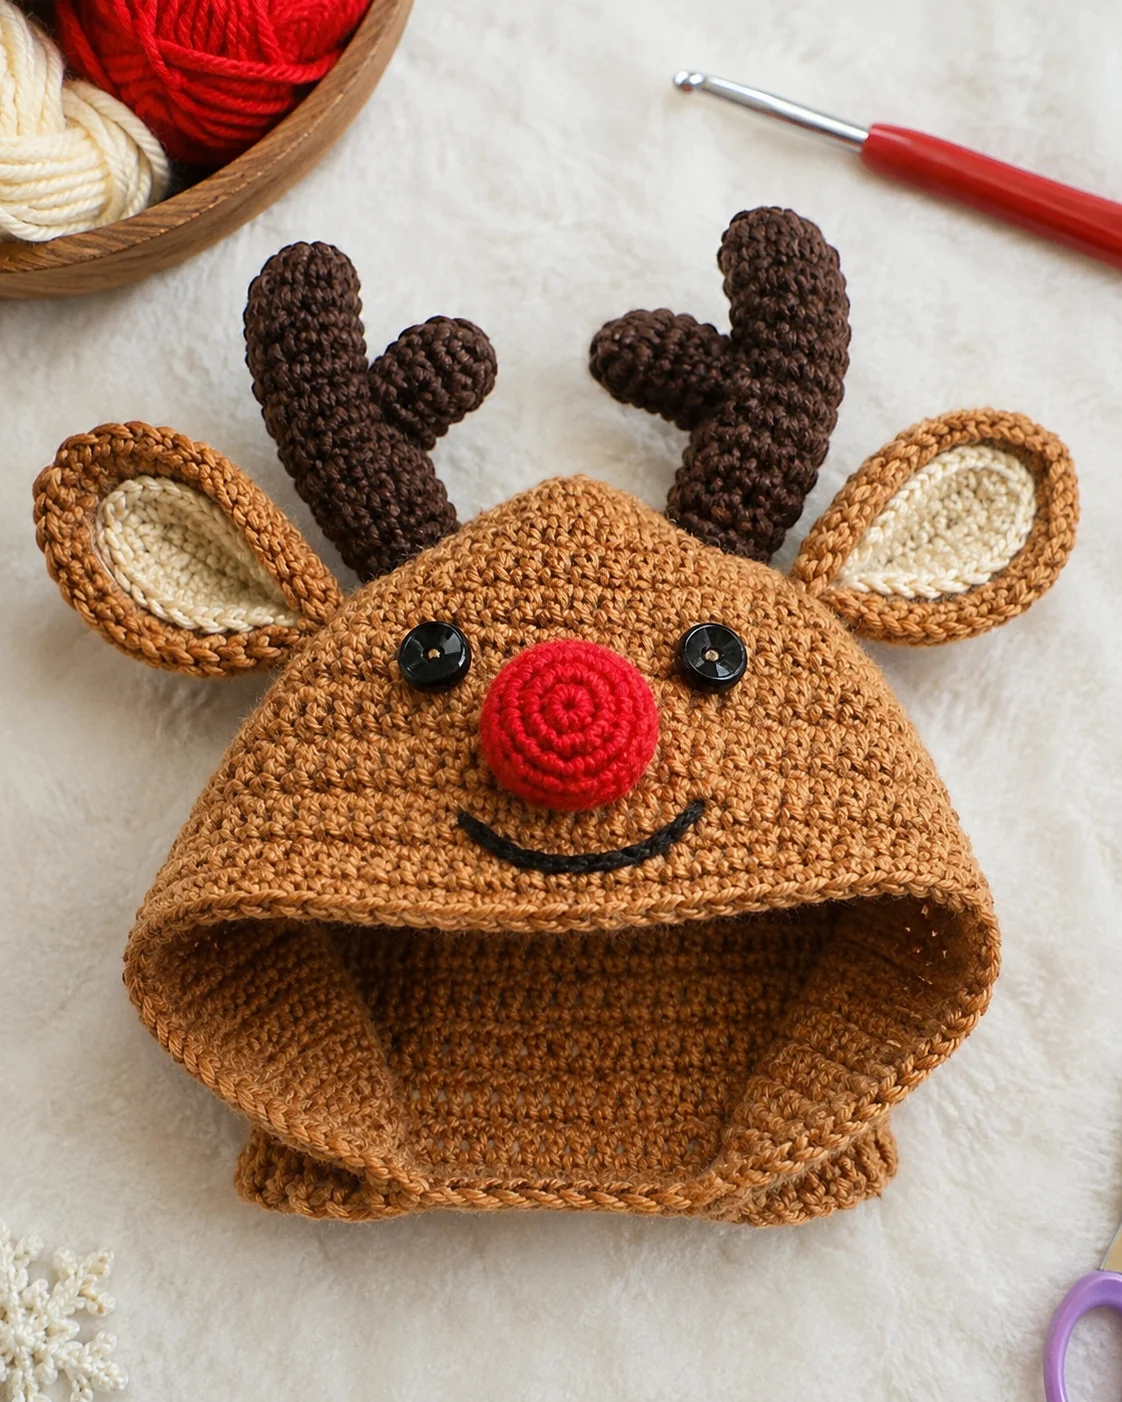
Make a small rounded red nose using compact crochet stitches. A lightly stuffed shape can give it a raised appearance similar to the Rudolph-inspired nose in the reference design.
Position the nose in the center of the hood, leaving enough room for the eyes above it. Black yarn embroidery can be used to create the eyes and a curved smiling mouth.
Embroidered details are a practical alternative to plastic safety eyes for clothing intended for babies. Secure the yarn ends on the inside of the hood and check that no loose strands remain.
Step 6: Crochet the Cream Belly Patch
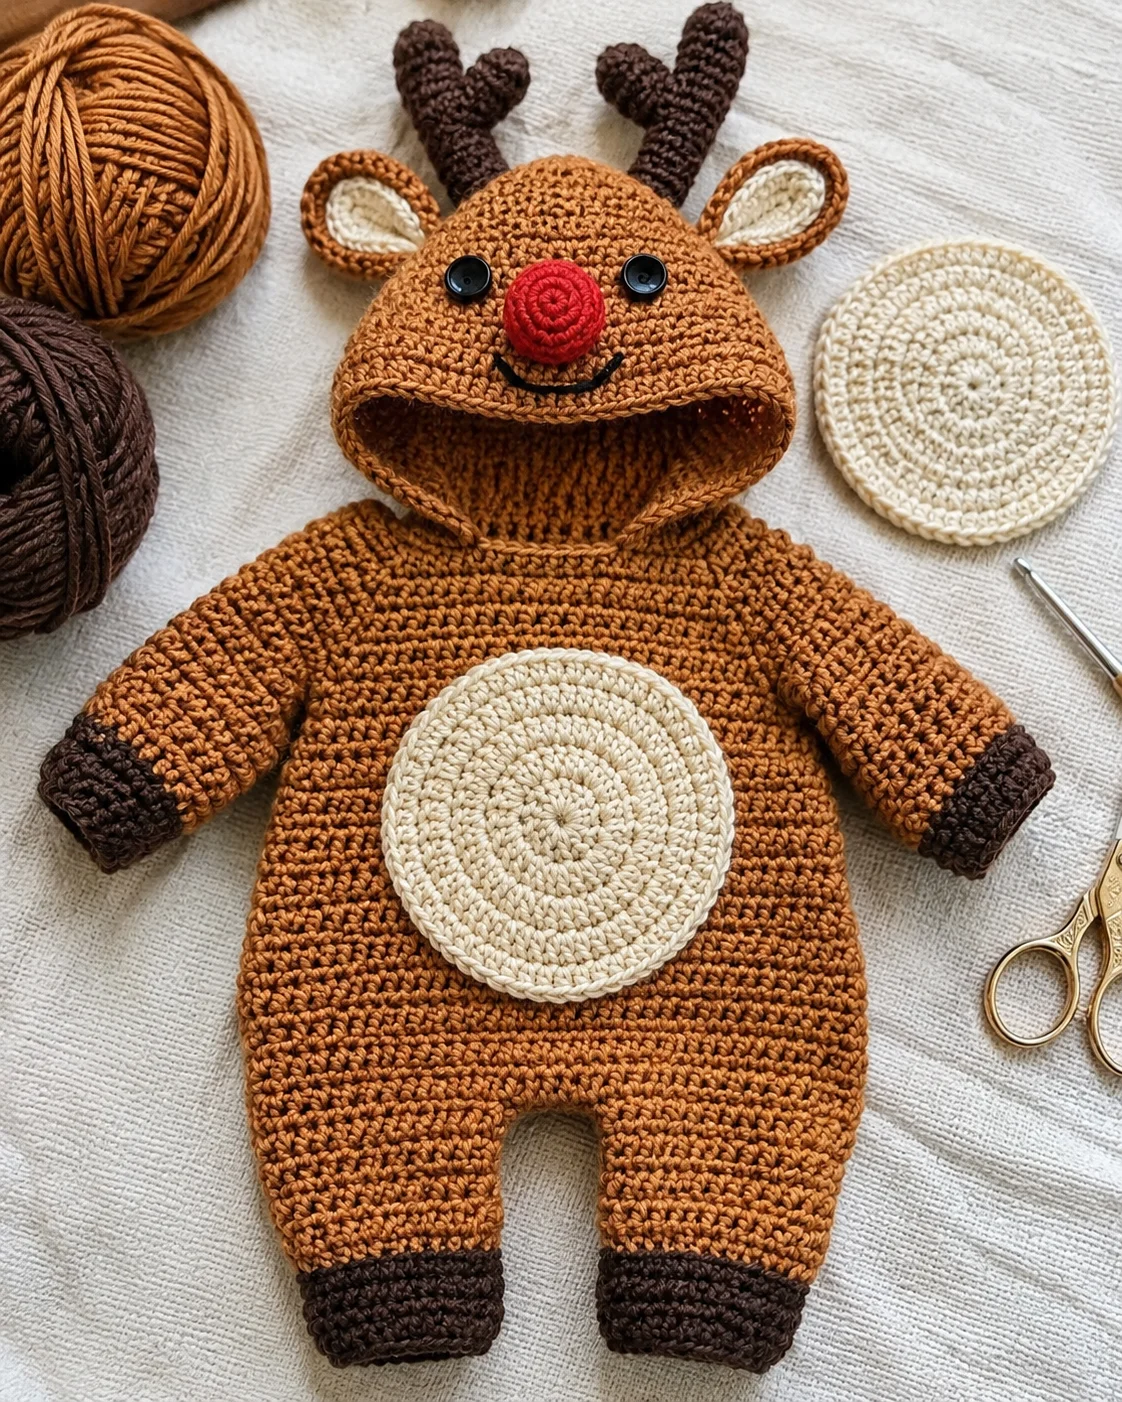
The large cream circle on the front gives the romper its characteristic reindeer appearance. Start with a small center ring and work outward in joined or continuous rounds, increasing evenly to create a flat circular shape.
Continue until the patch is proportionate to the front of the romper. The reference design uses a fairly large circle with visible concentric crochet rounds, so a simple textured stitch pattern can help reproduce that appearance.
Place the patch in the center of the lower front body and sew it down evenly with matching yarn. Check that the edges lie flat without puckering the garment.
Step 7: Make the Red and White Crochet Scarf
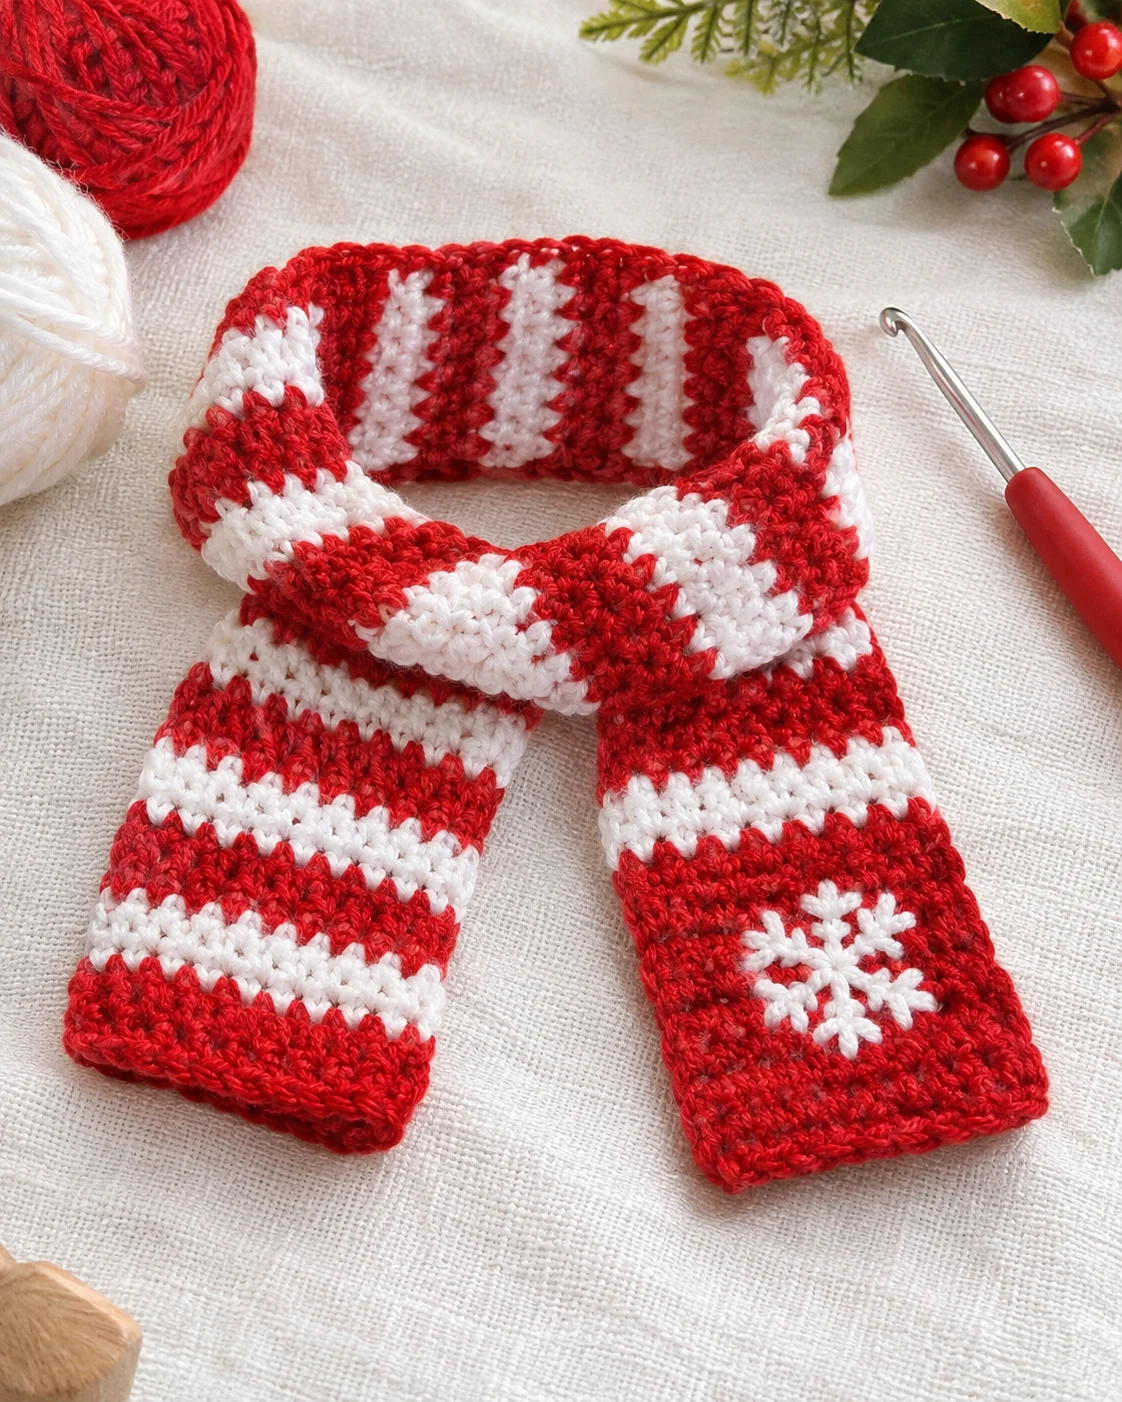
The striped scarf adds the strongest Christmas color contrast. Work a narrow rectangular strip using red and white yarn, alternating the colors to create horizontal stripes.
Keep the scarf long enough to create the wrapped appearance shown in the inspiration photo, but avoid excessive length. Finish the edges neatly and weave in all color-change ends.
For a decorative finish, add a small white motif or embroidered snowflake detail to the red section. The scarf should be treated as a photography or decorative accessory rather than left loose around a baby’s neck during ordinary wear or sleep.
Step 8: Assemble and Finish the Romper
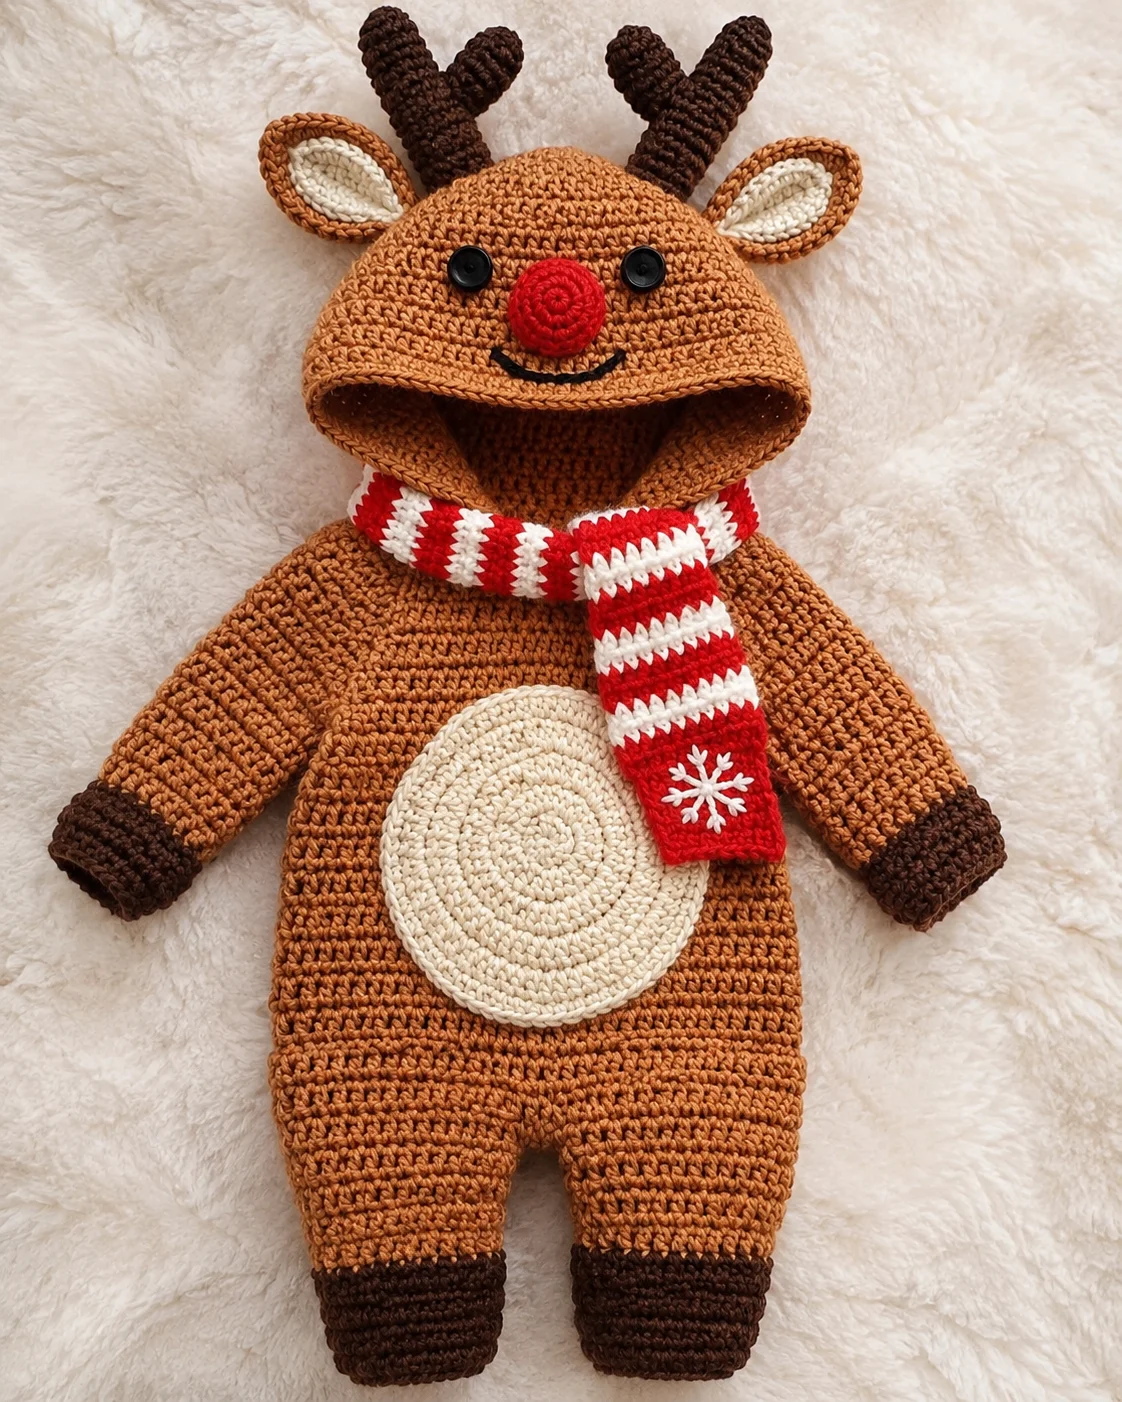
Once all the pieces are ready, assemble the garment carefully. Attach the hood to the neckline, sew the ears and antlers into position, and check the belly patch and decorative features.
Weave in all yarn ends and inspect the seams from both sides. Check the leg openings, sleeves, crotch area, and neckline for rough edges or loose stitches.
Wash and dry the finished garment according to the yarn manufacturer’s care instructions. Recheck the seams and decorative attachments after washing.
Tips for Customizing Your Christmas Reindeer Romper
The classic brown, cream, red, and dark brown palette is instantly recognizable, but there are several ways to personalize the design without losing its festive character.
- Traditional Rudolph colors: Keep the warm brown body, cream belly, dark antlers, and bright red nose.
- Soft woodland look: Use lighter caramel brown with natural ivory details.
- Extra Christmas detail: Add small embroidered snowflakes to the belly patch or scarf.
- Matching accessories: Create coordinating booties or a small decorative Christmas hat.
- Different scarf colors: Try forest green and cream for a more traditional winter palette.
Important Baby Clothing Safety Considerations
Because this project is designed for a baby, appearance should never take priority over construction and safety. Keep decorative parts securely attached, avoid loose cords around the hood and neck, and do not leave detachable accessories with the baby.
The U.S. Consumer Product Safety Commission explains the risks associated with drawstrings in children’s hooded clothing. Its guidance on children’s upper outerwear drawstrings is particularly relevant when designing hooded garments.
Also inspect small decorative components and regularly check that seams, embroidery, and attached details remain secure. The Consumer Product Safety Office’s children’s apparel advice highlights the importance of checking loose buttons, small parts, and cords.
A crocheted garment is not automatically suitable for every baby or every use. Open crochet stitches, detachable decorations, and long accessories require particular attention. The finished item should be inspected carefully and used under appropriate adult supervision.
Frequently Asked Questions
Is a crochet reindeer baby romper suitable for beginners?
The basic stitches are accessible to beginners, but assembling a complete garment with a shaped hood, sleeves, legs, and decorative details requires additional experience. Beginners may find it easier to practice the smaller components before attempting the full outfit.
What yarn is best for a crochet baby romper?
A soft, washable yarn intended for baby garments is a sensible starting point. Cotton and suitable baby-rated acrylic blends are possible options. Always check the fiber content, care instructions, and recommended hook size on the yarn label.
Can I make the reindeer hood separately?
Yes. A separately crocheted hood can be attached to the neckline after the main romper is assembled. This approach makes it easier to adjust the hood shape and position the ears and antlers before final sewing.
Can I change the colors of the reindeer romper?
Absolutely. You can experiment with caramel, chocolate brown, ivory, cream, and different Christmas scarf combinations. Keeping the red nose and recognizable antler shape helps preserve the reindeer character.
Can the scarf be used as part of the baby’s everyday outfit?
The scarf is best treated as a decorative styling accessory for a supervised photo session. Do not leave a loose scarf around a baby’s neck during sleep or unattended use.
Final Thoughts
This DIY crochet reindeer baby romper is a festive handmade project with plenty of charming details. The combination of a character hood, little antlers, red nose, cream belly, and striped scarf creates a recognizable Christmas look that stands out in seasonal baby photographs.
Take your time with the garment measurements and finishing work, especially around the hood and decorative pieces. A carefully constructed romper with neat seams and securely attached details will look much more polished and make a lovely addition to a handmade Christmas wardrobe.